
Virtual TapeServer SCSI-to-FC Adapter User Manual


2-2
Chapter 2: Getting Started
Mounting the VT5900-SA on a Desktop
Use the following instructions to mount the VT5900-SA on a table or desktop.
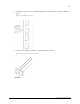
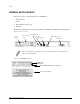
1. Remove the VT5900-SA from the protective bag.
2. Attach the stick-on feet to the bottom of the unit.
3. Place the VT5900-SA on the table or desktop.
Mounting the VT5900-SA in a Rack
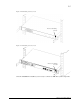
There are two methods available to install the VT5900-SA in a rack, one method using ear
brackets and the other using rails. Before beginning installation, review whichever of the
following installation procedures is appropriate for the mounting materials included in the
shipping container of the product you received. When familiar with the installation procedure,
follow the steps indicated to mount the VT5900-SA into a standard 19” rack using the provided
mounting materials, which include:
– one VT5900-SA
– two ear brackets (or two slides rails with two extension brackets)
– a bag of mounting screws (8 #M6x12 Phillips screws and 4 #6-32x.312 Phillips screws)
Required Tools
Phillips screwdriver (#2 size)
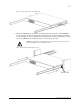
Installation Procedure With Ear Brackets
1. Remove the VT5900-SA from the protective bag.
2. Determine where the VT5900-SA will be mounted.
3. Remove any blanking panels and other equipment from the chosen rack location.
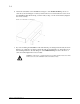
Note: Place the VT5900-SA so the intake/exhaust vents remain clear of obstructions to ensure
proper airflow.