
Virtual TapeServer SCSI-to-FC Adapter User Manual


3-1
Chapter 3
Configuration Procedures
The VT5900-SA can be configured in a variety of ways. The following are general procedures for
setting up basic operational status. Not all of these exact settings will apply to every environment,
but this section of the manual should provide guidance for some of the basic considerations that
need to be made when configuring the VT5900-SA.
Quick Setup from the Visual Manager Interface
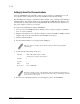
1. Set the IP address using the serial interface.
a. In the main menu of the serial interface, select menu option 1, “Perform Configuration”
and then menu option 2, “Ethernet and SNMP Configuration”.
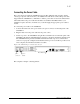
b. Set the IP address:
– To set the IP address dynamically, ensure that the value for DHCP Configuration is
“enabled”. If DHCP is disabled, select menu option 7, “Toggle DHCP Configuration”.
– To set a specific IP address, select menu option 1, “Change IP Address” and then type the
IP address for the VT5900-SA. Select menu option 2, “Change IP Subnet Mask” and type
the IP subnet mask for the VT5900-SA. Select menu option 3, “Change IP Gateway” and
type the IP gateway for the VT5900-SA.
c. Select menu option X to exit this menu.
d. Select menu option A to save your configuration changes.
e. Reboot the VT5900-SA.
2. Enter the VT5900-SA’s IP address into the browser Address field and press the Enter key.
3. In the Home page of the Visual Manager interface, select “Ports” from the Main menu on the
left.
4. When the security page appears, enter the appropriate user ID and password values and then
select the Submit button. The default user name is ‘root’ and the default password is
‘password’.
5. Select the appropriate Fibre Channel port.
6. If you are using a switch, toggle Port Mode to the “N-Port” setting. When finished, select the
Submit button.
Note: The VT5900-SA is configured to use DHCP by default. Refer to Chapter 7 (section on
Ethernet and SNMP Configuration) of this manual for information on configuring the IP address.