
Web ViewPoint User Guide, Version 5.14

Web ViewPoint User Guide Version 5.14 - 528226-014 178
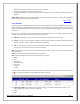
Macro Library: This displays a new Window showing the Macro Library. For more details read Macro
Library.
Create File: This displays a new Window where you can specify settings to create a new file on the server.
Simple settings for unstructured, entry-sequenced, key-sequenced and relative files are supported.
Create Edit File: This displays a new editor window where you can enter the contents of an edit file. Use
the File -> SaveAs menu to save the newly edited file to the server. Specify the location at which the file should
be saved. (NOTE: DO NOT USE the Save option for newly created files. Using the Save option will save the file
with filename NONAME, opening the NONAME file again results in a blank file. So, it is recommended to use
the SaveAs option for saving newly created files).
Quick Open: This prompts the user for the name of an edit file to open. It then opens the specified edit
file in an editor window.
Print: This opens the default windows print dialog and prints the disk/sub-volume/file information table
currently being viewed.
Export to Excel: This opens an instance of Microsoft Excel and populates a spread sheet of a new 'book'
with the disk/sub-volume/file information table currently being viewed.
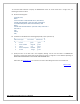
Refresh: Issues a command to the server to update/refresh the displayed file list.
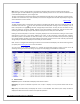
Historyand Quick Navigation: The location list box contains a list of the last 20 disks and disk.subvolumes that
have been visited in the current session. To go to a previously visited disk or subvolume directly without
having to traverse the tree on the left panel, select the corresponding disk or subvolume from the dropdown
and click on the ‘Go’ button.
The contents of the specified disk or subvolume are displayed. Enter the disk or subvolume in the listbox to
navigate to it directly. Using the ’Back’ and ‘Forward’ icons it is possible to traverse through the history of
visited disks and subvolumes.
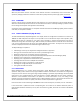
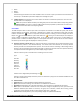
B. Macro Library: This is a repository of Macro files that can be added to and retrieved. Each macro file is
associated with a “bookmark”. Bookmark is stored in a folder.
Macro Library Tree: The hierarchical folders are displayed on the left frame. Clicking on a folder displays the
bookmarks and the associated physical macro file. Clicking on the bookmarks display commands that can be
executed on the macro file. A bookmark can be removed from a folder by selecting it and clicking the icon.
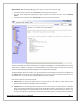
Clicking on the Macro Library opens a window that provides the means to add/delete a folder. To ‘add’ a folder,
specify the name of the folder to be created, click on the folder into which you want to add to and click Add. To
‘delete’ a folder, simply click on the folder into which you want to delete and click Delete.
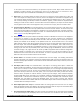
Run: To execute the Macro, click on Run. It opens a new Window and the results of the Macro are displayed in the
window.
Open Dialog: This provides the means to specify run file options for the macro.