
OpenView Storage Provisioner v1.1 - Installation Instructions


Page 6
Refreshing Storage Systems
Because the structure of the database is different in version 1.1
than version 1.0, you were instructed to deleted the SANworks
Nexus database files before installing version 1.1. Therefore
you must refresh (rediscover) each storage system to create a
new database for the new installation.
If you are installing Storage Provisioner for the first time, you
need to discover your storage systems to create the database.
To refresh (or discover) a storage system:
1. From the Navigation pane, select a storage system.
2. Click the Discover button.
3. Click Refresh.
4. Repeat this for each storage system.
Note: If you are creating new folders or files for the database,
ensure that the names do not exceed 30 characters.
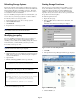
Modifying java.policy
If you are installing Storage Provisioner V1.1 you may not
have to modify your java policy if it was changed when
installing version 1.0. If you are installing Storage Provisioner
for the first time, you must modify your java.policy file.
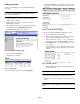
To modify your java.policy file:
Note: Modifying the
java.policy
file does not affect your license
agreement or how Java works on your computer.
1. On the hard drive of each computer used to browse into the
SMA, locate your java.policy file by using the computer’s
search or find function.
2. Open the file.
3. Find the following grant line at the top of the file:
4. Edit this part of the java.policy file to look like this:
5. Save the modified java.policy file.
Starting Storage Provisioner
Once the storage provider defines storage utilities, service
levels, and customers, then storage consumers can launch
Storage Provisioner through a designated URL and port
number provided by the storage provider. Review the HP
OpenView Storage Provisioner Release Notes provided with
the product for the latest updates.
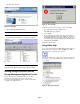
To start Storage Provisioner:
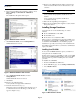
1. Open a browser page.
2. Enter the SMA address in the browser address bar, and
press Enter.
The Enter Network Password dialog box displays.
Figure 8: Enter user name and password
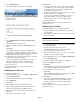
3. Click OK.
4. The OpenView Storage Management Home page displays.
Figure 9: SMA Home page
5. Click the Tools icon.
grant {
permission java.security.AllPermission;
};
grant {
permission java.security.AllPermission;
};
//Standard extensions get all permissions by default
grant codeBase “file:${java.home}/lib/ext/*”{
permission java.security.AllPermission;
};
//default permissions granted to all domains