
Advanced Data Guarding User Guide
3-2 Advanced Data Guarding for the Smart Array 5300 Controller Reference Guide
Compaq Confidential – Need to Know Required
Writer: John Turner Project: Advanced Data Guarding for the Smart Array 5300 Controller Reference Guide Comments: final draft
Part Number: 188270-xx1 File Name: d-ch3 System Setup.doc Last Saved On: 12/11/00 12:02 PM
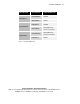
Configuring a New System for RAID ADG
Windows NT and Windows 2000
There are three main steps to configure a new system for RAID ADG:
1. Set up an array.
2. Assign hard drives to the array.
3. Create logical drives within the array.
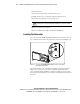
Setting Up an Array
1. Check that you have the latest version of the configuration utility by
visiting the Compaq website (www.compaq.com). Download and install
the newer version if necessary. An ACU program icon will
automatically be generated on the desktop.
2. Double-click the ACU icon.
3. Select the controller (Smart Array 5300) from the drop-down list in the
top left corner of the main ACU screen.
4. Click the Settings button in the Controller section in the top right corner
of the main ACU screen.
5. Set the rebuild priority, expansion priority, and accelerator ratio.
6. Click the Done button to activate the settings and return to the main
ACU screen.
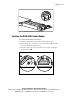
Assigning Hard Drives to the Array
1. Click the Create Array button in the Controller section of the screen.
2. Select the hard drives that are to make up the array, remembering to
leave one for the online spare if desired. With RAID ADG, you may
select up to 56 drives per array.
3. Click the Assign Drive(s) to Array button.
4. Select the hard drive that is to be the online spare.
5. Click the Assign Spare to Array button.
6. Click the Done button to activate the settings and return to the main
ACU screen.