HP XP7 Provisioning for Mainframe Systems User Guide Abstract This document describes and provides instructions for using the provisioning software to configure and perform operations on HP XP7 Storage. Provisioning software includes Thin Provisioning Z, Smart Tiers Z software, and Virtual LVI.
© Copyright 2014 Hewlett-Packard Development Company, L.P. Confidential computer software. Valid license from HP required for possession, use or copying. Consistent with FAR 12.211 and 12.212, Commercial Computer Software, Computer Software Documentation, and Technical Data for Commercial Items are licensed to the U.S. Government under vendor's standard commercial license. The information contained herein is subject to change without notice.
Contents 1 Introduction to provisioning........................................................................10 About provisioning.................................................................................................................10 Basic provisioning..................................................................................................................10 Fixed-sized provisioning.........................................................................................................
Business Copy Z................................................................................................................29 Continuous Access Synchronous Z........................................................................................29 Continuous Access Journal Z...............................................................................................30 External Storage................................................................................................................
Thin provisioning requirements.................................................................................................54 License requirements...........................................................................................................54 Pool requirements...............................................................................................................54 Pool-VOL requirements....................................................................................................
Smart Tiers Z workflow.....................................................................................................104 Smart Tiers Z tasks and parameters....................................................................................105 Task and parameter settings.........................................................................................106 Display items: Setting parameters..................................................................................
Changing external LDEV tier rank......................................................................................140 Increasing THP V-VOL capacity..........................................................................................140 Changing the name of a THP V-VOL...................................................................................141 About releasing pages in a THP V-VOL...............................................................................
Add Resources window....................................................................................................190 Add Resources Confirm window.........................................................................................191 Remove Resources window....................................................................................................194 Delete Resource Groups window............................................................................................
Expand Pool Confirm window............................................................................................281 Edit Pools wizard..................................................................................................................283 Edit Pools window............................................................................................................283 Edit Pools Confirm window................................................................................................
1 Introduction to provisioning Provisioning a storage system requires balancing the costs of the solution with the benefits that the solution provides. The following is an overview of provisioning strategies that you can implement on the HP XP7 Storage to support your business. About provisioning Provisioning is a method of managing storage system devices or volumes. Some provisioning methods are host-based, while others use existing storage system capabilities such as concatenated array groups.
When to use fixed-sized provisioning Fixed-sized provisioning is a best fit in the following scenarios: • In a mainframe environment in which the simplest form of provisioning can be utilized at the expense of some efficiency in capacity utilization. Custom-sized provisioning Custom-sized (or variable-sized) provisioning has more flexibility than fixed-sized provisioning and is the traditional storage-based volume management strategy typically used to organize storage space.
Thin Provisioning Overview Thin provisioning is an approach to managing storage that maximizes physical storage capacity. Instead of reserving a fixed amount of storage for a volume, it simply assigns capacity from the available physical pool when data is actually written to disk.
38-MB pool pages are assigned on demand to any of the THP V-VOLs that are connected to that pool. Other pages assigned over time to that THP V-VOL randomly originate from the next free page of some other pool volume in the pool. THP V-VOLs are defined as 3390-A volumes that can be larger than traditional volumes. This volume type was created to reduce device address requirements. Setting up a Thin Provisioning Z environment requires a few extra steps.
the disks. Up to 1024 LDEVs may be assigned to a single pool, providing a considerable amount of I/O capability to just a few THP volumes. Thin Provisioning Z work flow The following illustrates the Thin Provisioning Z workflow. Smart Tiers Z After using Thin Provisioning Z software to implement a thin provisioning strategy, the array now has all the elements in place to offer automatic self-optimizing storage tiers provided by Smart Tiers.
Smart Tiers Z gives you: • Improved storage resource usage • Improved return on high-cost storage tiers • Reduced storage management effort • More automation • Nondisruptive storage management • Reduced costs • Improved overall performance Tiers concept When not using Smart Tiers Z, data is allocated to only one kind of data drive (without regard to the workload) to the volumes because the volumes are configured with only one kind of data drive.
To avoid such problems, use Resource Partition to set up resource groups that allow you to manage one storage system as multiple virtual private storage systems. The storage administrator in each resource group can access only their assigned resources and cannot access other resources. Configuring resource groups prevents the risk of data leakage or data destruction by another storage administrator in another resource group.
Term Description For example, when the subscription limit is set to 100%, the total THP-VOL capacity that can be created is obtained using this formula: total THP-VOL capacity <= pool capacity x 100% Using this setting protects the pool when doing the following: • Shrinking a pool • Creating THP-VOLs • Increasing THP-VOL capacity VDEV A virtual device in the storage system. A VDEV is a group of logical volumes (LDEVs) in a parity group. One parity group consists of multiple VDEVs.
Total capacity of all pools Required shared memory capacity If the total capacity satisfies both of following: 24 GB • More than 3.1 PB • 7.1 PB or less If the total capacity satisfies both of following: 40 GB • More than 7.1 PB • 11.1 PB or less TIP: The V-VOL management area is automatically created when shared memory is added. This area is used to store information for associating pool-VOLs and THP V-VOLs.
Maximum capacity of cache management device Pool attribute Internal volume Maximum capacity Maximum capacity Maximum capacity (in MB) (in blocks) (in cylinders) 711,768.75 1,457,702,400 837,760 1,944,902,400 1,117,760 (695.08 GB) External volume 949,659.37 (927.40 GB) Use the following formula to calculate the number of cache management devices that a THP V-VOL requires. In this formula, the user-specified capacity is the user area capacity of a V-VOL.
2 Configuring resource groups The Storage Administrator can divide a provisioned storage system into resource groups that allow managing the storage system as multiple virtual private storage systems. Configuring resource groups involves creating resource groups, moving storage system resources into the resource groups, and assigning resource groups to user groups. Resource groups can be set up on both open and mainframe systems. Resource Partition software is required.
The Security Administrator in the system division creates resource groups for each division in the storage system and assigns them to the respective divisions. The Storage Administrator in Division A can manage the resource groups for Division A, but cannot access the resource groups for Division B. In the same manner, the Storage Administrator in Division B can manage the resource groups for Division B, but cannot access the resource groups for Division A.
Example of resource groups not sharing ports If you assign ports to each resource group without sharing, performance can be maintained on a different port even if the bulk of I/O is issued from one side port. The following shows a system configuration example of an in-house system division providing the virtual private storage system for two divisions. Divisions A and B each use individual assigned ports and parity groups. In this example, they do not share a port.
After the above procedures, the Storage Administrators in A and B divisions can access the resource groups allocated to their own division. Meta_resource The meta_resource is a resource group comprised of additional resources (other than external volumes) and the resources that exist on the storage system before the Resource Partition is installed.
Resource group license requirements Use of Resource Partition on the HP XP7 Storage requires the following: • A license key for Resource Partition software. For details about the license key or product installation, HP XP7 Remote Web Console User Guide. Resource group rules, restrictions, and guidelines Rules • The maximum number of resource groups that can be created on a storage system is 1023.
3. Enter a resource group name in the Create Resource Groups window. Parity groups, LDEVs, ports, or host groups can be specified as follows: 1. Click Select resource-name. For example, click Select Parity Groups. 2. Select resources from the Available resource-name table. 3. Click Add resource-name table. The added resources move to the Selected resource-name table. You can click Remove to move resources from the Selected to the Available resource-name table. 4. Click OK.
7. In the Confirm window, confirm the settings, in Task Name type a unique name for this task or accept the default, and then click Apply. If Go to tasks window for status is checked, the Tasks window opens. Removing resources from a resource group Before removing remove resources from a resource group, consider the following: • The resources removed from a resource group are returned to meta_resource. • Resources cannot be deleted from the meta_resource.
5. In the Confirm window, confirm the settings, in Task Name type a unique name for this task or accept the default, and then click Apply. If you select a row and click Detail, the Resource Group Properties window appears. If Go to tasks window for status is checked, the Tasks window opens. Deleting a resource group The Security Administrator (View & Modify) role is required to perform this task. You cannot delete the following: • The meta_resource. • A resource group that is assigned to a user group.
Parallel Access Volumes The following table provides information about specific Parallel Access Volumes conditions that must be observed when using Resource Partition. Operation name Condition Assign aliases The specified base volumes and free volumes must be assigned to the Storage Administrator group permitted to manage them. Remove aliases The specified base volumes and alias volumes must be assigned to the Storage Administrator group permitted to manage them.
Performance Monitor The following table provides information about specific Performance Monitor conditions that must be observed when using Resource Partition. Operation name Condition Add to ports The specified ports must be assigned to the Storage Administrator group permitted to manage them. Add new monitored WWNs The specified ports must be assigned to the Storage Administrator group permitted to manage them.
Operation name Condition Edit Remote Connection Options Initiator ports of remote paths that are connected to a specified remote storage must be assigned to the user. Add SSIDs SSID Initiator ports of remote paths that are connected to a specified remote storage must be assigned to the user. Remove SSIDs Initiator ports of remote paths that are connected to a specified remote storage must be assigned to the user.
Operation name Condition Remove Journals Journal volumes must be assigned to the user. Edit Remote Connection Options Initiator ports of remote paths that are connected to a specified remote storage must be assigned to the user. Remove Remote Paths Specified initiator ports must be assigned to the user. Move LDEVs to other resource groups When you move LDEVs used for journal volumes to other resource groups, you must specify all the journal volumes of the journal to which the LDEVs belong.
Operation name Condition Reconnect external paths Ports of the specified external paths and all the external volumes connecting with those external paths must be assigned to the Storage Administrator group permitted to manage them. When you specify By Ports, all the external paths connecting with the specified ports and all the external volumes connecting with the external paths must be assigned to the Storage Administrator group permitted to manage them.
Cache Partition The following table provides information about specific Cache Partition conditions that must be observed when using Resource Partition. Operation name Condition Migrate parity groups When you specify virtual volumes, the specified LDEV must be assigned to the Storage Administrator group permitted to manage them. When you specify a parity group, the specified parity group must be assigned to the Storage Administrator group permitted to manage them.
3 Configuring custom-sized provisioning Configuring custom-sized provisioning involves creating and configuring a customized volume (CV). A CV is a fixed-sized volume that is divided into arbitrary sizes. Virtual LVI functions Virtual LVI function is used to create, configure, or delete a customized volume (LDEV). The Virtual LVI function is a mainframe function available in Virtual LVI software. A parity group usually consists of some fixed-sized volumes (FVs) and some free space.
CV capacity by emulation type for mainframe systems Emulation type Minimum CV capacity (cyl) Maximum CV capacity (cyl) 3390-1 1 1,113 3390-2 1 2,226 3390-3 1 3,339 3390-3A 1 3,339 3390-3B 1 3,339 3390-3C 1 3,339 3390-9 1 10,017 3390-9A 1 10,017 3390-9B 1 10,017 3390-9C 1 10,017 3390-A1,5 1 262,668 3390-L 1 32,760 3390-LA 1 32,760 3390-LB 1 32,760 3390-LC 1 32,760 3390-M 1 65,520 3390-MA 1 65,520 3390-MB 1 65,520 3390-MC 1 65,520 3390-V 2,3,4 44
SSID requirements The storage system is configured with one SSID (Storage System ID) for each group of 64 or 256 devices, so there are one or four SSIDs per CU image. Each SSID must be unique to each connected host system. SSIDs are user-specified and are assigned during storage system installation in hexadecimal format, from 0004 to FEFF. The following table shows the relationship between controller emulation types and SSIDs.
TIP: • To calculate the capacity of the CV of 3390-A, apply the multiples of 1,113 cylinders to user-specified CV capacity in the upper formula. For instance, if you want to apply 1 cylinder to user-specified CV capacity, apply 1,113 cylinders. If you want to apply 1,114 cylinders to user-specified CV capacity, apply 2,226 cylinders.. • In 3390-A, if a value is specified that exceeds 65,520 cylinders, the value is corrected to multiples of 1,113 cylinders.
Calculating the size of a 3390-XA, 3390-XB, 3390-XC volume TIP: • 3390-XA indicates 3390-3A, 3390-9A, 3390-LA, and 3390-MA. • 3390-XB indicates 3390-3B, 3390-9B, 3390-LB, and 3390-MB. • 3390-XC indicates 3390-3C, 3390-9C, 3390-LC, and 3390-MC. To calculate the entire capacity of a CV, use the following formulas. For the user-specified-CV-capacity, specify the capacity of the user area in a CV.
Boundary values for RAID levels Boundary values of external volumes are always one slot, regardless of RAID levels. Emulation type 3390-xx Boundary value (KB) RAID 1 (2D+2D) RAID 5 (3D+1P) RAID 5 (7D+1P) RAID 6 (6D+2P) RAID 6 (14D+2P) 928 1,392 3,248 2,784 6,496 Notes: • xx indicates one or more numbers or letters. • Boundary values are expressed in kilobytes. • Boundary values are of external volumes are always one kilobyte, regardless of RAID levels.
Creating an LDEV The Storage Administrator (Provisioning) role is required to perform this task. Use this procedure to create one or more internal or external logical volumes (LDEVs) in a selected storage system. You can create multiple LDEVs at once, for example, when you are setting up your storage system. After the storage system is set up, you can add LDEVs as needed. Before creating an LDEV in a selected storage system, free space may need to be created.
5. 6. 7. 6. Click View Physical Location. In the View Physical Location window, confirm where the selected free space is physically located, and then click Close. In the Select Free Spaces window, if the selected free spaces have no issues, click OK. Otherwise, if creating an external volume, select the external volume, and then do the following: 1. Click Select Free Spaces. 2. In the Select Free Spaces window, in the Available Free Spaces table, select the free space to be assigned to the volumes.
NOTE: When a mainframe volume or multi-platform volume is created, corresponding LDEV numbers cannot be specified if these values are not identical: - model/serial numbers of the virtual storage machine and the storage system - LDEV ID and the virtual LDEV ID 2. Click Close. 13. In the Create LDEVs window, in SSID, type four digits, in hexadecimal format (0004 to FEFF), for the SSID. 14. To confirm the created SSID, click View SSIDs to open the View SSIDs dialog box. 1.
3. Click Close. The Create LDEVs window opens. Finding an LDEV SSID When creating volumes, the LDEV SSIDs must be specified. Use this procedure to determine the SSIDs in use in the storage system so you can specify the correct SSID. 1. In the Create LDEVs window, beside Initial SSID, click View SSIDs. 2. In the SSIDs window, review the list to confirm the LDEV SSIDs. The SSIDs table shows the SSIDs in use in the system. 3. Click Close. The Create LDEVs window opens.
Removing an LDEV to be registered The Storage Administrator (Provisioning) role is required to perform this task. If you do not want to register an LDEV that is scheduled to be registered, you can remove it from the registration task. 1. In the Selected LDEVs table in the Create LDEVs window, select an LDEV, and then click Remove. A message appears asking whether you want to remove the selected row or rows. If you want to remove the row, click OK. 2. 3. Click Finish. In the Confirm window, click Apply.
3. Select the parity group. You can select multiple parity groups that are listed together or separately. 4. 5. Open the Block LDEVs window in one of 2 ways. • Click More Actions > Block LDEVs. • From the Actions menu, select Logical Device > Block LDEVs. Note the settings in the Confirm window and enter a unique Task Name or accept the default and click Apply. If Go to tasks window for status is checked, the Tasks window opens.
4. 5. Open the Restore LDEVs window in one of 2 ways. • Click More Actions > Restore LDEVs. • From the Actions menu, select Logical Device > Restore LDEVs. Note the settings in the Confirm window and enter a unique Task Name or accept the default and click Apply. If Go to tasks window for status is checked, the Tasks window opens. Editing an LDEV name The Storage Administrator (Provisioning) role is required to perform this task.
3. In the Confirm window, confirm the settings, in Task Name type a unique name for this task or accept the default, and then click Apply. The LDEV is deleted. The alias information contained in the deleted LDEV is also deleted. If the alias information is set to the LDEV, move it to another LDEV, or set it again after deleting the LDEV. If Go to tasks window for status is checked, the Tasks window opens. Formatting LDEVs If you initialize LDEVs that are being used, you will need to format the LDEVs.
I/O operation from a host during Quick Format are allowed. Formatting in the background might affect performance. Quick Format cannot be performed on the following volumes: • Any volumes other than internal volumes • Pool volumes • Journal volumes Because shared resources such as MP blades or cache paths are used during quick format operations, all host I/Os in a storage system may be affected.
Item Description Preliminary processing At the beginning of the Quick Format operation, preliminary processing is performed to generate management information. If a volume is undergoing preliminary processing, the status of the volume is Preparing Quick Format. While preliminary processing is in progress, hosts cannot perform I/O access to the volume.
1. Select and block the LDEV to be formatted. See “Blocking LDEVs” (page 44) for blocking an internal volume. See the HP XP7 External Storage for Open and Mainframe Systems User Guide for blocking an external volume. 2. Click Format LDEVs. When you select one of the following tabs, click More Actions and select Format LDEVs. 3. 4. • LDEVs tab, which appears when Logical Devices is selected from the Storage System tree.
Registering external volumes The Storage Administrator (Provisioning) role is required to perform this task. Using this procedure, you can make the external mainframe system volumes usable more quickly. When the external volume is disconnected, you cannot register the external volume. 1. Perform zero-formatting on the external mainframe system volumes. Zero-formatting writes 0’s in the entire disk area, formatting the entire disk area.
7. Select the target volumes from among the volumes with a status of Blocked. Then click Format LDEVs. The Format LDEVs window appears. 8. 9. From the Format Type list, select Write to Control blocks, and then click Finish. In the Confirm window, click Apply. If Go to tasks window for status is checked, the Tasks window opens. 10. When the processing is complete, click OK. 11. Select the external volumes. Then click More Actions and Reconnect External Volumes to restore them.
6. In the Confirm window, confirm the settings, in Task Name type a unique name for this task or accept the default, and then click Apply. If Go to tasks window for status is checked, the Tasks window opens. CAUTION: • The MP blade assigned to the LDEV that is used as a utility volume for Compatible XRC can be changed only when the XRC session is suspended and the number of the side files of the target session is zero.
4 Configuring thin provisioning Thin provisioning technology allows you to allocate virtual storage capacity based on anticipated future capacity needs, using virtual volumes instead of physical disks. Thin provisioning is an optional provisioning strategy for both open and mainframe systems. Thin provisioning is implemented by creating one or more Thin Provisioning Z pools (THP pools) of physical storage space.
Items Requirements Total Number of pages = Σ(floor(floor(pool-VOL number of blocks ÷ 116) ÷ 672)) for each pool-VOL. floor( ): Truncates the value calculated from the formula in parentheses after the decimal point. However, the upper limit of total capacity of all pools is 11.1 PB if shared memory is installed. Max number of pool-VOLs From 1 to 1,024 volumes (per pool). A volume can be registered as a pool-VOL to one pool only. Maximum number of Up to a total of 128 pools per storage system.
Items Requirements • Volumes whose LDEV status is other than Normal or Normal (Quick Format) You cannot specify volumes in blocked status or volumes in copying process. • Command devices The following pool-VOLs cannot exist in the same pool: • Internal volumes with external volumes whose cache mode is disabled. • External volumes whose cache mode is enabled and external volumes whose cache mode is disabled. Emulation type 3390-V RAID level for a Thin All RAID levels of pool-VOLs can be added.
Items Requirements A volume whose capacity is less than 8GB (9,676 cylinders) cannot be a pool volume. LDEV format The LDEV format operation can be performed on pool-VOLs if one of these conditions is satisfied: • The THP V-VOL defined for the pool does not exist. • All THP V-VOLs defined for the pool are blocked. THP V-VOL requirements Items Requirements Volume type THP V-VOL (V-VOL) The LDEV number is handled in the same way as for normal volumes.
• You cannot expand both the TSE-VOL and the THP V-VOL in one operation. Expand the same type volumes in a single operation. • You cannot expand both the Compatible FlashCopy SE volume and Thin Provisioning Z volume in one operation. In this case, you must expand volumes whose types are same. CAUTION: When increasing THP V-VOL capacity, do not perform the following operations. When you perform these operations, do not increase THP V-VOL capacity.
Using Thin Provisioning Z or Smart Tiers Z with other HP XP7 Storage products Interoperability of THP V-VOLs and pool-VOLs THP V-VOLs and pool-VOLs can be used in conjunction with other HP XP7 Storage products. The following table lists the operations that are permitted and not permitted.
Product name (Guide name) Permitted Not permitted Virtual LVI (HP XP7 Provisioning for Mainframe Systems User Guide) Registering Virtual LVI volumes in Thin Performing Virtual LVI operations on Provisioning Z pools. volumes that are already registered in a THP pool. Cache Partition (HP XP7 Performance Performing operations on THP V-VOLs Not applicable for Open and Mainframe Systems and pool-VOLs.
Figure 1 Thin Provisioning Z or Smart Tiers Z and Continuous Access Synchronous Z Continuous Access Synchronous P-VOL Continuous Access Synchronous S-VOL Explanation THP V-VOLs THP V-VOLs Supported. THP V-VOLs Normal (ordinary) volumes* Supported. Normal (ordinary) volumes* THP V-VOLs Supported. Note, however, that this combination consumes the same amount of pool capacity as the original normal volume (primary volume).
The following table lists the supported Continuous Access Journal and Thin Provisioning or Smart Tiers volume combinations. Continuous Access Journal Continuous Access Z P-VOL Journal Z S-VOL Continuous Access Explanation Journal Z journal volume THP V-VOLs THP V-VOLs THP V-VOL that has the Supported. OPEN-V emulation type2 THP V-VOLs Normal (ordinary) volumes1 THP V-VOL that has the Supported. OPEN-V emulation type2 Normal (ordinary) volumes1 THP V-VOLs THP V-VOL that has the Supported.
Business Copy Z primary volume Business Copy Z secondary Explanation volume The Quick Restore function is unavailable. *Normal volumes include the internal volumes and external volumes that are mapped to the volumes of the external storage system using External Storage. For more information on external volumes, see the HP XP7 External Storage for Open and Mainframe Systems User Guide.
Cache Partition CLPR setting THP V-VOLs and the associated pool volumes should be assigned to the same CLPR. For a Thin Provisioning Z, different CLPRs can be assigned to THP V-VOLs in the same pool. In this case, the CLPR assigned to the pool volumes is ignored. For detailed information about CLPRs, see the HP XP7 Cache Partition User Guide.
Smart Tiers Z About tiered storage In a tiered storage environment, storage tiers can be configured to accommodate different categories of data. A tier is a group of storage media (pool volumes) in a THP pool. Tiers are determined by a single storage media type. A storage tier can be one type of data drive, including SSD, SAS, or external volumes. Media of high-speed performance make up the upper tiers. Media of low-speed response become the lower tiers.
In Auto execution mode, monitoring and relocation are continuous and automatically scheduled. In Manual execution mode, the following operations are initiated manually.
In both execution modes, relocation of data is automatically determined based on monitoring results. The settings for these execution modes can be changed nondisruptively while the pool is in use.
• Auto execution mode Auto execution mode performs monitoring and tier relocation based on information collected by monitoring at a specified constant frequency: from 0.5, 1, 2, 4, or 8 hours. All Auto execution mode cycle frequencies have a starting point at midnight (00:00). For example, if you select a 1 hour monitoring period, the starting times would be 00:00, 01:00, 02:00, 03:00, and so on.
In auto execution mode, the collection of monitoring data and tier relocation operations are performed in parallel in the next cycle. Data from these parallel processes are stored in two separate fields. • Data while monitoring is in progress in the next cycle. • Fixed monitoring information used in tier reliocation. • Manual execution mode You can start and stop performance monitoring and tier relocation at any time.
Figure 7 Collection of monitoring data to tier relocation workflow in manual execution mode Case 1: If the second collection of the monitoring information is finished during the first tier relocation, the latest monitoring information is the second collection. In that case, the first collection of monitoring information is referenced only after the first tier relocation has completed.
In that case, the third collection of the monitoring information is started after the first tier relocation is stopped or tier relocation has completed. The collection of the monitoring information is not started under these conditions as well: • When the second tier relocation is performed, the fourth collection of monitoring information cannot be started. • When the third tier relocation is performed, the fifth collection of monitoring information cannot be started.
Explanation of the relocation flow: 1. Allocate pages and map them to THP V-VOLs Pages are allocated and mapped to THP V-VOLs on an on-demand basis. Page allocation occurs when a write is performed to an area of any THP V-VOL that does not already have a page mapped to that location. Normally, a free page is selected for allocation from an upper tier with a free page. If the capacity of the upper tier is insufficient for the allocation, the pages are allocated to the nearest lower tier.
4. Determine the tier range values The page is allocated to the appropriate tier according to performance monitoring information. The tier is determined as follows. 1. Determine the tier boundary The tier range value of a tier is calculated using the frequency distribution graph. This acts as a boundary value that separates tiers The pages of higher I/O load are allocated to the upper tier in sequence.
allocated during the monitoring cycle. Pages that are not allocated during performance monitoring are not candidates for tier relocation. • Tier relocation can be performed concurrently on up to eight pools. If more than eight pools are specified, relocation of the ninth pool starts after relocation of any of the first eight pools has completed.
Monitoring information or execution conditions Status of data collection in progress Status of fixed monitoring information used in tier relocation Tier relocation operations Solutions When V-VOLs are deleted Volume is not monitored. Only monitoring information on the volume is invalid. Tier relocation of the volume is suspended. N/A When execution Suspended. mode is changed to Manual from Auto or vice versa. Monitoring information collected before suspension is valid. Suspended.
Monitoring information or execution conditions Status of data collection in progress Status of fixed monitoring information used in tier relocation Tier relocation operations Solutions collected during the previous cycle continues to be valid. When the depletion Continued. threshold of the pool is nearly exceeded during relocation. No effect on the fixed Suspended. monitoring information. The monitoring information collected during the previous cycle continues to be valid.
Setting external volumes for each tier If you use external volumes as pool-VOLs, you can put the external volumes in tiers by setting the External LDEV Tier Rank for the external volumes. The External LDEV Tier Rank consists of the following three types: High, Middle, and Low.
Figure 10 Workflow of a new page assignment Tier relocation workflow: Tier relocation is performed taking advantage of the buffer space allocated for tier relocation, as mentioned above. Tier relocation is also performed to secure the space reserved in each tier for new page assignment. The area is called the buffer space for new page assignments. When tier relocation is performed, Smart Tiers reserves buffer spaces for relocation and new page assignment.
Auto execution mode In Auto execution mode, the system automatically and periodically collects monitoring data and performs tier relocation. You can select an Auto execution cycle of 0.5, 1, 2, 4, or 8 hours, or a specified time. The following illustrates tier relocation processing in a 2-hour Auto execution mode: Manual execution mode In Manual execution mode, you can manually collect monitoring data and relocate a tier. You can issue commands to manually: 1. Start monitoring. 2. Stop monitoring. 3.
Notes on performing monitoring • You can collect the monitoring data even while performing the relocation. • After stopping the monitoring, the tier range is automatically calculated. • The latest available monitoring information, which is collected just before the relocation is performed, is used for the relocation processing. • When the relocation is performed, the status of the monitor information must be valid.
• Relocation Result on “Pools window” (page 257), “Pools: Volume tabs” (page 262), and “View Pool Management Status window” (page 319). Displays the status of the tier relocation processing. • ◦ In Progress: The status of Pool Management Task is Waiting for Relocation or Relocating. ◦ Completed: The tier relocation operation is not in progress, or the tier relocation is complete. ◦ Uncompleted (n% relocated): The tier relocation is suspended at the indicated percentage progression.
Notes on performing monitoring • You can collect the monitoring data even while performing the relocation. • After stopping the monitoring, the tier range is automatically calculated. • The latest available monitoring information, which is collected just before the relocation is performed, is used for the relocation processing. • When the relocation is performed, the status of the monitor information must be valid.
• ◦ MON: The performance monitor is operating. The tier relocation is stopped. ◦ RLM: The performance monitor and the tier relocation are operating. DAT This item displays the status of the monitor information. • ◦ VAL: Valid. ◦ INV: Invalid. ◦ PND: Being calculated. R(%) This item displays the progress percentage of tier relocation. 0 to 99: Shows one of the following statuses. ◦ When the value of STS is RLC or RLM: Relocation is in progress.
performing the tier relocation based on the weighted average efficiency, even if a temporary decrease or an increase of the I/O load occurs, unnecessary relocation can be avoided.
Notes on performing monitoring • You can collect a new cycle of monitoring data while performing relocation. • After monitoring stops, the tier range is automatically calculated. • The latest available monitoring information, collected just before the relocation is performed, is used for relocation processing. • When relocation is performed, the status of the monitor information must be valid (VAL).
Item Does each pool output the log information? Does each V-VOL output the log information? Type of information Description Tier2 Total Yes No Capacity information Total pages of tier 2. Tier3 Total Yes No Capacity information Total pages of tier 3. Tier1 Used Yes Yes Capacity information Pages assigned to tier 1 at the start of tier relocation. Tier2 Used Yes Yes Capacity information Pages assigned to tier 2 at the start of tier relocation.
Item Does each pool output the log information? Does each V-VOL output the log information? Type of information Description Access Synchronous Z pair and an initial copy operation was performed. • A V-VOL was specified as the secondary volume of the Continuous Access Journal Z pair, and an initial copy operation was performed. Completed Rate (%) Yes Yes Tier relocation result Progress percentage rate at the time tier relocation ends or is suspended.
Item Does each pool output the log information? Does each V-VOL output the log information? Type of information Description Performance Util Tier1 (%) Yes No Monitoring result Performance utilization of tier 1. The performance utilization is the current I/O percentage based on the maximum performance of tier 1. Performance Util Tier2 (%) Yes No Monitoring result Performance utilization of tier 2.
Tiering policy expansion In the current release, the tiering policy concept has been expanded to provide new options: • Custom policies. You can define up to 26 new policies (Level6(6) - Level31(31)) in addition to the existing six (All(0), Level1(1), Level2(2), Level3(3), Level4(4), and Level5(5)). See “Setting tiering policy on a THP V-VOL” (page 90). A custom policy can be set for a THP V-VOL when it is created and changed, if necessary, after creation. NOTE: Custom policies cannot be renamed.
The following figure shows an example of data allocation when setting the tiering policy to Level1(1) (see Level1(1) in “Tiering policy levels” (page 91)). In this case, pages in the THP V-VOL are relocated to tier 1, and are not relocated to other tiers. Setting tiering policy on a THP V-VOL The setting of a tiering policy for a THP V-VOL is optional. If one is not selected, the default is the All(0) tiering policy level. The available levels are listed in “Tiering policy levels” (page 91)).
Example of deleting a tier If a tier no longer has any pool-VOLs when you delete them, the tier is deleted from the pool. The following figure illustrates deleting a tier. For more information about tiering policy and groups, see “Tiering policy levels” (page 91). Tiering policy levels Tiering policy 1 tier pool 2 tier pool 3 tier pool Note All(0) Single Tier Both tiers All 3 tiers Default Tiering Policy Level1(1) Same as All(0) Tier 1 Tier 1 Data is located to the Top Tier.
The following table shows how tiering policy is shown in the performance graph. How the graph appears depends on the number of tiers set in a pool and tiering policy level selected when viewing the performance graph. 92 Tiering policy selected with performance graph V-VOL displayed in the performance graph All(0) In the performance graph, you can display a frequency distribution of a THP V-VOL, set to all tiers.
Reserving tier capacity when setting a tiering policy If you set the tiering policy of a THP-VOL, the THP-VOL used capacity and the I/O performance limitation are reserved from the tier. The reserved limit performance per page is calculated as follows: The reserved limit performance per page = (The performance limit of the tier) ÷ (The number of pages in the tier). A THP-VOL without a tiering policy setting uses the unreserved area in the pool.
diagram below, tier 1 is reserved first. If the capacity of tier 1 is deficient at this point, tier 2 is reserved automatically. For details, see “Notes on tiering policy settings” (page 95). Tier reservation priority Tiering policy Reserved tier 1 Level1(1) Tier 1 2 Level3(3) Tier 2 3 Level5(5) Tier 3 From 4 to 29 From Level6(6) to Level31(31) The custom policy whose number is small is prioritized. Tier 1: From Level6(6) to Level31(31), each of the Tier1 Min values are reserved.
Notes on tiering policy settings • If Auto is set as the execution mode, tier relocation is performed based on the monitoring cycle. Therefore, when the tiering policy setting is changed, tier relocation will automatically implement the tiering policy at the end of the current monitoring cycle. See Example 1 in “Execution mode settings and tiering policy” (page 100).
Tiering Policy Allocation capacity considerations Allocation capacities in each tier. ◦ Tier1: The setting value(%) in Tier1 Min. ◦ Tier2: The value deducted Tier1 Max(%) and Tier3 Max(%) from 100(%). ◦ Tier3: The setting value(%) in Tier3 Min. Second phase: Tier range and I/O performance. Capacities deducted from the allocated capacities of the first phase from the total used capacity, are allocated to each tier.
Number Condition Order of new page allocation 1 T1 MIN = 100% Same as Level1(1) 2 T1 MAX = 0% Same as Level5(5) 3 T1 MAX > 0% Same as All(0) Tiering policy When specifying High When specifying Middle All From tier 1, 2, to 3. From tier 2, 3, to 1. From tier 3, 2, to 1. Specifying High, Middle or Low to the assignment sequence is effective. Level 1 From tier 1, 2, to 3. From tier 1, 2, to 3. From tier 1, 2, to 3. Assignment sequences when High, Middle, and Low are same.
example, three LDEVs are relocated in each period, but the number of LDEVs to relocate may change by the relocation cycle or the data size.
Tier of deleted pool-VOLs Order in which pages are allocated to tiers Description If there is no free space in Tier 1 and Tier 2, pages are allocated to Tier 3. Tier 3 Tier 3, Tier 2, and Tier 1 If there is free space in Tier 3, pages are allocated to Tier 3. If there is no free space in Tier 3, pages are allocated to Tier 2. If there is no free space in Tier 2 and Tier 3, pages are allocated to Tier 1. The following table describes page allocation in a 2-tier configuration.
• Reclaiming zero pages in a page release request issued by the host with the Write Same command, for example. • Performing tier relocations several times If you expand the pool capacity, Thin Provisioning Z moves data to the added space on a per-page basis. When the data is moved, the usage rate among parity groups of the pool-VOLs is rebalanced. Host I/O performance may decrease when data is moved.
Changing the tiering policy level on a THP V-VOL The Storage Administrator (Provisioning) role is required to perform this task. 1. In the Remote Web Console main window, in the Storage Systems tree, select Logical Devices. The following is another way to select LDEVs. 1. In the Remote Web Console main window, in the Storage Systems tree, select Pool. 2. Select the pool associated with the THP V-VOL that has the tiering policy level you want to change. 3. Click the Virtual Volumes tab. 2. 3. 4. 5. 6.
1. In the Storage Systems tree on the left pane of the top window, select Logical Devices. The following shows an example of the other operations to select LDEVs. 1. In the Storage Systems tree on the left pane of the top window, select Pool. The pool name appears below Pool. 2. 3. 2. 3. Click the pool associated with the V-VOL that has new page assignment tier you want to change. Click the Virtual Volumes tab on the right pane.
7. Click Apply. If the Go to tasks window for status check box is selected, the Tasks window appears. 8. 9. Click Finish. In the Confirm window, verify your settings. In Task Name, type a unique name for this task or accept the default, and then click Apply.
Smart Tiers Z workflow The following diagram shows the flow of work for a Storage Administrator to set up Smart Tiers Z on the storage system. As shown in the diagram,Remote Web Console and RAID Manager have different workflows. The details about how to set up Smart Tiers using Remote Web Console are covered in subsequent topics. For details about how to set up Smart Tiers Z using RAID Manager, see the HP XP7 RAID Manager Reference Guide and HP XP7 RAID Manager User Guide.
• In RAID Manager, when creating a pool, you cannot enable Smart Pool and cannot register multiple media as pool-VOLs. Before making tiers, enable Smart Pool. • Enabling Smart Pool from RAID Manager automatically sets Tier Management to Manual. To change Tier Management to Auto, you must do this in Remote Web Console. • If you delete a pool, its pool-VOLs (LDEVs) will be blocked. If they are blocked, format them before using them.
• “Display items: Capacity usage for each tier” (page 108) • “Display items: Performance monitor statistics” (page 108) • “Display items: Operation status of performance monitor/relocation” (page 108) Task and parameter settings No.
No.
Display items: Capacity usage for each tier No. Category Output information GUI RAID Manager 1 THP pool Capacity for each tier (Total) Y Y Capacity for each tier (Usage) Y Y Capacity for each tier (Usage) Y Y 2 3 THP V-VOL Display items: Performance monitor statistics No.
5. Select Enable from the Smart Pool field. If TSE-VOL is assigned to the selected pool, you cannot select Enable. 6. To configure Smart Tiers Z: 1. Select the Tier Management check box. 2. From the Tier Management field, select Auto or Manual. Normally Auto should be set. When you select Auto, monitoring and tier relocation can automatically executed. When you select Manual, monitoring and tier relocation can be executed with the RAID Manager commands or the Pools window.
7. Click Finish. The Confirm window appears. 8. In the Task Name text box, enter the task name. You can enter up to 32 ASCII characters and symbols in all, except for \ / : , ; * ? " < > |. The value "date-window name" is entered by default. 9. In the Confirm window, click Apply to register the setting in the task. If the Go to tasks window for status check box is selected, the Tasks window appears.
2. 3. From the Pools table on the right, click the row of the pool with the Smart Tiers Z setting you want to change. Click More Actions and select Edit Pools. The Edit Pools window appears. 4. 5. Check Monitoring Mode. From the Monitoring Mode option, select Period Mode or Continuous Mode. If you want to perform tier relocation using the monitor results from the prior cycle, select Period Mode. If you want to perform tier relocation weighted to the past period monitoring result, select Continuous Mode.
3. Click More Actions and select Edit Pools. The Edit Pools window appears. 4. 5. 6. Select the Buffer Space for Tier relocation check box. In the Buffer Space for Tier relocation text box, enter an integer value from 2 to 40 as the percentage (%) to set for each tier. Click Finish. The Confirm window appears. 7. In the Task Name text box, enter the task name. You can enter up to 32 ASCII characters and symbols in all, except for \ / : , ; * ? " < > |.
A pool number must be assigned to a pool. Multiple THP V-VOLs can be related to one pool. • capacity of the pool (MB) = total number of pages * 38 - 3800 3800 in the formula is the management area size of the pool-VOL with System Area. • total number of pages = Σ(floor(floor(pool-VOL number of blocks ÷ 116) ÷ 672)) for each pool-VOL • 1 cylinder - 1740 blocks • floor( ) means to truncate the part of the formula within the parentheses after the decimal point.
When the pool is created, a pool-VOL with system area is assigned the priority shown in the following table. Priority Data drive type 1 SAS7.2K 2 SAS10K 3 SAS15K 4 SSD 5 External volume If multiple pool-VOLs of the same data drive type exist, the priority of each is determined by the internal index of the storage system. For Thin Provisioning Z when selecting pool-VOLs manually The Storage Administrator (Provisioning) role is required to perform this task.
TIP: 5. Perform the following steps if necessary: • Click Filter to open the menu, specify the filtering, and then Apply. • Click Select All Pages to select all pool-VOLs in the table. To cancel the selection, click Select All Pages again. • Click Options to specify the volumes or the number of rows to be displayed. Click OK. The information in the Selected Pool Volumes table is applied to Total Selected Pool Volumes and Total Selected Capacity. 8.
1. In the Storage Systems tree on the left pane of the top window, select Pool. The Pool window appears. 2. Click Create Pools. The Create Pools windows appears. 3. 4. 5. 6. 7. From the Pool Type list, select Thin Provisioning. From the System Type list, select Mainframe. From the Smart Pool field, select Disable. From the Pool Volume Selection field, select Auto. Follow the steps below to select pool-VOLs. 1. From the Resource Group list, select the resource group name of the pool-VOL. 2.
11. In the Subscription Limit text box, enter an integer value from 0 to 65534 as the subscription rate (%) for the pool. If no number is entered, the subscription rate is set to unlimited. 12. In the Warning Threshold text box, enter an integer value from 1 to 100 as the rate (%) for the pool. The default value is 70%. 13. In the Depletion Threshold text box, enter an integer value from 1 to 100 as the rate (%) for the pool. The default value is 80%.
4. In the Available Pool Volumes table, select the pool-VOL row to be associated with a pool. Then click Add. The selected pool-VOL is registered in the Selected Pool Volumes table. Up to 1,024 volumes can be added to a pool. You can add volumes with the same Drive Type/RPM and different RAID Levels. For example, you can add a volume that has an SAS/15K Drive Type/RPM and a 5(3D+1P) RAID Level to the same pool with a volume that has an SAS/15K Drive Type/RPM and a 5(7D+1P) RAID Level.
Performance monitoring and tier relocation is performed once a day In the Monitoring Period field, set the time to start and end performance monitoring. The default value is 00:00 to 23:59. Set one or more hours between the starting and ending times. If you specify a starting time that is later than the ending time, the performance monitoring continues until the ending time on the next day. You can view the information gathered by performance monitoring with Remote Web Console or the RAID Manager.
21. In the Confirm window, click Apply to register the setting in the task. If you select a row and click Detail, the Pool Properties window appears. If the Go to tasks window for status check box is selected, the Tasks window appears. For Smart Tiers Z pool when selecting pool-VOLs automatically To create pools by selecting pool-VOLs automatically: 1. In the Storage Systems tree on the left pane of the top window, select Pool. The Pool window appears. 2. Click Create Pools.
8. In the Pool Name text box, enter the prefix and initial number of the pool. The pool name may consist of up to 32 characters. Prefix: Case-sensitive, alphanumeric characters that begin the pool name. Initial Number: 1 to 9 digits that follow the prefix. 9. Click Options. 10. In the Initial Pool ID text box, type the number of the initial pool ID, from 0 to 127. When you specify a pool ID that was previously registered, the smallest available ID is displayed by default instead of the value you entered.
16. From the Relocation Speed option, select the page relocation speed to use when performin relocation. You can set the speed to: 1(Slowest), 2(Slower), 3(Standard), 4(Faster), and 5(Fastest). The default is 3(Standard). If you want to perform tier relocation at high speed, use the 5(Fastest) setting. If the speed specified is slower than 3(Standard), the data drive load is low when tier relocation is performed. 17.
You can create a THP V-VOL from any of the following tabs: • The LDEVs tab, which appears when Logical Devices is selected. • The Pools tab, which appears when Pools is selected. • 1. The Virtual Volumes tab, which appears when a pool in Pools is selected. You can create LDEVs from the following tab windows: 2. • The LDEVs tab, which appears when Logical Devices is selected. • The Pools tab, which appears when Pools is selected.
NOTE: You can specify a pool when creating THP-VOLs if the pool has a status of one of the following: • Normal status • Exceeded Threshold status • In progress of pool capacity shrinking You can select only one pool. When Enable is selected in step 6, the Smart Tiers Z-pools appear, and when Disable is selected, only the non-Smart Tiers Z-pools appear. Perform the following if necessary: 5. • Click Filter to open the menu, specify the filtering, and then Apply.
15. From the Cache Partition list, select CLPR. 16. From the MP Blade list, select a MP blade. Select a MP blade to be used by the LDEVs. If you assign a specific MP blade, select the ID of the MP blade. If you can assign any MP blade, click Auto. 17. From the Tiering Policy field, select the tiering policy to be used by the LDEVs. If you assign a specific tiering policy, select any policy. All(0) is selected by default. You can change a level from Level1(1) to Level5(5) or from Level6(6) to Level31(31).
4. 5. 6. In the Edit SSIDs window, click OK. In the Create LDEVs window, click Finish. In the Confirm window, confirm the settings, and then click Apply. If Go to tasks window for status is checked, the Tasks window opens. Changing THP V-VOL settings The Storage Administrator (Provisioning) role is required to perform this task. Before registering a THP V-VOL, you may need to change the THP V-VOL settings. 1.
Monitoring capacity and performance Monitoring pool capacity The storage system monitors the pool’s free capacity in accordance with threshold values defined when you create pools. If the pool capacity reaches the threshold values, warnings are issued as SIMs and as SNMP traps to the open-systems host. See “Monitoring pool usage levels” (page 127) for more information. You can provision a larger virtual capacity beyond the pool capacity by using THP V-VOLs of Thin Provisioning Z.
• ◦ THP V-VOL usage (stored data rates) and elapsed time of pool usage (using Remote Web Console). ◦ Smart Tiers Z performance monitoring of pool storage Possible tuning actions (without Smart Tiers Z). The following techniques using Business Copy Z or Tiered Storage Manager will move a THP V-VOL. ◦ The THP V-VOL is copied using Business Copy Z from a pool with an I/O bottleneck. For more information, see HP XP7 Business Copy for Mainframe Systems User Guide.
Thresholds Pool utilization thresholds Thin Provisioning Z monitors pool capacity using thresholds. A threshold is the proportion (%) of used capacity of the pool to the total pool capacity. Each pool has its own pool threshold values. • Warning Threshold: Set the value between 1% and 100%, in 1% increments. The default is 70%. • Depletion Threshold: Set the value between 1% and 100%, in 1% increments. The default is 80%.
Monitoring total THP-VOL subscription for a pool You can configure the Subscription Limit of total THP-VOL capacity to pool capacity. This prevents a new THP-VOL capacity that exceeds the configured subscription limit from being allocated and is associated with the pool. If you specify more than 100% as the Subscription Limit or the subscription limit is not set, you must monitor the free capacity of the pool because it is possible that writes to the THP-VOLs may exceed pool capacity.
2. 3. 4. From the Pools table, select the pool with the subscription limit you want to change. Click More Actions, and then select Edit Pools. In the Edit Pools window, check Subscription Limit, and then type the subscription limit percentage. If the subscription limit is blank, then it is disabled, and any amount of THP V-VOLs can be created regardless of the pool free capacity. 5. 6. Click Finish.
Automatic completion of a SIM Some SIMs are completed automatically when you resolve the problem that caused the SIM. SOM 734 must be enabled for automatic completion of a SIM. Automatic completion of a SIM removes it from the system with no additional manual intervention. After the SIM is automatically completed, the status of the SIM changes to completed. The following SIMs occur when the usage level of the pool exceeds the threshold.
Managing pools and THP V-VOLs Viewing pool information The Storage Administrator (Provisioning) role is required to perform this task. 1. In the Remote Web Console main window, in the Storage Systems tree, select Pool. 2. View the pool information. For details about the window for pool information, see “Pools window” (page 257) and “Pools: Volume tabs” (page 262). Viewing formatted pool capacity The Storage Administrator (Provisioning) role is required to perform this task. 1.
• The cache memory is blocked. • Pool-VOLs in the selected pool are blocked. • Pool-VOLs which are external volumes in the selected pool are blocked. • Correction access executes to the pool-VOL in the selected pool. NOTE: Following are cases that the formatted pool capacity may decrease: • New pages are being allocated. • LDEV format is being performed on the pool-VOL. • Correction copy is being executed.
4. In the Expand Pool window, select the pool-VOL. 1. Click Select Pool VOLs. 2. In the Select Pool VOLs window, from the Available Pool Volumes table, select the pool-VOL you want to assign, and then click Add. The selected pool-VOLs are registered in the Selected Pool Volumes table. Up to 1024 volumes can be added including the volumes already in the pool. NOTE: If necessary, perform the following steps: • From Filter option, select ON to filter the rows.
1. In the Remote Web Console main window, in the Storage Systems tree, select Pool. The pool name appears below Pool. 2. 3. 4. From the Pool table, select the pool to be recovered. Click More Actions, and then select Restore Pools. In the Confirm window, confirm the settings, in Task Name type a unique name for this task or accept the default, and then click Apply. If Go to tasks window for status is checked, the Tasks window opens.
NOTE: You cannot perform the following operations on a pool while the pool volume capacity is in the process of shrinking. Wait until shrinking completes or stop the shrinking process. • Expand Pool • Shrink Pools • Edit Pools • Restore Pools If you delete the pool-VOL with the pool’s system area, the used capacity and the management area will move to other pool volumes.
Decreasing pool capacity The Storage Administrator (Provisioning) role is required to perform this task. 1. In the Remote Web Console main window, in the Storage Systems tree, select Pool. The pool name appears below Pool. 2. 3. Select the pool that contains the pool-VOLs to be deleted. From the Pool volumes, select the pool-VOL to be deleted. You cannot delete pool-VOLs unless Shrinkable is applied. 4. Click Shrink Pool. The Shrink Pool window opens.
Notes on deleting a tier in a pool You cannot delete a pool-VOL under these conditions. • If the pool-VOL is deleted, the used capacity of the pool-VOL exceeds the pool threshold. • If the pool-VOL is deleted, the subscription rate of the total V-VOL capacity exceeds the subscription limit. • If the pool-VOL with system area has less than 3.8 GB of free space. There must be 3.8 GB of free space in the pool in order to delete the pool-VOL with system area.
Changing external LDEV tier rank The Storage Administrator (Provisioning) role is required to perform this task. 1. In the Storage Systems tree on the left pane of the top window, select Pool. The pool name appears below Pool. 2. From the Pool volumes table in the right pane, select the pool-VOL that has the external LDEV tier rank you want to change. You cannot change the external LDEV tier rank of a pool-VOL if External Volume is not displayed in the Drive Type/RPM column. 3.
Changing the name of a THP V-VOL The Storage Administrator (Provisioning) role is required to perform this task. 1. In the Remote Web Console main window, in the Storage Systems tree, select Logical Devices. The following is another way to select LDEVs. 1. In the Remote Web Console main window, in the Storage Systems tree, select Pool. The pool name appears below Pool. 2. 3. 2. 3. Select the pool associated with the THP V-VOL you want to rename. Select the Virtual Volumes tab.
If you stop an operation to reclaim zero pages in mid-stream, the pages that have been released will remain as free pool capacity. After an operation to reclaim zero pages, Thin Provisioning Z automatically balances usage levels among parity groups in the pool. This rebalancing is performed on parity groups related to the pool. If you do not want automatic balancing of the usage levels of parity groups, call HP Technical Support to change your configuration.
In any of the following cases, the reclaiming zero pages will stop, and THP-VOL pages will not be released: • LDEV formatting was performed while reclaiming zero pages. • The pool-VOL that is being accessed by the target THP-VOL was blocked. • The pool associated with the target THP-VOL was blocked while reclaiming zero pages. • Cache memory failure occurred while reclaiming zero pages. • The THP-VOL was deleted when zero pages were reclaimed.
Disable do not allow tier relocation to be performed on the THP V-VOL in the case of both automatic and manual tier relocation. 5. 6. Click Finish. In the Confirm window, confirm the settings, in Task Name type a unique name for this task or accept the default, and then click Apply. If Go to tasks window for status is checked, the Tasks window opens. Deleting a THP V-VOL The Storage Administrator (Provisioning) role is required to perform this task. You cannot delete a THP V-VOL if the status is online.
3. Click More Actions to select Stop Monitoring Pools. The Stop Monitoring Pools window appears. 4. In the Task Name text box of the Stop Monitoring Pools window, enter the task name. You can enter up to 32 ASCII characters and symbols in all, except for \ / : , ; * ? " < > |. "date-window name" is entered by default. 5. In the Stop Monitoring Pools window, click Apply to register the setting in the task. If the Go to tasks window for status check box is selected, the Tasks window appears.
5 Configuring access attributes Volume Retention is required to assign access attributes to volumes. Access attributes strategies By default, all the volumes are subject to read and write operations by hosts. With Volume Retention, you can assign access attributes to volumes that restrict read and/or write operations as needed. By properly setting these attributes, you can prevent unauthorized access to data and avoid the possibility of data being damaged, lost, or leaked.
be disabled. Also, operations such as REFORMAT and REFVTOC cannot be performed for overwriting volume serial numbers. • If a volume has the Protect attribute, the volume can neither be used as an P-VOL nor an S-VOL. ◦ If the Protect attribute is set to the volume which is being used by Continuous Access Synchronous Z, the pair might be suspended. ◦ If the Protect attribute is set to the volume which is being used by Continuous Access Journal Z, the remote copy processing might not be continued.
Table 1 Supported volume emulation types (continued) Supported volume emulation types Description 3390-LA, 3390-LB, 3390-LC Notes 3390-MA, 3390-MB, 3390-MC • You must ensure that the access attribute of these volumes is Read/Write. • Access attributes only take effect when mainframe hosts access volumes. Access attributes does not take effect when open-system hosts access volumes. Setting Access Attributes You can prevent volumes from unauthorized read and/or write operations.
Specifying the VTOC size When a host accesses a volume, the volume table of contents (VTOC) in the volume changes to include updated access logs. Prerequisites • Volume has Read Only attributes. • Volume is not for a VM minidisk. • Remote Web Console secondary windows must be defined for use in advance. When you select Modify from the Volume Retention secondary window to set access attributes, other users and programs are prevented from changing storage system settings.
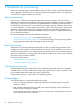
6 Troubleshooting The information in this chapter can help you troubleshoot problems when provisioning a storage system. Troubleshooting Virtual LVI If a failure occurs while you are operating, see the HP XP7 Remote Web Console Messages. For the problems and solutions regarding the Remote Web Console, see the XP7 Remote Web Console User Guide Troubleshooting Thin Provisioning Z The following table provides troubleshooting instructions for using Thin Provisioning Z.
Problems Causes and Solutions • Adjust the value of Subscription Limit for the pool. See “Changing the pool subscription limit” (page 130). • Ask HP Technical Support to solve the problem. Cannot add a pool-VOL. Causes: • 1,024 pool-VOLs are already defined in the pool. • The pool-VOL does not fill the requirements for a pool-VOL. • Something in the storage system is blocked. Solution: • Change the setting of the LDEV to satisfy the requirement of the Pool-VOL. See “Pool-VOL requirements” (page 55).
Problems Causes and Solutions A failure occurs to the application for monitoring the volumes installed in a host. Causes: • Free space of the pool is insufficient. • Something in the storage system is blocked. Solutions: • Check the free space of the pool and increase the capacity of the pool. See “Increasing pool capacity” (page 134)). • Perform the operation to reclaim zero pages in order to release pages in which zero data are stored. See “About releasing pages in a THP V-VOL” (page 141).
Problems Causes and Solutions Cannot reclaim zero pages in a THP V-VOL. Causes: • Zero pages in the THP V-VOL cannot be reclaimed because the THP V-VOL does not meet conditions for releasing pages in a THP V-VOL. Solutions: • Make sure that the THP V-VOL meets the conditions described in “Releasing pages in a THP V-VOL” (page 142). The THP V-VOL cannot be released if the process to reclaim zero pages in the THP V-VOL is interrupted.
If an error occurs during the operations, the error code and error message appear in the error message dialog box. For more information about error messages, see HP XP7 Remote Web Console Messages. Troubleshooting provisioning while using RAID Manager If an error occurs while operating Data Retention or Thin Provisioning Z while using RAID Manager, you might identify the cause of the error by referring to the log appearing on the RAID Manager window or the RAID Manager operation log file.
Error Code (SSB2) Error Contents Solutions 0xaf2b Because the specified volume operation was not Re-execute the operation after a brief interval. finished, the operation was rejected. 0xaf2c Because the shared memory capacity is not enough to increase the specified capacity, the operation was rejected. Confirm the value immediately below LDEV Capacity in the Expand Virtual Volumes window.
7 Support and other resources Contacting HP For worldwide technical support information, see the HP support website: http://www.hp.
HP websites For additional information, see the following HP websites: • http://www.hp.com • http://www.hp.com/go/storage • http://www.hp.com/service_locator • http://www.hp.com/support/manuals • http://www.hp.com/support/downloads • http://www.hp.
Table 2 Document conventions (continued) Convention Element Monospace text • File and directory names • System output • Code • Commands, their arguments, and argument values Monospace, italic text • Code variables • Command variables Monospace, bold text WARNING! CAUTION: IMPORTANT: NOTE: TIP: 158 Emphasized monospace text Indicates that failure to follow directions could result in bodily harm or death. Indicates that failure to follow directions could result in damage to equipment or data.
A RAID Manager command reference This appendix provides information on Remote Web Console tasks and corresponding RAID Manager commands used in provisioning. Remote Web Console tasks and RAID Manager command list The following lists actions (tasks) that can be performed in the Remote Web Console GUI, and the corresponding commands that can be issued in RAID Manager.
Item External Storage Action name RAID Manager command Restore Pools raidcom modify pool View Tier Properties raidcom get thp_pool Disconnect External Volumes raidcom disconnect external_grp Reconnect External Volumes raidcom check_ext_storage 160 RAID Manager command reference
B Resource Partition GUI reference Sections in this appendix describe the Resource Partition windows, wizards, and dialog boxes used in configuring resource groups. Resource Group window Use this window to create or delete resource groups, and to view, edit, or export information about resource groups. You must have the correct user permissions to perform tasks on resource groups.
Resource Groups tab Item Description Resource Group Name Name of a resource group. Resource Group ID* Identifier of a resource group. Number of User Groups Number of user groups where the resource group is assigned. Number of Parity Groups Number of parity groups that are assigned to the resource group. Number of LDEVs Number of LDEVs that are assigned to the resource group. Number of Ports Number of ports that are assigned to the resource group.
Parity Groups tab Item Description Parity Group ID Identifiers of parity groups that are already defined. Capacity Capacity of each parity group. Number of LDEVs Number of LDEVs in each parity group. Add Resources Opens the Add Resources window, where you can add one or more resources to the resource group. Remove Resources Opens the Remove Resources window, where you can remove one or more resources from the resource group.
LDEVs tab Item Description LDEV ID LDEV identifiers. Some undefined LDEV IDs may appear. A hyphen appearing in the LDEV name indicates the LDEV is undefined. LDEV Name LDEV name. Parity Group ID Parity group identifier in which the LDEV belongs. Pool Name (ID) Pool name and identifier in which the LDEV belongs. Capacity Capacity of each LDEV. Provisioning Type Provisioning type of each volume.
Item Description Attribute Attribute of the volume indicating how the LDEV is being used. • Command Device: Command device. • Remote Command Device. • JNL VOL: Journal volume. • Pool VOL: Pool volume. The number in parentheses is the pool identifier. • TSE: TSE-VOL. • Hyphen (-): Volume in which the attribute is not defined. Journal ID Journal identifier when the attribute is JNL VOL. A hyphen indicates the attribute is other than JNL VOL.
Ports tab Item Description Port ID Identifiers of the ports that are already mounted. Attribute Attribute of the port indicating I/O flow. • Initiator: Issues I/O commands to a target port when I/O is executed between storage systems with Continuous Access Synchronous, and so on. • Target: Receives I/O commands from a host. • RCU Target: Receives I/O commands from an initiator when I/O is executed between storage systems with Continuous Access Synchronous, and so on.
Host Groups tab Item Description Port ID Port identifiers. Host Group Name Name and identifier of each host group that uses a port. Some undefined host groups may appear. If a host group is not defined, the host name is blank. Resource Group ID* Identifier of a resource group. Add Resources Opens the Add Resources window, where you can add one or more resources to a resource group.
Create Resource Groups wizard Create Resource Groups window Use this window to designate the parity groups, LDEVs, ports, and host groups, if any, that will make up a resource group.
Setting fields Item Description Resource Group Name* Type a unique name for this resource group. the following rules apply: • meta_resource cannot be set as a resource group name.
Item Description name are not allowed in one storage system. • Resource names are case-sensitive. • Usable characters are alphanumeric, spaces, and symbols (! # $ % & ' ( ) + - . = @ [ ] ^ _ ` { } ~) Select Parity Groups Opens the Select Parity Groups window, where you select one or more parity groups to be assigned to the resource group. Select LDEVs Opens the Select LDEVs window, where you select one or more LDEVs to be assigned to the resource group.
Selected Resource Groups table Item Description Resource Group Name (ID) Name and identifier of each resource group.
Item Description A hyphen indicates the ID number is not assigned before setting a resource group. Number of Parity Groups Number of parity groups to be assigned to the resource group. Number of LDEVs Number of LDEVs to be assigned to the resource group. Number of Ports Number of ports to be assigned to the resource group. Number of Host Groups Number of host groups to be assigned to the resource group.
Available Parity Groups table Item Description Parity Group ID Parity group identifiers. Capacity Capacity of each parity group. Number of LDEVs Number of LDEVs in each parity group. Add Adds one or more parity groups selected in the Available Parity Groups table to the Selected Parity Groups table. Remove Removes one or more selected parity groups from the Selected Parity Groups table and relocates the parity groups to the Available Parity Groups table.
Selected Parity Groups table 174 Item Description Parity Group ID Parity group identifiers. Capacity Capacity of each parity group. Number of LDEVs Number of LDEVs in each parity group.
Select LDEVs window Create Resource Groups wizard 175
Available LDEVs table Item Description LDEV ID LDEV identifiers. LDEV IDs may be appear for undefined LDEVs. A hyphen appearing in columns to the right of the LDEV ID and LDEV name (for example, Parity Group ID, Pool Name ID, Capacity, and so on) indicates the LDEV is undefined. 176 LDEV Name LDEV names. Parity Group ID Parity group identifier where the LDEV belongs. Pool Name (ID) Pool name and identifier where the LDEV belongs. Capacity Capacity of each LDEV.
Item Description Basic: Internal volume THP: V-VOLs of Thin Provisioning or Thin Provisioning Z External: External volume External MF: Migration volume Snapshot: Fast Snap volume Attribute Attribute of the volume indicating how the LDEV is used. Command Device: Command device Remote Command Device: Remote command device JNL VOL: Journal volume Pool VOL: Pool volume. The number in parentheses shows the pool ID.
Selected LDEVs table Item Description LDEV ID LDEV identifiers. Some undefined LDEV IDs may appear. A hyphen in the LDEV name indicates the LDEV is undefined. LDEV Name LDEV names. Parity Group ID Parity group identifier where the LDEV belongs. Pool Name (ID) Pool name and identifier where the LDEV belongs. Capacity Capacity of the LDEV. Provisioning Type Displays the type of each volume.
Item Description THP: V-VOLs of Thin Provisioning External: External volume External MF: Migration volume Snapshot: Fast Snap volume Attribute Attribute of the volume indicating how the LDEV is being used. • Command Device: Command device. • Remote Command Device. • JNL VOL: Journal volume. • Pool VOL: Pool volume. The number in parentheses is the pool identifier. • TSE: TSE-VOL. • Hyphen (-): Volume in which the attribute is not defined. Journal ID Journal identifier when the attribute is JNL VOL.
Available Ports table Item Description Port ID Port identifier. Attribute Attribute of the port indicating I/O flow. • Initiator: Issues I/O commands to a target port when I/O is executed between storage systems with Continuous Access Synchronous, and so on. • Target: Receives I/O commands from a host. • RCU Target: Receives I/O commands from an initiator when I/O is executed between storage systems with Continuous Access Synchronous, and so on.
Item Description • HTP: Use this port when the external volume is mapped to the local storage system. Specify this port to the external storage system. • FNP: Use this port when the external volume is mapped to the local storage system. Specify this port to the local storage system. Add Adds one or more ports selected in the Available Ports table to the Selected Ports table. Remove Removes one or more selected ports from the Selected Ports table and relocates the ports to the Available Ports table.
Selected Ports table Item Description Port ID Port identifier. Attribute Attribute of the port indicating I/O flow. • Initiator: Issues I/O commands to a target port when I/O is executed between storage systems with Continuous Access Synchronous, and so on.
Item Description • Target: Receives I/O commands from a host. • RCU Target: Receives I/O commands from an initiator when I/O is executed between storage systems with Continuous Access Synchronous, and so on. • External: Issues I/O commands to a target port of an external storage system with External Storage. • HTP: Use this port when the external volume is mapped to the local storage system. Specify this port to the external storage system.
Available Host Groups table Item Description Port ID Port identifiers. Host Group Name Name and identifier of each host group that uses a port. Some undefined host groups may appear. If a host group is not defined, the host name is blank.
Item Description Add Adds one or more host groups selected in the Available Host Groups table to the Selected Host Groups table. Remove Removes one or more selected host groups from the Selected Host Groups table and relocates the host groups to the Available Host Groups table.
Selected Host Groups table Item Description Port ID Port identifiers. Host Group Name Name and identifier of each host group that uses a port. Some undefined host groups may appear. If a host group is not defined, the host name is blank.
Create Resource Groups Confirm window Confirm proposed settings, name the task, and then click Apply. The task will be added to the execution queue. Item Description Resource Group Name (ID) Name and identifier of each resource group. Number of Parity Groups Number of parity groups to be assigned to the resource group. Number of LDEVs Number of LDEVs to be assigned to the resource group. Number of Ports Number of ports to be assigned to the resource group.
Edit Resource Group wizard Edit Resource Group window Item Description Resource Group Name Type the name of the resource group after editing. • meta_resource cannot be set as a name. • Duplicate occurrences of the same resource group name are not allowed in one storage system. • Names are case-sensitive. • Usable characters are alphanumeric, spaces, and symbols (! # $ % & ' ( ) + - . = @ [ ] ^ _ ` { } ~) Edit Resource Group Confirm window Confirm proposed settings, name the task, and then click Apply.
Selected Resource Group tab Item Description Resource Group Name (ID) Name and identifier of the edited resource group. Number of Parity Groups Number of parity groups that are assigned to the resource group. Number of LDEVs Number of LDEVs that are assigned to the resource group. Number of Ports Number of ports that are assigned to the resource group. Number of Host Groups Number of host groups that are assigned to the resource group.
Add Resources wizard Add Resources window Item Description Select Parity Groups Opens the Select Parity Group window, where you can select one or more parity groups to be added to the resource group. Select LDEVs Opens the Select LDEVs window, where you can select one or more LDEVs to be added to the resource group.
Item Description Select Ports Opens the Select Ports window, where you can select one or more ports to be added to the resource group. Select Host Groups Opens the Select Host group window, where you can select one or more host groups to be added to the resource group. Add Resources Confirm window Confirm proposed settings, name the task, and then click Apply. The task will be added to the execution queue.
Selected Resource Group table Item Description Resource Group Name (ID) Name and identifier of the resource group to be added to the storage system. Selected Parity Groups table Item Description Parity Group ID One or more parity group identifiers to be added to the resource group. Capacity Capacity of each parity group. Number of LDEVs Number of LDEVs in each parity group. Total Total number of selected parity groups.
Selected Ports table Item Description Port ID Port identifiers to be added to a resource group. Attribute Attribute of the port indicating I/O flow. • Initiator: Issues I/O commands to a target port when I/O is executed between storage systems with Continuous Access Synchronous, and so on. • Target: Receives I/O commands from a host. • RCU Target: Receives I/O commands from an initiator when I/O is executed between storage systems with Continuous Access Synchronous, and so on.
Remove Resources window Selected Resource Group table Item Description Resource Group Name (ID) Name and identifier of each resource group whose resources are deleted. Selected Parity Groups table (when deleting parity groups) Item Description Parity Group ID Identifier of each parity group to be deleted from the resource group. Capacity Capacity of each parity group. Number of LDEVs Number of LDEVs in the parity group. Total Total number of parity groups.
Item Description Some undefined LDEV IDs may appear. A hyphen in the LDEV name indicates the LDEV is undefined. LDEV Name LDEV names to be deleted from the resource group. Parity Group ID Parity group ID where the LDEV belongs. Pool Name (ID) Pool name where the LDEV belongs. Capacity Capacity of each LDEV. Provisioning Type Provisioning type of each volume.
Selected Host Groups table (when deleting Host Groups) Item Description Port ID Port IDs that are used by the host group. Host Group Name Name and ID of each host group name to be deleted from the resource group. Some undefined host group names may appear. If a host group is not defined, the host name is blank. Total Total number of selected host groups.
Resource Group Properties window Resource Group Properties table Item Description Resource Group Name (ID) Name and ID of a resource group name. Number of Parity Groups Number of parity groups that are assigned to the resource group. Number of LDEVs Number of LDEVs that are assigned to the resource group. Number of Ports Number of ports that are assigned to the resource group. Number of Host Groups Number of host groups that are assigned to the resource group.
Parity Groups table Item Description Parity Group ID Parity group IDs. Capacity Capacity of each parity group. Number of LDEVs Number of LDEVs in each parity group. Attribute Displays the attribute of the parity group. -: Parity group in which the attribute is not defined. Total Total number of selected parity groups. LDEVs table Item Description LDEV ID LDEV IDs. Some undefined LDEV IDs may appear. A hyphen in the LDEV name indicates the LDEV is undefined. LDEV Name LDEV names.
Item Description SSID: Virtual SSID. If Virtual SSID is not set to LDEV, this column is blank. Total Total number of selected volumes. Ports table Item Description Port Name Port IDs. Attribute Displays the attribute of each port. Initiator, Target, RCU Target, External, HTP, or FNP is displayed. Total Total number of selected ports. Host Groups table Item Description Port ID Port IDs that are used by the host group. Host Group Name Name and ID of each host group.
C Volume Retention GUI reference Sections in this appendix describe the Volume Retention windows, wizards, and dialog boxes. Volume Retention window Use Volume Retention to change attributes of volumes. Item Description LDKC Select a LDKC to be displayed in the tree. CU Group Select the CU group to be displayed in the tree. Tree Displays a CUs of the CU group that is selected from CU Group. When you click a CU, the table on the right displays details of the volumes that belong to the CU.
Item Description Apply Applies the requested Volume Retention settings to the storage system. Cancel Discards the requested Volume Retention settings without applying them to the storage system. The table of Volume Retention displays following items. Item Description LDEV Displays an LDEV ID. If an LDEV ID is displayed with a number sign (#), the volume is an external volume. The descriptions of icons follow: Indicates a volume that has the Read/Write attribute.
Item Description Note: When you click OK, the change to the VTOC size has not been applied to the storage system. To apply the requested change to the storage system, you must click Apply in the Volume Retention window. Cancel Closes the VTOC Area dialog box without saving the requested VTOC change. Error Detail Dialog Box If an error occurs with Volume Retention, the Error Detail dialog box appears. The Error Detail dialog box displays error locations and error messages.
D LDEV GUI reference Sections in this appendix describe the windows, wizards, and dialog boxes used in creating LDEVs. Parity Groups window Use this window to view information about parity groups. Only the parity groups assigned to the logged-on user are available. • “Summary” • “Parity Groups tab” Summary Item Description Capacity - Internal Capacity of all of the parity groups in the internal volume. • Free1: Free space capacity of the internal volume.
Parity Groups tab Item Description Parity Group ID Parity group identifier of the parity group in the storage system. LDEV Status Status of each LDEV in the parity group. Normal: Normal status. Blocked: Host cannot access a blocked volume. Warning: Problem occurs in the volume. Formatting: Volume is being formatted. Preparing Quick Format: Volume is being prepared for quick formatting. Quick Formatting: Volume is being quick-formatted. Correction Access: Access attribute is being corrected.
Item Description Block LDEVs* Opens the Block LDEVs window. Restore LDEVs* Opens the Restore LDEVs window. Export Opens a window where you can export configuration information listed in the table to a file that can be used for multiple purposes, such as backup or reporting. * Available when you click More Actions. Parity Groups tab: Internal or external volume Use this window to view information about the parity groups in the internal (or external) volume.
Parity Groups tab Item Description Parity Group ID The parity group identifiers of the parity groups in the storage system. LDEV Status The icons indicate the LDEV status. Normal: Normal status. Blocked: Host cannot access a blocked volume. Warning: Problem occurs in the volume. Formatting: Volume is being formatted. Preparing Quick Format: Volume is being prepared for quick formatting. Quick Formatting: Volume is being quick-formatted. Correction Access: Access attribute is being corrected.
Item Description Restore LDEVs* Opens the Restore LDEVs window. Export Opens a window where you can export configuration information listed in the table to a file that can be used for multiple purposes, such as backup or reporting. *Available when you click More Actions. LDEVs tab: Internal or external volumes Use this window to view information about the LDEVs assigned to parity groups in an internal or external volume. Only the parity groups assigned to the logged-on user are available.
Item Description Quick Formatting: Volume is being quick-formatted. Correction Access: Access attribute is being corrected. Copying: Data in the volume is being copied. Read Only: Data cannot be written on a read-only volume. Shredding: Volume is being shredded. Hyphen (-): Any status other than the above. RAID Level RAID level. An asterisk "*" indicates that the parity group to which the LDEV belongs is interleaved (concatenated). Capacity - Free Capacity of the free space.
Item Description Attribute Attribute of the volume indicating how the LDEV is being used. • Command Device: The volume is a command device. • Remote Command Device: The volume is a remote command device. • JNL VOL: The volume is a journal volume. • TSE: TSE-VOL • Hyphen (-): Volume in which the attribute is not defined Resource Group Name (ID) Resource group name and identifier of the LDEV. Virtual Storage Machine1 Information about the virtual storage machine.
Summary Item Description Number of LDEVs - Open Allocated Number of allocated LDEVs for open system. Number of LDEVs - Open Unallocated Number of unallocated LDEVs for open system. Number of LDEVs - Open Reserved Number of reserved LDEVs for the open system. Number of LDEVs - Open V-VOLs Number of allocated V-VOLs for the open system. Number of LDEVs - Mainframe Allocated Number of allocated LDEVs for the mainframe system.
Item Description View Migration Plans* Open the View Migration Plans window. For details, see the HP XP7 Auto LUN User Guide. View Histories* Open the View Histories window. For details, see the HP XP7 Auto LUN User Guide. *Available when you select Auto LUN. LDEVs tab Item Description LDEV ID LDEV identifier, which is the combination of LDKC, CU, and LDEV. LDEV Name LDEV name. Status LDEV status. Normal: Normal status. Blocked: Host cannot access a blocked volume.
Item Description Attribute Attribute of the volume indicating how the LDEV is being used. • Command Device: Volume is a command device. • Remote Command Device: Volume is a remote command device. • JNL VOL: Volume is a journal volume. • Pool VOL: Volume is a pool volume. The number in parentheses shows the pool identifier. • TSE: TSE-VOL • Hyphen (-): Volume other than the above. Access Attribute1 Displays the access attribute of the LDEV. Pool Name (ID) Pool name (pool identifier).
Item Description Expand V-VOLs2 Opens the Expand V-VOLs window. 2 Migrate Volumes Opens the Migrate Volumes window. For details, see XP7 Auto LUN User Guide. Force Delete Pairs (Cnt Ac-S Pairs)2 Opens the Force Delete Pairs (Cnt Ac-S Pairs) window. For details see XP7 Continuous Access Synchronous User Guide or XP7 Continuous Access Synchronous for Mainframe Systems User Guide. Force Delete Pairs (Cnt Ac-J Pairs)2 Opens the Force Delete Pairs (Cnt Ac-J Pairs) window.
LDEV GUI reference
Setting fields Item Description Provisioning Type Select the type of LDEV. Basic: Internal volume. Thin Provisioning: THP V-VOL. External: External volume.
Item Description Snapshot: Fast Snap volume. System Type Select the system of LDEV. Open: Volume for open system. Mainframe: Volume of mainframe system. Emulation Type Select the LDEV emulation. For open system, OPEN-V is default. For mainframe system, 3390 is default. Note: The emulation type might differ depending on the configuration. Smart Pool Select Enable or Disable of using Smart Tiers or Smart Tiers Z. Enable: The pool for Smart Tiers or Smart Tiers Z is displayed in the Select Pool window.
Item Description Input area: • Specify the LDEV capacity to create in a free space, a pool, or an external volume. Detailed calculation of the LDEV capacity differs depending on the specification of the unit. For details, see “Virtual LVI size calculations” (page 36). Number of LDEVs per Free Space, Number Specify the number of LDEVs to create in a free space, pool, or the external of LDEVs, or Number of LDEVs per External volume. Volume LDEV Name LDEV name.
Item Description New Page Assignment Tier Specify the new page assignment tier you want to assign to the LDEV. Middle is selected by default. You can select from the levels of High, Middle, and Low. See New “New page assignment tier” (page 96). You can specify this function when the Multi-Tier Pool is enabled. Relocation Priority Specify this option if the LDEV is to be relocated preferentially. You can select Default or Prioritize. You can specify this function when the Smart Pool is enabled.
Selected LDEVs table Item Description LDEV ID LDEV identifier, which is the combination of LDKC, CU, and LDEV. LDEV Name LDEV name, including the combination of prefix characters and the initial number. Parity Group ID Parity group identifier.
Item Description Pool Name (ID) Pool name and pool identifier. Drive Type/RPM Drive type and rpm in use on this LDEV. RAID Level RAID level. An asterisk "*" indicates that the parity group to which the LDEV belongs is interleaved (concatenated). Emulation Type Emulation type. Capacity LDEV capacity. Format Type Format type. SSID Storage system identifier in hexadecimal format. CLPR Cache logical partition number, displayed as ID:CLPR.
Selected LDEVs table Item Description LDEV ID LDEV identifier, which is the combination of LDKC, CU, and LDEV. LDEV Name LDEV name, including the combination of prefix characters and the initial number. Parity Group ID Parity group identifier. Drive Type/RPM Drive type and rpm in use on this LDEV. Pool Name (ID) Pool name (pool identifier). RAID Level RAID level. An asterisk "*" indicates that the parity group to which the LDEV belongs is interleaved (concatenated).
Item Description Enable: The LDEV for Smart Tiers or Smart Tiers Z is displayed. Disable: The LDEV for Thin Provisioning or Thin Provisioning Z is displayed. Tiering Policy Displaying the tiering policy name and ID for the LDEV. New Page Assignment Tier Displays the new page assignment tier for the LDEV. Relocation Priority Relocation priority assigned to the LDEV. Attribute Displays the attribute of the LDEV. TSE: TSE-VOL. -: Volume in which attribute is not defined.
Item Description LDEV Name Specify the LDEV name, using up to 32 characters. • Prefix: Fixed character string. • Initial Number: Initial number. Specify the prefix characters and the initial number according to these rules. • 1: Up to 9 numbers are added (1, 2, 3 ... 9) • 08: Up to 92 numbers are added (08, 09, 10 ...
Item Description • 23: Up to 77 numbers are added (23, 24, 25 ... 99) • 098: Up to 902 numbers are added (098, 099, 100 ... 999) Tiering Policy Specify the tiering policy for the LDEV. For details about the setting. You can specify this function only when the V-VOLs using Smart Tiers or Smart Tiers Z are available. See “Notes on tiering policy settings” (page 95) New Page Assignment Tier Specify the new page assignment tier you want to assign to the LDEV. Middle is set by default.
Item Description LDEV ID LDEV identifier, which is the combination of LDKC, CU, and LDEV. LDEV Name LDEV name, including the combination of prefix characters and the initial number. Parity Group ID Parity group identifier. Pool Name (ID) Pool name and pool identifier. Emulation Type Emulation type. Capacity LDEV capacity. Provisioning Type Type of LDEV. • Basic: Internal volume. • THP: THP V-VOL. • External: External volume. • Snapshot: Fast Snap volume. Tiering Policy Tiering policy.
Item Description New Page Assignment Tier Displays the new page assignment tier for the LDEV. A hyphen (-) is displayed for volumes other than Smart Tiers or Smart Tiers Z volumes. Tier Relocation Displays whether tier relocation is enabled or disabled. A hyphen (-) is displayed for volumes other than Smart Tiers or Smart Tiers Z volumes. Relocation Priority Displays the relocation priority assigned to the LDEV. A hyphen is displayed if LDEV is the one of following: • LDEV other than Smart Tiers.
Item Description LDEV Name Specify the LDEV name, using up to 32 characters. Prefix: Fixed character string. Initial Number: Initial number. Specify the prefix character and the initial number according to these rules. • 1: Up to 9 numbers are added (1, 2, 3 ... 9) • 08: Up to 92 numbers are added (08, 09, 10 ... 99) • 23: Up to 77 numbers are added (23, 24, 25 ... 99) • 098: Up to 902 numbers are added (098, 099, 100 ...
Item Description LDKC Specify the LDKC number. It is fixed to 00. CU Specify the CU number. DEV Specify the LDEV number. Interval Specify the interval of the assigned LDEV ID. View LDEV IDs Opens the View LDEV IDs window. MP Blade Select the MP blade you want to assign to the LDEV. Select any ID or Auto. Select an ID from MPB0 to MPB7. If automatic assignment is enabled for one or more MPs, you can also select Auto.
Item Description LDKC LDKC number. CU Control unit number. LDEV Boundary The range of LDEVs that can be allocated to the SSID. Each LDEV group (divided by LDEV boundary) has a unique SSID. SSID Storage system identifier in hexadecimal format. Select Free Spaces window Use this window to view information about available free space slots in the parity group. Only the free spaces in the parity groups assigned to the logged-on user are available.
Item Description Parity Group ID Parity group identifier. Free Space No. Sequence number for identifying free space in the parity group. RAID Level RAID level. An asterisk "*" indicates that the parity group to which the LDEV belongs is interleaved (concatenated). Capacity Capacity of free space. Base Emulation Type Emulation type of the parity group. Drive Type/ RPM Drive type and rpm in use on this LDEV. View Physical Location Opens the View Physical Location window.
Select Pool window Available Pools table Item Description Pool Name (ID) Displays the pool name and pool ID. RAID Level Displays the RAID level. Capacity Displays information about the pool capacity. • Total: Total capacity of pool. • Used: Used pool capacity. • Used (%): Pool usage rates for pool capacity. Used (%) displays the value which is truncated after the decimal point of the actual value. Drive Type/RPM Displays the data drive type and RPM.
Item Description Subscription (%) Displays information about subscription of the pool. • Current: Percentage of the total V-VOL capacity assigned to the pool and the V-VOL capacity to be created. • Limit: Percentage of the subscription limit of the pool. Detail Displays the Pool Properties window when selecting a row and clicking this button View LDEV IDs window Use this window to view available, used, and disabled LDEV IDs in matrix format.
Item Description Usage of selected emulation type Emulation type selected in the Create LDEVs window. See “Emulation groups and types” (page 234) for a list. LDEV IDs LDEV identifier, which is the combination of LDKC, CU, and LDEV. LDKC: Indicates the LDKC number. CU: Indicates the CU number.
Emulation groups and types The following table shows the emulation groups and emulation types for mainframe systems. Emulation group D-type (Overseas PCM) emulation type Group 1 3390-3, 3390-A, 3390-3A, 3390-3B, 3390-3C, 3390-9, 3390-9A, 3390-9B, 3390-9C, 3390-L, 3390-LA, 3390-LB, 3390-LC, 3390-M, 3390-MA, 3390-MB, 3390-MC, 3390-V The following table shows the emulation groups and emulation types for open systems.
Parity Group Property table Item Description Parity Group ID Parity group identifier. For an interleaved parity group, all parity groups that are contained in the interleaved parity group are shown. RAID Level RAID level. An asterisk "*" indicates that the parity group to which the LDEV belongs is interleaved (concatenated). Capacity (Free/Total) Free capacity and total capacity of the parity group.
Item Description LDKC LDKC number. CU Control unit number. LDEV Boundary The range of LDEVs that can be allocated to the SSID. Each LDEV group (divided by LDEV boundary) has a unique SSID. SSID Storage system identifier in hexadecimal format.
Item Description SSID Changeable Indicates whether the storage system identifier is can be changed. • Yes: The SSID can be changed. The SSID was assigned when creating LDEVs but has not yet been registered (unused). • No: The SSID can not be changed. The SSID has been registered (used) and cannot be changed. • Hyphen (-): The SSID is not assigned. Change SSIDs Select a row and click this button to open the Change SSID window. Change SSIDs window Use this window to change the SSID.
Item Description Initial SSID Specify the initial storage system identifier in hexadecimal format. The default is 0004 if none is specified. Format LDEVs wizard Use this window to format LDEVs. LDEVs must be formatted before you can use the storage space.
Format LDEVs window Item Description Format Type Select the type of formatting to be used on this LDEV. • Quick Format (default): Select this to perform quick-formatting. This option is available only for formatting an internal volume. • Write to Control Blocks: Select this when the provisioning type is for a mainframe external volume. The management area of external volumes for mainframe systems will be overwritten. This is the default option for an external volume.
Item Description LDEV ID LDEV identifier, which is the combination of LDKC, CU, and LDEV. LDEV Name LDEV name. Parity Group ID Parity group identifier. Pool Name (ID) Pool name and pool identifier. Emulation Type Emulation type. Capacity LDEV capacity. Provisioning Type Provisioning type to be assigned to the LDEV. • Basic: Internal volume. • THP: THP V-VOL. • External: External volume. • Snapshot: Fast Snap volume. Attribute Displays the attribute of the LDEV.
Restore LDEVs window Use this window to recover blocked LDEVs. Item Description LDEV ID LDEV identifier, which is the combination of LDKC, CU, and LDEV. LDEV Name LDEV name. Parity Group ID Parity group identifier. Pool Name (ID) Pool name and pool identifier. Emulation Type Emulation type. Capacity LDEV capacity. Provisioning Type Provisioning type assigned to the LDEV. • Basic: Internal volume. • THP: THP V-VOL. • External: External volume. • Snapshot: Thin Image volume.
Block LDEVs window Use this window to block specific LDEVs. The data on the LDEV cannot be accessed when the LDEV is blocked. Item Description LDEV ID LDEV identifier, which is the combination of LDKC, CU, and LDEV. LDEV Name LDEV name. Parity Group ID Parity group identifier. Pool Name (ID) Pool name and pool identifier. Emulation Type Emulation type. Capacity LDEV capacity. Provisioning Type Provisioning type assigned to the LDEV. • Basic: Internal volume. • THP: THP V-VOL.
Item Description LDEV ID LDEV identifier, which is the combination of LDKC, CU, and LDEV. LDEV Name LDEV name. Parity Group ID Parity group identifier. Pool Name (ID) Pool name and pool identifier. Emulation Type Emulation type. Capacity LDEV capacity. Provisioning Type Provisioning type assigned to the LDEV. • Basic: Internal volume. • THP: THP V-VOL. • External: External volume. • Snapshot: Fast Snap volume. Attribute Displays the attribute of the LDEV. Command Device: Command device.
LDEV Properties window Use this window to view properties assigned to a selected LDEV. • “LDEV Properties table” • “Basic tab” • “Replication Tab” LDEV Properties table Item Description LDEV ID LDEV identifier, which is the combination of LDKC, CU, and LDEV. LDEV Name Displays the LDEV name. Emulation Type Displays the emulation type.
Item Description Capacity Displays the LDEV capacity. Virtual Storage Machine Information about the virtual storage machine. Model / Serial Number: Model name and serial number of the virtual storage machine that has the LDEV. LDEV ID: Virtual LDEV ID. If a Virtual LDEV ID is not assigned to the LDEV, this column is blank. Device Name: Virtual device name, which is a combination of the virtual emulation type, virtual LUSE volume number, and the virtual CVS attribute.
Item Description Attribute Displays the attribute of the LDEV. Command Device: Command device. Remote Command Device: Remote command device. JNL VOL: Journal volume. Pool VOL: Pool volume. The number in parentheses shows the pool ID. TSE: TSE-VOL. Hyphen (-): Volume in which the attribute is not defined. Command Device Attribute Security: Displays the setting (Enable or Disable) of Command Device Security. User Authentication: Displays the setting (Enable or Disable) of user authentication.
Hosts table This table provides information about the host that can view LDEVs. This table is not available if the WWN is not registered in the host to which the path is set. Item Description HBA WWN WWN of the host that can view LDEVs. Host Name Host name. Replication Tab Information about the volume of the local replication pair is displayed in the Replication Properties, BC Pairs, FS Pairs, Cnt Ac-S Pairs, and Cnt Ac-J Pairs tables.
Item Description Status Displays the pair status. Secondary Volume- LDEV ID Displays LDEV ID of the secondary volume. Secondary Volume- LDEV Name Displays LDEV name of the secondary volume. Secondary Volume - Emulation Type Displays emulation type of the secondary volume. Secondary Volume - Capacity Displays capacity of the secondary volume. Secondary Volume - CLPR Displays CLPR ID of the secondary volume. Copy Pace Displays the pace of copying of the pair.
Item Description Cnt Ac-S Z: Continuous Access Synchronous Z pair Pair Position Displays whether the volume is a primary or secondary volume. Status Displays the pair status. Remote Storage System - Model / Serial Number Displays the model and serial number of the remote storage system. Remote Storage System - SSID Displays the SSID of the remote storage system. Remote Storage System - LDEV ID Displays LDEV ID of the remote storage system.
Components window Use this window to view information about the controller chassis components in the storage system. • “Summary” • “Components tab” Summary Item Description Number of Controller Chassis Number of controller chassis. Components tab Item Description Chassis ID Chassis identifier of the storage system. Chassis Type Chassis type.
• “Summary” • “MP Blades tab” Summary Item Description Number of MP Blades Number of MP blades assigned to this component. MP Blades tab Item Description MP Blade ID Identifier of the MP blade. MP Blade Name Name of the MP blade. Status Status of the MP blade. Normal: Available. Warning: The MP blade is partially blocked. Blocked: The MP blade is blocked. Failed: The MP blade is in abnormal status. Cluster Cluster number of the MP blade.
Item Description Disabled: The MP blade is not automatically assigned to resources. Edit MP Blades Opens the Edit MP Blades window. Export Opens a window where you can export configuration information listed in the table to a file that can be used for multiple purposes, such as backup or reporting. Edit MP Blades wizard Use this wizard to enable or disable the storage system to automatically assign the load of resources controlled by the selected MP blades.
Item Description MP Blade ID MP blade identifier. Cluster Cluster number of the MP blade. Auto Assignment Indicates whether automatic assignment of MP blades is in use. • Enabled: An MP blade is automatically assigned to resources (logical devices, external volumes, and journal volumes). • Disabled: An MP blade is not automatically assigned to resources. Assign MP Blade wizard Use this wizard to assign a MP blade that will control selected resources.
Item Description MP Blade Change the MP blade assigned to the LDEV. MP blade ID: The selected MP blade is assigned to the LDEV. Assign MP Blade Confirm window Confirm proposed settings, name the task, and then click Apply. The task will be added to the execution queue.
Selected LDEVs table Item Description LDEV ID LDEV identifier, which is the combination of LDKC, CU, and LDEV. LDEV Name LDEV name. Parity Group ID Parity group identifier. Pool Name (ID) Pool name and pool identifier. Emulation Type Emulation type. Capacity LDEV capacity. Provisioning Type Provisioning type to be assigned to the LDEV. • Basic: Internal volume. • THP: THP V-VOL. • External: External volume. • External MF: Migration volume. • Snapshot: Fast Snap volume.
Item Description Remote Command Device: Remote command device. JNL VOL: Journal volume. Pool VOL: Pool volume. The number in parentheses shows the pool ID. TSE: TSE-VOL. Hyphen (-): Volume in which the attribute is not defined. MP Blade ID MP blade identifier to be set. View Management Resource Usage window Management Resource Usage table Item Description Number of Cache Management Devices The current number and maximum allowed number of cache management devices in the storage system are displayed.
E Thin Provisioning Z and Smart Tiers Z GUI reference The Thin Provisioning Z and Smart Tiers Z windows, wizards, and dialog boxes are described in the following topics. Pools window • “Summary” • “???TITLE??? tab” Summary Item Description Pool Capacity1 Displays information about the pool capacity. • Used/Total THP: Displays the pool capacity (used/total) of Thin Provisioning and Smart Tiers. Mainframe THP: Displays the pool capacity (used/total) of Thin Provisioning Z and Smart Tiers Z.
Item Description FS: Displays the remaining physical pool capacity that is configurable for Fast Snap. V-VOL Capacity1 Displays information about the THP V-VOL capacity. • Allocated/Total THP: In the Allocated field, total capacity of the Thin Provisioning and Smart Tiers THP V-VOLs to which LU paths are allocated is displayed. In the Total field, total capacity of the Thin Provisioning and Smart Tiers THP V-VOLs is displayed.
Item Description Status Displays information about the pool status. Normal: Pool is in a normal status. Warning: Pool-VOL in the pool is blocked, or the pool is being shrunk. Exceeded Threshold: Used capacity of the pool exceeds the pool threshold. Shrinking: Pool-VOL is being reduced. Blocked: Pool is full, or an error occurred in the pool, indicating that the pool is blocked. If the pool is in both Warning and Blocked status, only Blocked is displayed.
Item Description Drive Type/RPM Displays the data drive type and RPM of the pool. If multiple drive types or RPMs exist in a pool, this field indicates that drive types or RPMs are mixed. When the volume is the external volume, Drive Type displays External Storage and the value of the external LDEV tier rank. Tier Management Displays whether Smart Tiers or Smart Tiers Z is enabled or disabled. If it is enabled Auto or Manual is displayed. If it is disabled, a hyphen (-) is displayed.
Item Description Expand Pool Displays the Expand Pool window. 2 Delete Pools Displays the Delete Pools window. Restore Pools2 Displays the Restore Pools window. Edit Pools2 Displays the Edit Pools window. Monitor Pools2 Displays the Monitor Pools window. Stop Monitoring Pools2 Displays the Stop Monitoring Pools window. 2 Start Tier Relocation Displays the Start Tier Relocation window. Stop Tier Relocation2 Displays the Stop Tier Relocation window.
Pools: Volume tabs • “Summary” • “Pool Volumes tab” • “Virtual Volumes tab” Summary Item Description Status Displays information about the pool status. Normal: Pool is in a normal status. Warning: Pool-VOL in the pool is blocked, or the pool is being shrunk. Exceeded Threshold: Used capacity of the pool exceeds the pool threshold. Shrinking: Pool-VOL is being reduced. Blocked: The pool is full, or an error occurred in the pool, indicating that the pool is blocked.
Item Description For a Smart Tiers pool, Smart is displayed. For a Thin Provisioning Z pool, Mainframe THP is displayed. For a Smart Tiers Z pool, Mainframe Smart is displayed. For a Fast Snap pool, FS is displayed. RAID Level Displays RAID level. If multiple RAID levels exist in a pool, this field indicates that RAID levels are mixed. If all pool-VOLs are external volumes, a hyphen (-) is displayed. Drive Type/RPM Displays the data drive type and RPM of the pool.
Item Description Recent Monitor Data Displays the latest monitoring data. • If the monitoring data exists, the monitoring period of time is displayed. Example: 2010/11/15 00:00 - 2010/11/15 23:59 • If the monitoring data is being obtained, only the starting time is displayed. Example: 2010/11/15 00:00 • If the latest monitoring data does not exist, a hyphen (-) is displayed. Pool Management Task Displays the pool management task being performed to the pool.
Item Description LDEV ID LDEV identifier, which is the combination of LDKC, CU, and LDEV. LDEV Name Displays the LDEV name. Status Displays the following information about the pool-VOL status. Normal: Pool-VOL is in the normal status. Shrinking: Pool-VOL is being reduced. Blocked: Pool-VOL is blocked. Parity Group ID Displays the parity group ID. Usable Capacity Displays available capacity of page boundaries in a pool-VOL by the specified unit.
Item Description External: External volume. Shrinkable Displays whether the pool-VOL can be removed while the pool is being shrunk, a hyphen (-) is displayed. Resource Group Name (ID) Displays the resource group names and IDs of the LDEV. The ID is provided in parentheses. Expand Pool Displays the Expand Pool window. Shrink Pool Displays the Shrink Pool window. Stop Shrinking Pools Displays the Stop Shrinking Pools window.
Item Description Blocked: Host cannot access a blocked volume. Warning: Problem occurs in the volume. Formatting: Volume is being formatted. Preparing Quick Format: Volume is being prepared for quick formatting. Quick Formatting: Volume is being quick-formatted. Correction Access: Access attribute is being corrected. Copying: Data in the volume is being copied. Read Only: Data cannot be written to a read-only volume. Shredding: Volume is being shredded. Hyphen (-): Any status other than the above.
Item Description Hyphen (-): V-VOL is not the Smart Tiers Z V-VOL. Tier Relocation Displays whether tier relocation is set to enabled or disabled. If the Smart Tiers or Smart Tiers Z V-VOL is not used, a hyphen (-) is displayed. Relocation Priority Displays the relocation priority. Prioritized: The priority is set to V-VOL. Blank: The priority is not set to V-VOL. Hyphen (-): V-VOL is not the Smart Tiers or Smart Tiers Z V-VOL or the tier relocation function is disabled.
Item Description Shred LDEVs2 Displays the Shred LDEVs window. 2 Block LDEVs Displays the Block LDEVs window. Restore LDEVs2 Displays the Restore LDEVs window. Edit LDEVs2 Displays the Edit LDEVs window. Reclaim Zero Pages2 Displays the Reclaim Zero Pages window. Stop Reclaiming Zero Pages2 Displays the Stop Reclaiming Zero Pages window. View Tier Properties2 Displays the View Tier Properties window. This window can open only for a pool for which Smart Tiers Z is enabled.
When selecting pool-VOL manually 270 Thin Provisioning Z and Smart Tiers Z GUI reference
When selecting pool-VOL automatically Create Pools wizard 271
Setting fields Item Description *Pool Type Select the pool type. For Fast Snap, select Fast Snap. For following program products, select Thin Provisioning.
Item Description • Thin Provisioning Z • Smart Tiers Z *System Type Select the system type. If you select Fast Snap, only Open is displayed. *Multi-Tier Pool If Smart Tiers or Smart Tiers Z is enabled, Auto or Manual for performance monitoring and tier relocation is displayed. If Smart Tiers or Smart Tiers Z is disabled, a hyphen (-) is displayed. *Pool Volume Selection Select the mode of the pool-VOL setting from Auto or Manual. *Drive Type/RPM Select the data drive type and RPM of the pool-VOL.
Item Description If you specify the pool ID which is used already, the minimum pool ID after that the specified pool ID is automatically set. Subscription Limit Set the subscription limit of the pool from 0 to 65534 (%). If this is blank, the subscription is set to unlimited. When creating a Fast Snap pool, this setting is not necessary. Warning Threshold Set the threshold between 1 and 100%. The default value is 70%. For Fast Snap: Set the threshold between 20% and 95%. The default value is 80%.
CAUTION: When you create the Thin Provisioning or Thin Provisioning Z pool, if you specify Mixable for RAID level to display the Select Pool VOLs window, external volumes with the cache mode set to disabled are not displayed in the Available Pool Volumes table because they cannot coexist with volumes of the other RAID levels: When you select these volumes in the Select Pool VOLs window, specify a hyphen (-) for RAID level.
Selected Pools table Item Description Pool Name (ID) Displays the pool name and pool ID. RAID Level Displays RAID level of the pool. If multiple RAID levels exist in a pool, this field indicates that RAID levels are mixed. If all pool-VOLs are external volumes, a hyphen (-) is displayed.
Item Description Capacity Displays the total capacity of the created pool in the specified unit. For open systems, the displayed capacity is approximately 4.1 GB (capacity of the management area) less than the total capacity of the selected pool-VOLs. For mainframe systems, the displayed capacity is approximately 3.7 GB (capacity of the management area) less than the total capacity of the selected pool-VOLs. Pool Type Displays the pool type. For a Thin Provisioning pool, THP is displayed.
Item Description Tier 1: If you make the Smart Tiers or Smart Tiers Z function available, the buffer space for tier relocation to tier 1 is displayed. If you make the Smart Tiers or Smart Tiers Z function unavailable, a hyphen (-) is displayed. Tier 2: If you make the Smart Tiers or Smart Tiers Z function available, and tier 2 exists, the buffer space for tier relocation to tier 2 is displayed.
Item Description Pool Name (ID) Displays the pool name and pool ID. RAID Level Displays the RAID level. If multiple RAID levels exist in a pool, this field indicates that RAID levels are mixed. If all pool-VOLs are external volumes, a hyphen (-) is displayed. Capacity Displays the pool capacity. Pool Type Displays the pool type. For a Thin Provisioning pool, THP is displayed. For a Smart Tiers pool, Smart is displayed. For a Thin Provisioning Z pool, Mainframe THP is displayed.
Item Description Subscription Limit (%) Displays the subscription limit. For Fast Snap pool, a hyphen (-) is displayed. Number of Pool VOLs Displays the number of pool-VOLs. Tier Management If Smart Tiers or Smart Tiers Z is enabled, Auto or Manual for performance monitoring and tier relocation is displayed. If Smart Tiers or Smart Tiers Z is disabled, a hyphen (-) is displayed. Cycle Time Displays the cycle of performance monitoring and tier relocation.
Item Description Drive Type/RPM The Drive Type/RPM of the selected pool or Mixable is displayed. When the volume is the external volume, Drive Type displays External Storage. RAID Level Set the RAID level of the selected pool. If the level is not set, Mixable appears. If External Storage is selected in the Drive Type/RPM field, a hyphen (-) is displayed. Select Pool VOLs Opens the Select Pool VOLs window. Total Selected Pool Volumes Total number of the pool-VOLs selected for this pool.
Selected Pool table Item Description Pool Name (ID) Displays the pool name and pool ID.
Selected Pool Volumes table Item Description LDEV ID Displays LDEV identifier, which is the combination of LDKC, CU, and LDEV. LDEV Name Displays the LDEV name. Capacity Displays the pool-VOL capacity. Parity Group ID Displays the parity group ID. RAID Level Displays RAID level. If a pool-VOL is an external volume, a hyphen (-) is displayed. Drive Type/RPM Displays the data drive type and RPM.
Item Description Smart Pool Select the check box, then Enable or Disable when using or not using Smart Tiers or Smart Tiers Z. A pool that consists of the external volumes to which the cache mode is set to Disable cannot be changed from Disable to Enable. In Fast Snap, you cannot change the setting of this function.
Item Description If TSE-VOL is assigned to the selected pool, the pool cannot be changed from Disable to Enable. Options for Smart Pool Specifies the performance monitoring, tier relocation, edit buffer space for new page assignment, and buffer space for tier relocation if Smart Pool is set to Enable. In Fast Snap, you cannot change the setting of this function. Select the Tier Management check box, and then set the tier management, the cycle time, and the monitoring period.
Item Description • For the mainframe system, when the current subscription setting is unlimited and the value calculated by the following formula exceeds 65534, you cannot configure the subscription limit. ((Total V-VOL capacity / pool capacity) * 100) • If the check box is not selected, the subscription limit is disabled. Pool Name Select the Pool Name check box, and then enter the pool name. • Prefix: Enter the alphanumeric characters, which are fixed characters of the head of the pool name.
Item Description Pool Name (ID) Displays the pool name and pool ID. RAID Level Displays the RAID level. If multiple RAID levels exist in a pool, this field indicates that RAID levels are mixed. If all pool-VOLs are external volumes, a hyphen (-) is displayed. Capacity Displays the pool capacity. Pool Type Displays the pool type.
Item Description For a Thin Provisioning pool, THP is displayed. For a Smart Tiers pool, Smart is displayed. For a Thin Provisioning Z pool, Mainframe THP is displayed. For a Smart Tiers Z pool, Mainframe Smart is displayed. For a Fast Snap pool, FS is displayed. Drive Type/RPM Displays the data drive type and RPMs. If multiple drive types or RPMs exist in a pool, this field indicates Mixed.
Item Description Tier 3: If you make the Smart Tiers or Smart Tiers Z function available, and tier 3 exists, the buffer space for tier relocation to tier 3 is displayed. If you make the Smart Tiers or Smart Tiers Z function unavailable, or tier 3 does not exist, a hyphen (-) is displayed. Delete Pools wizard Delete Pools window Item Description Pool Name (ID) Displays the pool name and pool ID. RAID Level Displays the RAID level.
Item Description User-Defined Threshold (%) Displays the pool threshold. • Warning: Warning threshold is displayed. • Depletion: Depletion threshold is displayed. For a Fast Snap pool, a hyphen (-) is displayed for Depletion. Number of Pool VOLs Displays the number of pool-VOLs. Detail Displays the Pool Properties window when a row is selected, and shows the error window when a row is not selected or multiple rows are selected.
Item Description Pool Name (ID) Displays the pool name and pool ID. RAID Level Displays the RAID level. If multiple RAID levels exist in a pool, this field indicates that RAID levels are mixed. If all pool-VOLs are external volumes, a hyphen (-) is displayed. Capacity Displays the pool capacity. Pool Type Displays the pool type. For a Thin Provisioning pool, THP is displayed. For a Smart Tiers pool, Smart is displayed. For a Thin Provisioning Z pool, Mainframe THP is displayed.
Item Description Number of Pool VOLs Displays the number of pool-VOLs. Detail Displays the Pool Properties window when a row is selected, and shows the error window when a row is not selected or multiple rows are selected. NOTE: Information in this topic assumes that only a single task is executed. If multiple tasks are executed, this window displays all configuration items. To check information of a configuration item, click Back to return to each configuration window, and then click Help.
Item Description LDEV ID LDEV identifier, which is the combination of LDKC, CU, and LDEV. LDEV Name Displays the LDEV name. Pool Name (ID) Displays the pool name and pool ID. Emulation Type Displays the emulation type. Capacity Displays the capacity of the LDEV. • Current: Displays the capacity before expanding the volume. • Assigned: Displays the capacity that is derived by the current value subtracted from the final value.
Restore Pools window Item Description Pool Name (ID) Displays the pool name and pool ID. RAID Level Displays the RAID level. If multiple RAID levels exist in a pool, this field indicates that RAID levels are mixed. If all pool-VOLs are external volumes, a hyphen (-) is displayed. Capacity Displays the pool capacity. If the pool is blocked and pool-VOLs that belong to the pool cannot be identified, 0 is displayed. Pool Type Displays the pool type. For a Thin Provisioning pool, THP is displayed.
Item Description User-Defined Threshold (%) Displays the pool threshold. • Warning: Warning threshold is displayed. • Depletion: Depletion threshold is displayed. For a Fast Snap pool, a hyphen (-) is displayed for Depletion. Number of Pool VOLs Displays the number of pool-VOLs. If the pool is blocked and pool-VOLs that belong to the pool cannot be identified, 0 is displayed.
Shrink Pool window 296 Thin Provisioning Z and Smart Tiers Z GUI reference
Prediction Result of Shrinking table Item Description Pool Name (ID) Displays the pool name and pool ID. User-Defined Threshold (%) Displays the pool threshold. • Warning: Warning threshold is displayed. • Depletion: Depletion threshold is displayed. For a Fast Snap pool, a hyphen (-) is displayed for Depletion. Capacity(Used/Total) Displays the capacity before and after shrinking. • Before Shrinking: Displays the used capacity, total capacity before shrinking and the usage rates.
Stop Shrinking Pools window Item Description Pool Name (ID) Displays the pool name and pool ID. RAID Level Displays the RAID level. If multiple RAID levels exist in a pool, this field indicates that RAID levels are mixed. If all pool-VOLs are external volumes, a hyphen (-) is displayed.
Item Description Capacity Displays the pool capacity. Pool Type Displays the pool type. For a Thin Provisioning pool, THP is displayed. For a Smart Tiers pool, Smart is displayed. For a Thin Provisioning Z pool, Mainframe THP is displayed. For a Smart Tiers Z pool, Mainframe Smart is displayed. Drive Type/RPM Displays the data drive type and RPM. If multiple drive types or RPMs exist in a pool, this field indicates that drive types or RPMs are mixed.
Complete SIMs window Item Description Task Name Confirm the settings, type a unique task name or accept the default, and then click Apply. A task name is case-sensitive and can be up to 32 ASCII letters, numbers, and symbols. The default is -.
Select Pool VOLs window Use this window to add pool-VOLs to a pool. Up to 1024 volumes can be added including the volumes already in the pool. Only the LDEVs assigned to the logged-on user are available. • Up to three different drive types of pool-VOLs can be registered in the same pool.
Available Pool Volumes table 302 Thin Provisioning Z and Smart Tiers Z GUI reference
Only the LDEVs assigned to the user are displayed. Item Description LDEV ID Displays the LDEV identifier, which is the combination of LDKC, CU, and LDEV. LDEV Name Displays the LDEV name. Capacity Displays the pool-VOL capacity. Parity Group ID Displays the parity group ID. RAID Level Displays the RAID level. If an LDEV is an external volume, a hyphen (-) is displayed. Drive Type/RPM Displays the data drive type and RPM.
Selected Pool Volumes table Item Description LDEV ID Displays the LDEV identifier, which is the combination of LDKC, CU, and LDEV. LDEV Name Displays the LDEV name. Capacity Displays the pool-VOL capacity. Parity Group ID Displays the parity group ID. RAID Level Displays the RAID level. If an LDEV is an external volume, a hyphen (-) is displayed. Drive Type/RPM Displays the data drive type and RPM. When the volume is the external volume, Drive Type displays External Storage.
Reclaim Zero Pages window Item Description LDEV ID Displays the LDEV identifier, which is the combination of LDKC, CU, and LDEV. LDEV Name Displays the LDEV name. Pool Name (ID) Displays the pool name and pool ID. Emulation Type Displays the emulation type. Capacity Displays the capacity. Provisioning Type Displays the LDEV type. In this case, THP is displayed. Attribute Displays the attribute of the LDEV. Command Device: Command device.
Item Description Provisioning Type Displays the LDEV type. In this case, THP is displayed. Attribute Displays the attribute of the LDEV. Command Device: Command device. Hyphen (-): Volume in which the attribute is not defined. Pool Property window Use this window to view and change pool properties. Only the LDEVS assigned to the logged-on user are available.
Pool Properties table Item Description Pool Name (ID) Displays the pool name and pool ID. Pool Type Displays the pool type. For a Thin Provisioning pool, THP is displayed. For a Smart Tiers pool, Smart is displayed. For a Thin Provisioning Z pool, Mainframe THP is displayed. For a Smart Tiers Z pool, Mainframe Smart is displayed. For a Fast Snap pool, FS is displayed. Capacity Displays the pool capacity in the specified unit.
View Tier Properties window This window shows tier properties and a performance graph: • “For pools” • “For V-VOLs” When the pool name (pool ID) appears in the graph banner, you are looking a pool information. When the LDEV name (LDEV ID) appears in the graph banner, you are looking at V-VOL information. For pools The following tables list the View Tier Properties information.
Tier Properties table Item Description Pool Name(ID) Displays the pool name and ID. Tier name Displays the tier names: Tier1, Tier2, Tier3, and Total. Each column displays information about the tier. Drive Type/RPM Displays the data drive type and RPM of tier. If multiple types exist in a tier, Mixed is displayed. For an external volume, Drive Type displays External Storage with the value of the external LDEV tier rank. Buffer Space Displays the following buffer spaces.
Item Description appears. The vertical scale indicates the average number of I/Os on an hourly basis. The number of I/Os is a weighted, averaged with the monitoring data from the past cycle weighted against the monitoring data from the current cycle. The horizontal scale indicates the capacity. If there is no monitor data, this item does not appear. Policy If Tiering Policy and the period mode of the monitoring mode are specified, this item appears.
The following table describes these items. Item Description Capacities The capacity (GB) of the area from the dot of the maximum value on the vertical scale to a specified dot. The capacity of the dot on the vertical scale is 0.00 GB. Average I/Os All I/Os are sorted into 127 sections. The average I/O is the representative I/O number assigned to each section, based on the definition of the storage system. By the total number of I/Os, the number of dots may be 127 or less.
Recent Tier Utilization (monitoring period) table Item Description Header area If a error occurs, a message appears. Tier name Displays the tier names: Tier1, Tier2, Tier3, and Total. Each column displays information about the tier. Average Number of I/O (per Hour) Displays the average number of I/Os on an hourly basis.* * This field is updated when performance monitoring information is collected, asynchronously with Used Capacity (Used %).
A maximum of 127 dots is shown in the graph. The following information appears over a dot in the graph depending on where the cursor is placed. • Capacities, average I/Os, and total I/Os appear if the cursor is placed on the dot of the Tier1, Tier2, Tier3, Volume or the Volume(Weighted average). • The lower value of the average I/Os appears if the cursor is placed on the dot of the Tier1 Range or the Tier2 Range. The following table describes these items.
Monitor Pools window Selected Pools table Item Description Pool Name (ID) Displays the pool name and pool ID. Number of Pool VOLs Displays the number of pool-VOLs in the selected pool. Capacity Displays the information about the pool capacity. • Total: Total capacity of pool. Using Option, you can select unit of capacity. ◦ One block equals 512 bytes and one page equals 42 megabytes in a pool capacity of Thin Provisioning, Smart Tiers, or Fast Snap.
Item Description For the pool of Thin Provisioning, Smart Tiers, and Fast Snap, a hyphen (-) is displayed if the unit of capacity is changed into Cylinder. Recent Monitor Data Displays the period of monitoring time as follows: Starting-time-Ending-time If the monitoring data is being obtained, only the starting time is displayed. If the latest monitoring data does not exist, a hyphen (-) is displayed.
Item Description For the pool of Thin Provisioning, Smart Tiers, and Fast Snap, a hyphen (-) is displayed if the unit of capacity is changed into Cylinder. Recent Monitor Data Displays the period of monitoring time as follows: Starting-time-Ending-time If the monitoring data is being obtained, only the starting time is displayed. If the latest monitoring data does not exist, a hyphen (-) is displayed.
Item Description For the pool of Thin Provisioning, Smart Tiers, and Fast Snap, a hyphen (-) is displayed if the unit of capacity is changed into Cylinder. Recent Monitor Data Displays the period of monitoring time as follows: Starting-time-Ending-time If the monitoring data is being obtained, only the starting time is displayed. If the latest monitoring data does not exist, a hyphen (-) is displayed.
Item Description Capacity Displays the information about the pool capacity. • Total: Total capacity of pool. Using Option, you can select unit of capacity. ◦ One block equals 512 bytes and one page equals 42 megabytes in a pool capacity of Thin Provisioning, Smart Tiers, or Fast Snap. ◦ One block equals 512 bytes and one page equals 38 megabytes in a pool capacity of Thin Provisioning Z or Smart Tiers Z. • Used: Used pool capacity. • Used (%): Pool usage rates to pool capacity.
View Pool Management Status window Pool Management Status table Item Description Pool Name (ID) Displays the pool name and pool ID. Pool Type Displays the pool type. For a Thin Provisioning pool, THP is displayed. For a Smart Tiers pool, Smart is displayed. For a Thin Provisioning Z pool, Mainframe THP is displayed. For a Smart Tiers Z pool, Mainframe Smart is displayed. For a Fast Snap pool, FS is displayed.
Item Description If you select a Thin Provisioning, Smart Tiers, Thin Provisioning Z, or a Smart Tiers Z pool, this item appears. Number of Primary VOLs Displays the number of primary volumes of Fast Snap pairs that are associated with the pool. If you select a Fast Snap pool, this item appears. Number of Pool VOLs Displays the number of pool-VOLs set for the pool, and the maximum number of pool-VOLs that can be set for the pool.
Item Description Capacity - Used/Total Displays the used and total pool capacity. If the pool consists of multiple pool-VOLs, the sum of its capacities is displayed in the Total field. Capacity - Free Displays the free and formatted pool capacity. If the pool consists of multiple pool-VOLs, the sum of its capacities is displayed in the Total field. Virtual Volume table If you select a Thin Provisioning, Smart Tiers, Thin Provisioning Z, or a Smart Tiers Z pool, this table is displayed.
Item Description -: V-VOL is not the V-VOL of Smart Tiers or Smart Tiers Z V-VOL. New Page Assignment Tier Displays the new page assigned tier. High: High is set to V-VOL. Middle: Middle is set to V-VOL. Low: Low is set to V-VOL. Hyphen (-): V-VOL is not the Smart Tiers or Smart Tiers Z V-VOL. Tier Relocation Displays whether tier relocation is set to enable or disable. If the Smart Tiers or Smart Tiers Z V-VOL is not used, a hyphen (-) is displayed.
Edit External LDEV Tier Rank wizard Edit External LDEV Tier Rank window Edit External LDEV Tier Rank wizard 323
Selected Pool Volumes table Item Description LDEV ID Displays the combination of the LDKC, CU, and LDEV. LDEV Name Displays the LDEV name. Parity Group ID Displays the parity group ID. Emulation Type Displays the emulation type. Usable Capacity Displays available capacity of page boundaries in a pool-VOL by the specified unit. For the pool-VOL with system area, the displayed capacity does not include the capacity of the management area.
Edit External LDEV Tier Rank Confirm window Selected Pool table Item Description Pool Name (ID) Displays the pool name and pool ID.
Selected Pool Volumes table Item Description LDEV ID Displays the combination of the LDKC, CU, and LDEV. LDEV Name Displays the LDEV name. Parity Group ID Displays the parity group ID. Emulation Type Displays the emulation type. Usable Capacity Displays available capacity of page boundaries in a pool-VOL by the specified unit. For the pool-VOL with system area, the displayed capacity does not include the capacity of the management area.
Edit Tiering Policies wizard Edit Tiering Policies window Edit Tiering Policies wizard 327
Tiering Policies table Item Description ID Displays the ID of the tiering policy. Tiering Policy Displays the name of the tiering policy. Tier1 Max(%) Displays the maximum percentage that is allocated to tier 1 in the total capacity to which tier relocation is performed. For a policy with an ID from 0 to 5, a hyphen (-) is displayed. Tier1 Min(%) Displays the minimum percentage that is allocated to tier 1 in the total capacity to which tier relocation is performed.
Edit Tiering Policies Confirm window Tiering Policies table Item Description ID Displays the ID of the tiering policy. Tiering Policy Displays the name of the tiering policy.
Item Description Tier1 Max(%) Displays the maximum percentage that is allocated to tier 1 in the total capacity to which tier relocation is performed. For a policy with an ID from 0 to 5, a hyphen (-) is displayed. Tier1 Min(%) Displays the minimum percentage that is allocated to tier 1 in the total capacity to which tier relocation is performed. For a policy whose ID is from 0 to 5, a hyphen (-) is displayed.
Change Tiering Policy table Item Description Tiering Policy Displays the tiering policy name and policy ID. Tier1 Max(%) Select the maximum percentage that is allocated to tier 1 in the total capacity for the tier relocation from 0 (%) to 100 (%). The setting value is needed to satisfy either one of following conditions: Equal to Tier1 Min Bigger than Tier1 Min Tier1 Min(%) Select the minimum percentage that is allocated to tier 1 in the total capacity for the tier relocation from 0 (%) to 100 (%).
Change Pool Configuration Pattern Window For Thin Provisioning or Thin Provisioning Z pools When you create a Thin Provisioning or Thin Provisioning Z pool, the following table is displayed. Pool Configuration Patterns table Item Description Priority Displays the priority of the pool configuration. Selected Displays whether the pool configuration is selected or not. Total Capacit Displays the total capacity of the pool. Drive Type/RPM Displays the data drive type and RPM of the pool.
For Smart Tiers or Smart Tiers Z pools When you create a Smart Tiers or Smart Tiers Z pool, the following table is displayed. Pool Configuration Patterns table Item Description Priority Displays the priority of the pool configuration. Selected Displays whether the pool configuration is selected or not. Total Capacity Displays the total capacity of the pool Tier 1 Displays the tier 1 information. Drive Type/RPM: Displays the data drive type and RPM of pool-VOLs.
Item Description RAID Level: Displays the RAID level of pool-VOLs. Rate (%): Displays the percentage of the tier 3 against the total capacity of the pool. Select If the pool configuration is changed, select a row in the Pool Configuration Patterns table. Then click this button. The selected pool configuration is reflected to the pool setting.
Glossary allocation The ratio of allocated storage capacity versus total capacity as a percentage. Allocated storage refers to those logical devices (LDEVs) that have paths assigned to them. Allocated storage capacity is the sum of the storage of these LDEVs. Total capacity is the sum of the capacity of all LDEVs on the disk array. BC P9000 or XP Business Copy. An HP application that provides volume-level, point-in-time copies in the disk array.
to be associated with 1 to 36 LDEVs. Essentially, LUSE makes it possible for applications to access a single large pool of storage. M-VOL Main volume. MCU Main control unit. OPEN-x A general term describing any of the supported OPEN emulation modes (for example, OPEN-E). There are two types of OPEN-x devices: legacy OPEN-x devices with a fixed size (such as OPEN-3, OPEN-8, OPEN-9, and OPEN-E), and OPEN-V, which has a variable size and is a CVS-based volume.
Index removing from registering task, 44 restoring if blocked, 45 A Auto LUN, 63 B basic provisioning overview, 10 workflow, 11 boundary values for RAID levels, 39 C capacity of a slot, 39 Changing External LDEV Capacity, 140 contacting HP, 156 Continuous Access Journal, 61 conventions document, 157 storage capacity values, 157 text symbols, 158 Create LDEV function, 39 custom-sized provisioning overview, 11 D document conventions, 157 related information, 156 documentation HP website, 156 providing fee
removing resources from, 26 resource lock, 23 rules, restrictions, and guidelines, 24 strategies, 15 system configuration, 20 user groups, 23 resource lock, 23 S shared memory requirements for provisioning, 17 SIM reference codes listed, 131 SIMs completing automatically, 132 completing manually, 132 overview, 131 slot capacity, 39 SSID confirming, 43 editing, 43 requirements, 36 storage capacity values conventions, 157 subscription limit of a pool changing, 130 subscription service, HP, 156 symbols in tex