
Hitachi Dynamic Link Manager Software Users Guide for Solaris
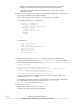


4. Execute the ldm rm-vdisk command to remove virtual disks from the
guest domain.
For example, to remove virtual disks vdisk1 and vdisk2 from the guest
domain ldg2, execute the command as follows:
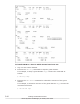
# ldm rm-vdisk vdisk1 ldg2
# ldm rm-vdisk vdisk2 ldg2
5. Execute the ldm rm-vdsdev command to stop exporting virtual disk
backends from the service domain on the I/O domain to which HDLM will
be installed.
For example, to stop exporting virtual disk backends vol1 and vol2 from
the service domain ldg1, execute the command as follows:
# ldm rm-vdsdev vol1@ldg1-vds0
# ldm rm-vdsdev vol2@ldg1-vds0
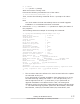
6. Log in to the I/O domain.
7. Install HDLM in the I/O domain.
Use the virtual disk backends exported before installing HDLM to perform
the following operations:
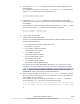
¢
For a physical disk and physical disk slice
No action is required.
¢
For a UFS or VxFS file system
Unmount the file system.
¢
For a ZFS file system
Export the ZFS file system.
¢
For a VxVM logical volume
Deport the disk group.
¢
For an SVM logical volume
Cancel the volume group setting.
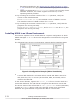
For details on the HDLM installation procedure, see
Performing a New
Installation of HDLM (When Solaris Cluster Is Not Being Used) on page
3-55 or Performing an Upgrade Installation or Re-installation of HDLM on
page 3-73 After installing HDLM, restore the volume group and file
system that will be used as the virtual disk backend.
8. On the control domain, execute the ldm add-vdsdev command to export
the virtual disk backends from the service domain on the I/O domain to
which HDLM will be installed.
For example, to export virtual disk backends vol1 and vol2 from the
service domain ldg1, execute the command as follows:
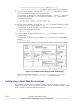
# ldm add-vdsdev /dev/dsk/c4t50060E8010027A82d0s2 vol1@ldg1-vds0
#
# ldm add-vdsdev /dev/dsk/c4t50060E8010027A82d1s2 vol2@ldg1-vds0
#
#
Creating an HDLM Environment
3-81
Hitachi Dynamic Link Manager (for Solaris) User Guide