
HP Photosmart R507/R607 digital camera with HP Instant Share - User's Manual
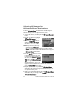

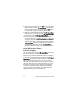
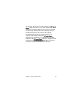


Table Of Contents
- Chapter 1: Getting Started
- Setup
- Camera Parts
- Camera States
- Camera Menus
- Camera Status Screen
- Chapter 2: Taking Pictures and Recording Video Clips
- Chapter 3: Reviewing Images and Video Clips
- Chapter 4: Using HP Instant Share
- Chapter 5: Transferring and Printing Images
- Chapter 6: Using the Setup Menu
- Chapter 7: Troubleshooting and Support
- Appendix A: Managing Batteries
- Appendix B: Purchasing Camera Accessories
- Appendix C: Specifications

Chapter 4: Using HP Instant Share 93
7 Press the HP Instant Share button again to exit the
HP Instant Share Menu.
8 Connect the camera to your computer and transfer the
images as explained in Transferring Images to a Computer
on page 97. Once the images are transferred to your
computer, they will be sent automatically to the HP Instant
Share destinations. Macintosh users will need to add
addressing information for their HP Instant Share
destinations before the images and messages can be sent.
Selecting Individual Images for
HP Instant Share Destinations
NOTE You can select each still image for any number of
HP Instant Share destinations. However, you cannot select
video clips for any HP Instant Share destinations, and
images within a panoramic sequence selected for
HP Instant Share destinations will be sent as individual
images.
1 Turn on the camera, and then press the HP Instant Share
button.
2 Use the buttons to scroll to the destination in the
HP Instant Share Menu that you want to select, such as an
e-mail destination.
3 Use the buttons to scroll to a still image for which you
want to select this HP Instant Share destination.
4 Press the Menu/OK button to select the destination, and a
appears over that destination in the HP Instant Share
Menu. To deselect the destination, press the Menu/OK
button again.
5 Repeat steps 3 and 4 to select any other HP Instant Share
destinations for this image.