
Datasheet: ProCurve 14 dBi Yagi Antenna


Table Of Contents
- SPECIFICATIONS
- ANTENNA LOCATION
- DESCRIPTION
- SAFETY
- MOUNTING INFORMATION
- WEEP HOLES
- 1. Vertical Mounting: When mounting vertically, find two weep holes on the broad, flat side of the radome and cover with adhesive dots.
- 2. Horizontal Mounting: When mounting horizontally, find two weep holes on the narrow edge of the radome and cover with adhesive dots. When adhesive dots are applied, check to ensure holes are fully closed.
- ASSEMBLY
- ASSEMBLY (continued)
- 2. Orient for the desired ploarization and install the antenna base against the mast using the two U-bolts (04), four hex nuts (18), four lock washers (19), and two V-blocks (63) provided in the hardware kit.
- 3. If using the articulating mount, install the antenna ball into position and tilt for the desired elevation angle (Figure D). Tighten the socket screw with the supplied wrench.
- 4. Rotate the antenna to the desired directional position and tighten all hardware.
- GROUNDING
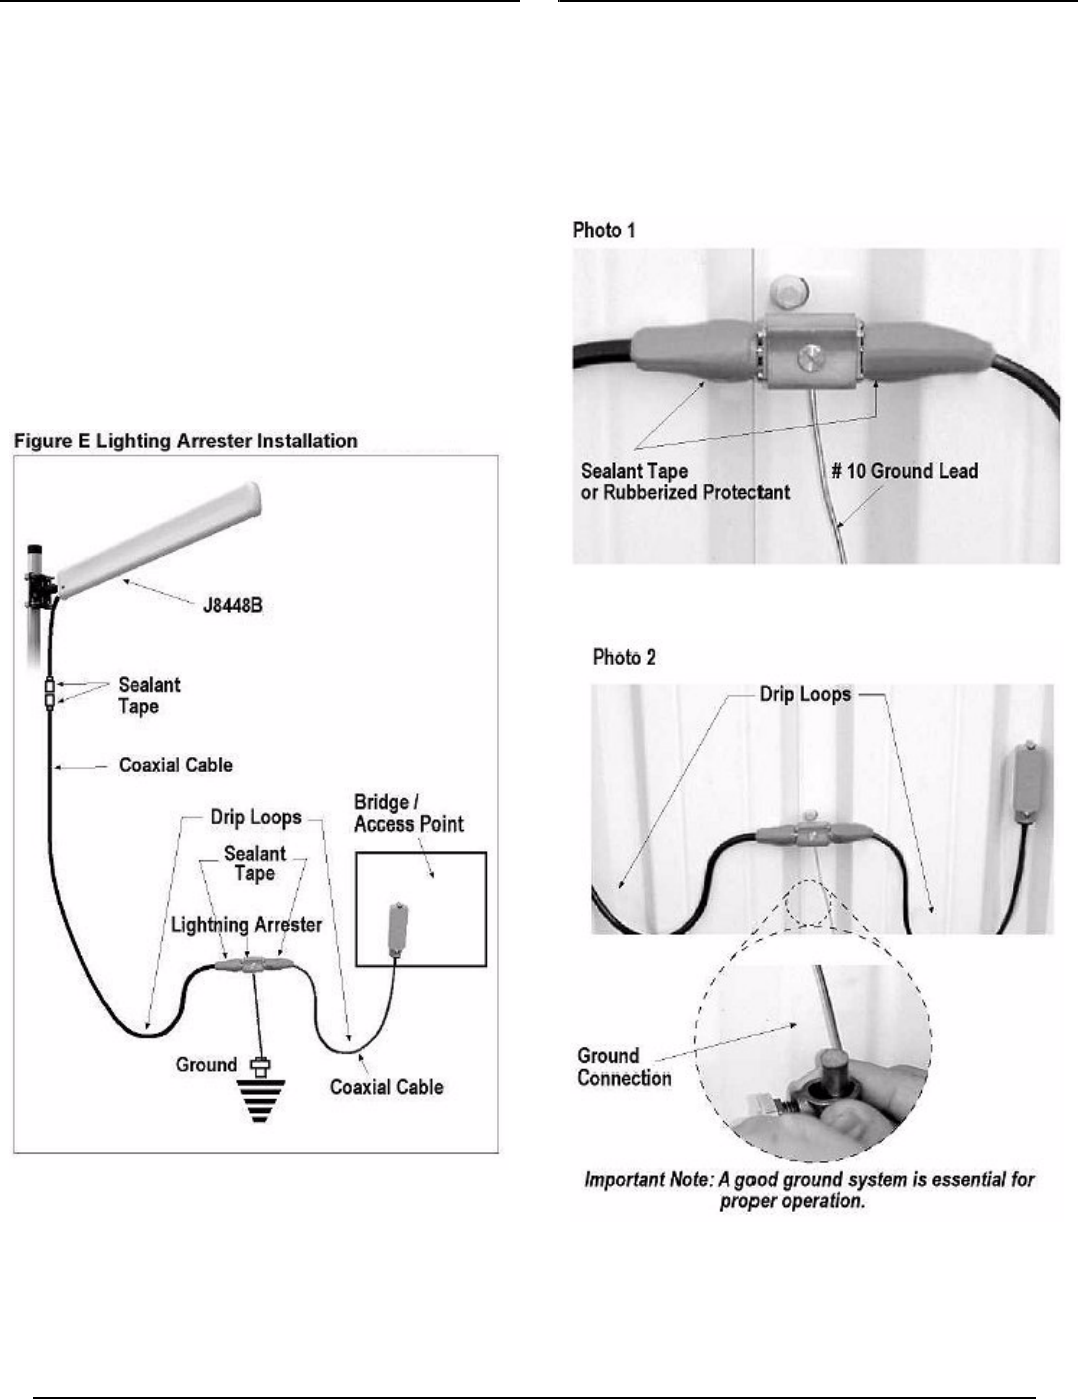
- LIGHTNING ARRESTER (optional)
- LIGHTNING ARRESTER (continued)
- J8448B Yagi-B Antenna: Radiation Plots
ProCurve Networking by HP Prod. J8448B
LIGHTNING ARRESTER (optional)
In external applications, it is recommended that you also install a
lightning arrester (HP Product # J8996A or equivalent) with the
antenna. The lightning arrester is not included with the antenna,
it must be purchased separately.
For best results, install the lightning arrester in close proximity to
a low-resistance ground at a point where the coaxial cable entes
the building (see Photo 1). In most cases, one 8-foot rod driven
into moist soil, or multiple rods bonded together, will provide ade-
quate grounding (see National Electrical Code guidelines).
To connect the Lightning Arrester to ground, use a very short and
direct run of #10 solid copper wir (or equivalent). For exterior
installations, use weatherproof coax connectors with a suitable
mastic or rubberized tape to prevent water incursion (see Photo
1).
LIGHTNING ARRESTER (continued)
Be sure to install the lightning arrester in an accessible location
that permits periodic inspection and (as needed) replacement.
Provide drip loops in cables to prevent water from entering the
building (see Photo 2).