
3Com Switch 7750 Configuration Guide Guide


790 CHAPTER 73: BOOTROM AND HOST SOFTWARE LOADING
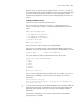
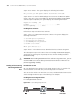
Step 1: As shown in Figure 208, connect the switch through an Ethernet port to
the PC (with IP address 10.1.1.1)
Step 2: Configure the IP address of VLAN1 on the switch to 192.168.0.65, and
subnet mask to 255.255.255.0.
n
You can configure the IP address for any VLAN on the switch for FTP transmission.
However, before configuring the IP address for a VLAN interface, you have to
make sure whether the IP addresses of this VLAN and PC are routable.
<SW7750> system-view
System View: return to User View with Ctrl+Z.
[SW7750] interface Vlan-interface 1
[SW7750-Vlan-interface1] ip address 192.168.0.65 255.255.255.0
Step 3: Enable FTP service on the switch, configure the FTP user name to test,
password to pass, and directory to FLASH root directory.
[SW7750-Vlan-interface1] quit
[SW7750] ftp server enable
[SW7750] local-user test
New local user added.
[SW7750-luser-test] password simple pass
[SW7750-luser-test] service-type ftp ftp-directory flash:/
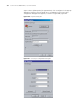
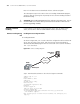
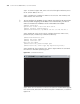
Step 4: Enable FTP client software on PC. Refer to Figure 209 for the command
line interface in Windows operating system.
Figure 209 Command line interface
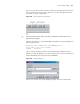
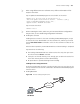
Step 5: Enter cd in the interface to switch to the path that the BootROM upgrade
file is to be stored, and assume the name of the path is "D:Bootrom", as shown in
Figure 210.