HP 12900 CMW710 R1106 Release Notes © Copyright 2014 Hewlett-Packard Development Company, L.P. The information contained herein is subject to change without notice. The only warranties for HP products and services are set forth in the express warranty statements accompanying such products and services. Nothing herein should be construed as constituting an additional warranty. HP shall not be liable for technical or editorial errors or omissions contained herein.
Contents Version information··························································································································································1 Version number ·································································································································································1 Version history ······································································································································
Running the primary extended BootWare segment ···························································································36 Running the backup extended BootWare segment ···························································································37 Accessing the BASIC ASSISTANT menu ······················································································································37 Using the EXTENDED-BOOTWARE menu ············································
List of Tables Table 1 Version history ................................................................................................................. 1 Table 2 HP 12900 product family matrix ......................................................................................... 1 Table 3 Hardware and software compatibility matrix ........................................................................ 1 Table 4 HP 12900 ISSU Version Compatibility Matrix .................................................
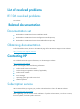
This document describes the features, restrictions and guidelines, open problems, and workarounds for version R1106. Before you use this version in a live network, back up the configuration and test the version to avoid software upgrade affecting your live network. Use this document in conjunction with the documents listed in "Related documentation." Version information Version number Comware software, Version 7.1.
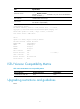
Item Specifications Shipped with the switch. Bootware version (Use the display version command in any view to view the BootWare version. See Note②) Host software 12900-CMW710-R1106.ipe iMC PLAT 7.0 (E0102L01) iMC version iMC QoSM 7.0 (E0102H01) [12910]display version HP Comware Software, Version 7.1.045, Release 1106 ------Note① Copyright (c) 2010-2014 Hewlett-Packard Development Company, L.P.
Hardware feature updates First release. Software feature and command updates First release.
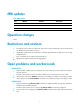
MIB updates Table 5 MIB updates Item MIB file Module Description 12900-CMW710-R1106 New None None None Modified None None None Operation changes None. Restrictions and cautions The software version does not support EA, EB or EC line card, and EA, EB or EC line card should use 12900 10xx series software version. An IRF fabric takes more than 10 minutes to complete diag information collection if it has a large configuration file. Layer 3 interfaces do not support multicast functions.
List of resolved problems R1106 resolved problems First release. Related documentation Documentation set HP FlexFabric 12900 Switch Series Installation Guide HP FlexFabric 12900 Switch Series Configuration Guides (R110x) HP FlexFabric 12900 Switch Series Command References (R110x). Obtaining documentation To find related documents, browse to the Manuals page of the HP Business Support Center website: http://www.hp.
Appendix A Feature list Hardware features Table 6 HP 12900 series hardware features Item Dimensions (H × W × D) (excluding feet and rack-mounting brackets) Weight Input AC voltage Max.
Item 12900 HP X170 1G SFP LC LH70 1590 Transceiver HP X170 1G SFP LC LH70 1610 Transceiver HP X170 1G SFP LC LH70 1470 Transceiver HP X170 1G SFP LC LH70 1490 Transceiver HP X170 1G SFP LC LH70 1510 Transceiver HP X170 1G SFP LC LH70 1530 Transceiver HP X120 1G SFP LC LH100 Transceiver HP X125 1G SFP LC LH40 1310nm Transceiver HP X120 1G SFP LC LH40 1550nm Transceiver HP X120 1G SFP LC SX Transceiver HP X120 1G SFP LC LX Transceiver HP X125 1G SFP LC LH70 Transceiver HP X120 1G SFP LC BX 10-U Transceiver H
IEEE 802.3/802.2 Long frame (1518-1536) Jumbo frame (1536-12228) VLAN (Port-based VLAN) IEEE 802.1Q IEEE802.1p RSTP(802.1w) MSTP(802.1s) LACP(802.
Traffic redirect Traffic shaping Line rate WFQ Traffic accounting Flow-based mirroring Port priority SNMP v1/v2/v3 Public MIBs Management Private MIBs Syslog/Debug IMC CLI File management Local management Dual-image RBAC Console login Telnet (VTY) login User access control SSH login FTP login Ping DNS client DHCP server DHCP client DHCP relay agent DHCP snooping Application protocols Telnet FTP client FTP server TFTP client NTP client/server VRRP Availability IRF RADIUS Security TACACS+ 6
Appendix B Upgrading software Software upgrade enables you to have new features and fix bugs. Before performing an upgrade, use the release notes for the new software version to verify software and hardware compatibility and evaluate upgrade impacts. Software types The following software types are available: BootWare image—A .bin file that contains a basic segment and an extended segment. The basic segment is the minimum code that bootstraps the system.
Upgrade method Upgrading from the CLI Software type Remarks BootWare image Comware images This method is disruptive. If you are upgrading MPUs, you must reboot the switch to complete the upgrade. If you are upgrading the BootWare image of a card (an LPU or switching fabric module), you must reboot the card. (excluding patches) NOTE: You can upgrade the BootWare of LPUs and switching fabric modules from the CLI only.
5 NONE Absent 0 NONE None 6 NONE Absent 0 NONE None 7 NONE Absent 0 NONE None 8 NONE Absent 0 NONE None 9 LSX1TGS48FC1 Normal 0 12900-1106 None 10 LSX1FAB10B1 Normal 0 12900-1106 None 11 LSX1FAB10B1 Normal 0 12900-1106 None 12 NONE Absent 0 NONE None 13 NONE Absent 0 NONE None 14 NONE Absent 0 NONE None 15 NONE Absent 0 NONE None 16 LSX1SUP10A1 Standby 0 12900-1106 None 17 LSX1SUP10A1 Master 0 12900-1106 None The output shows that
9 -rw- 33368 Aug 07 2013 08:55:31 startup.mdb 10 drw- - Aug 06 2013 17:26:40 versionInfo 1028096 KB total (487680 KB free) 4. If the free storage space is not sufficient, delete unused files: # On the active MPU: delete /unreserved flash:/12900-CMW710-R1106.ipe The contents cannot be restored!!! Delete flash:/12900-CMW710-R1106.ipe?[Y/N]:y Deleting a file permanently will take a long time. Please wait... ..................................................
Remote system type is MSDOS. ftp> # Set the file transfer mode to binary. ftp> binary 200 Type is Image (Binary) # Download the file from the PC to the root directory of the flash on the active MPU. ftp> get newest.ipe 227 Entering Passive Mode (192,168,0,23,7,100) 150 "C:\ newest.ipe " file ready to send (385 bytes) in IMAGE / Binary mode 226 Transfer finished successfully. 74948608 bytes received in 35.974 seconds (896.
bootrom update file slot16#flash:/12900-CMW710-BOOT-R1106.bin slot 16 This command will update bootrom file on the specified board(s), Continue? [Y/N]:y Now updating the Boot ROM, please wait........... ...........Done # Upgrade the BootWare on the LPU in slot 9. (Upgrade other LPUs in the same way.) bootrom update file flash:/12900-CMW710-BOOT-R1106.bin slot 9 This command will update bootrom file on the specified board(s), Continue? [Y/N]:y Now updating the Boot ROM, please wait......
3. Install a patch package: IMPORTANT: Use the display install active command to verify whether patches have been installed on the device. If the device has patches, uninstall them. Only one patch package file can be installed on the device. # Install the patch package 12900-CMW710-SYSTEM-E2102H08.bin. Make sure the file is saved to the root directory of the flashes on both MPUs. install activate patch flash:/12900-CMW710-SYSTEM-E2102H08.
1 2 NONE Absent 0 NONE None 1 3 NONE Absent 0 NONE None 1 4 NONE Absent 0 NONE None 1 5 NONE Absent 0 NONE None 1 6 NONE Absent 0 NONE None 1 7 NONE Absent 0 NONE None 1 8 NONE Absent 0 NONE None 1 9 LSX1TGS48FC1 Normal 0 12900-1106 None 1 10 LSX1FAB10B1 Normal 0 12900-1106 None 1 11 LSX1FAB10B1 Normal 0 12900-1106 None 1 12 NONE Absent 0 NONE None 1 13 NONE Absent 0 NONE None 1 14 NONE Absent 0 NONE None 1 15 NONE
Directory of flash: 0 drw- - Aug 06 2013 17:26:38 1 -rw- 42 Aug 07 2013 08:55:30 diagfile 2 drw- - Aug 06 2013 17:26:38 license 3 drw- - Aug 06 2013 18:26:41 logfile 4 -rw- 102294528 Apr 07 2013 13:47:21 5 -rw- 14908416 Aug 06 2013 17:21:31 6 -rw- 110083072 Aug 06 2013 17:23:20 7 drw- - Aug 06 2013 17:26:38 ifindex.dat 12900-CMW710-R1106.ipe 12900-cmw710-boot-r1106.bin 12900-cmw710-system-r1106.bin seclog 8 -rw- 1982 Aug 07 2013 08:55:30 startup.
Directory of chassis2#slot16#flash: 0 drw- - Aug 06 2013 17:26:38 1 -rw- 42 Aug 07 2013 08:55:30 diagfile 2 drw- - Aug 06 2013 17:26:38 license 3 drw- - Aug 06 2013 18:26:41 logfile 4 -rw- 102294528 Apr 07 2013 13:47:21 5 -rw- 14908416 Aug 06 2013 17:21:31 6 -rw- 110083072 Aug 06 2013 17:23:20 7 drw- - Aug 06 2013 17:26:38 ifindex.dat 12900-CMW710-R1106.ipe 12900-cmw710-boot-r1106.bin 12900-cmw710-system-r1106.bin seclog 8 -rw- 1982 Aug 07 2013 08:55:30 startup.
1. Run the FTP server program on the PC at 10.10.110.1, and set the username, password, and the file directory where the software file is stored. 2. Download the file to the global active MPU: # Log in to the PC with FTP. ftp 192.168.0.23 Connected to 192.168.0.23 (192.168.0.23). 220 WFTPD 2.0 service (by Texas Imperial Software) ready for new user User (192.168.0.
Perform the following tasks as needed: Upgrade BootWare Upgrade Comware software Install a patch package 1. Upgrade BootWare: The following example uses newest.ipe to upgrade the BootWare. # Decompress the file newest.ipe on the global active MPU (in slot 17 of member device 1). install add flash:/newest.ipe flash: Verifying image file...Done. This operation will take several minutes, please wait........................... ....................................................Done.
# Specify the images as the main startup software images for the standby MPUs: On the standby MPU in slot 16 of member device 1: boot-loader file boot flash:/12900-CMW710-BOOT-R1106system flash:/12900-CMW710-SYSTEM-R1106.bin chassis 1 slot 16 main This command will set the main startup software images. Continue? [Y/N]:y Successfully copied flash:/12900-CMW710-BOOT-R1106to chassis1#slot16#flash: / 12900-CMW710-BOOT-R1106. Successfully copied flash:/12900-CMW710-SYSTEM-R1106.
install activate patch flash:/12900-CMW710-SYSTEM-E2102H08.bin chassis 1 slot 17 # Install the patch package 12900-CMW710-SYSTEM-E2102H08.bin on the global standby MPUs. install activate patch flash:/12900-CMW710-SYSTEM-E2102H08.bin chassis 1 slot 16 install activate patch flash:/12900-CMW710-SYSTEM-E2102H08.bin chassis 2 slot 17 install activate patch flash:/12900-CMW710-SYSTEM-E2102H08.bin chassis 2 slot 16 The patches run immediately without requiring a reboot.
flash:/12900-CMW710-SYSTEM-R1106H08.bin Active packages on chassis 2 slot 16: flash:/12900-CMW710-BOOT-R1106.bin flash:/12900-CMW710-SYSTEM-R1106.bin flash:/12900-CMW710-SYSTEM-R1106H08.bin Active packages on chassis 2 slot 17: flash:/12900-CMW710-BOOT-R1106.bin flash:/12900-CMW710-SYSTEM-R1106.bin flash:/12900-CMW710-SYSTEM-R1106H08.
Enter your choice(0-4): 6. Enter 4 to set Ethernet port parameters. NOTE: To use the default settings, press Enter without modifying the settings. ==================================================== |Note: '.' = Clear field. | | '-' = Go to previous field. | | Ctrl+D = Quit. | ============================================================================ Protocol (FTP or TFTP):tftp Load File Name :test.bin Target File Name :test.bin Server IP Address :192.168.80.
|<3> Update Backup Image File | |<4> Modify Ethernet Parameter | |<0> Exit To Main Menu | | | ============================================================================ Enter your choice(0-4): 7. Enter 2 or 3 as needed. For example, to upgrade the main Comware software images, enter 2. Loading..................................................................... ............................................................................ .....
============================================================================ Enter your choice(0-4): 6. Enter 4 to set Ethernet port parameters. NOTE: To use the default settings, press Enter without modifying the settings. ==================================================== |Note: '.' = Clear field. | | '-' = Go to previous field. | Ctrl+D = Quit.
Field Description FTP User Password Set the password for accessing the FTP server. This password must be the same as the one configured on the FTP server. After you finish setting FTP parameters, the system returns to the Ethernet submenu.
|<1> Download Image Program To SDRAM And Run | |<2> Update Main Image File | |<3> Update Backup Image File | |<4> Modify Serial Interface Parameter | |<0> Exit To Main Menu | ============================================================================ Enter your choice(0-4): 5. Enter 4 in the serial submenu to change the baud rate of the console port.
Figure 2 Setting switch properties Figure 3 Modifying the baud rate 21
9. Select Call/Call to reconnect to the switch. Figure 4 Connecting to the switch 10. Press Enter in the BootWare interface.
Figure 5 Selecting the file to transfer 14. Click Send. Figure 6 File transfer progress When the download is complete, the following information appears: Download successfully! 31911808 bytes downloaded! Image file 12900-CMW710-BOOT-R1106.bin is self-decompressing.... Input the file name: 12900-CMW710-BOOT-R1106.bin Save file ...........................................
15. Enter 0 in the Serial submenu to return to the EXTENDED-BOOTWARE menu. 16. Enter 1 in the EXTENDED-BOOTWARE menu to run the new software. 17. Change the baud rate of the HyperTerminal back to 9600 bps, and reconnect to the switch.
7. Enter 4 to set file transfer parameters. For field descriptions, see Table 9 . NOTE: To use the default settings, press Enter without modifying the settings. ==================================================== |Note: '.' = Clear field. | | '-' = Go to previous field. | | Ctrl+D = Quit. | ============================================================================ Protocol (FTP or TFTP):tftp Load File Name :test.btw Target File Name :test.btw Server IP Address :192.
11. Enter 0 in the BOOTWARE OPERATION ETHERNET submenu to return to the BootWare Operation menu. 12. Enter 0 in the BootWare Operation menu to return to the EXTENDED-BOOTWARE menu. 13. Enter 0 in the EXTENDED-BOOTWARE menu to reboot the switch. Using FTP to upgrade through the management Ethernet port 1. Connect the management Ethernet port of the switch to the PC that stores the source .ipe BootWare image, and connect the console port of the switch to the configuration terminal.
Target File Name :test.btw Server IP Address :192.168.80.20 Local IP Address :192.168.80.10 :mpu.btw Subnet Mask :255.255.255.0 Gateway IP Address :0.0.0.0 FTP User Name :UserN FTP User Password :PWD After you finish setting FTP parameters, the system returns to the BOOTWARE OPERATION ETHERNET submenu.
=================================================== |Note:the operating device is flash | |<1> Backup Full BootWare | |<2> Restore Full BootWare | |<3> Update BootWare By Serial | |<4> Update BootWare By Ethernet | |<0> Exit To Main Menu | ============================================================================ Enter your choice(0-4): 5. Enter 3 in the BootWare Operation menu to access the Serial submenu.
9. Select File > Properties in the HyperTerminal window, click Configure in the popup dialog box, and select the baud rate of 19200 bps in the console port properties dialog box.
Figure 9 Modifying the baud rate 10. Select Call/Call to reconnect to the switch. Figure 10 Connecting to the switch 11. Press Enter in the BootWare interface.
======================================== |<1> Update Full BootWare | |<2> Update Extended BootWare | |<3> Update Basic BootWare | |<4> Modify Serial Interface Parameter | |<0> Exit To Main Menu | ============================================================================ Enter your choice(0-4): 13. Enter a number from 1 to 3 as needed. For example, enter 1 to upgrade the entire BootWare. Please Start To Transfer File, Press To Exit. Waiting ...
447616 bytes downloaded! Updating Basic BootWare? [Y/N] 16. Enter Y to upgrade the basic BootWare. Updating Basic BootWare.........Done! Updating Extended BootWare? [Y/N] 17. Enter Y to upgrade the extended BootWare. Updating Extended BootWare.........
Using BootWare menus You can use the BootWare menus to upgrade the switch and maintain files when the CLI is not accessible. Accessing the BootWare menu Table 11 lists the menus that each segment provides and the major tasks you can perform with these menus. You can access these menus only during system startup. Table 11 BootWare menus BootWare segment Basic Menu BASIC-BOOTWARE Tasks Reference Modify serial port parameters. Upgrade BootWare.
Shortcut key Prompt message Function Please Start To Transfer File, Press To Exit Stops the ongoing file transfer and exits the current operation interface. Info: Press Ctrl+C to abort or return to EXTENDED ASSISTANT MENU Returns to the EXTENDED ASSISTANT menu. If the system is outputting the result of an operation, this shortcut key combination aborts the display first. Press Ctrl+D to access BASIC-BOOTWARE MENU Accesses the BASIC-BOOTWARE menu.
Table 13 BASIC-BOOTWARE menu options Option Task Change the baud rate of the console port. <1> Modify Serial Interface Parameter Perform this task before downloading an image through the console port for software upgrade. Update the extended BootWare segment. <2> Update Extended BootWare If the corrupted extended segment has corrupted, choose this option to repair it. <3> Update Full BootWare Update the entire BootWare, including the basic segment and the extended segment.
NOTE: The baud rate change is a one-time operation. The baud rate will restore to the default (9600 bps) at reboot. To set up a console session with the device after a reboot, you must change the baud rate setting on the configuration terminal back to 9600 bps. Updating the extended BootWare segment If the extended BootWare segment is corrupted, enter 2 in the BASIC-BOOTWARE menu to update it. Enter your choice(0-5): 2 Please Start To Transfer File, Press To Exit. Waiting ...
Press Ctrl+B to access EXTENDED-BOOTWARE MENU... Password recovery capability is enabled. Note: The current operating device is flash Enter < Storage Device Operation > to select device. Running the backup extended BootWare segment To bootstrap the Comware images with the backup extended BootWare segment, enter 5 in the BASIC-BOOTWARE menu. For information about backing up the extended BootWare segment, see "Managing the BootWare image." Enter your choice(0-5): 5 Booting Backup Extended BootWare....
2. Press Ctrl+B within 5 seconds after the "Press Ctrl+B to access EXTENDED-BOOTWARE MENU..." prompt message appears. If you fail to do this, the system starts decompressing the Comware software file. Password recovery capability is enabled. Note: The current operating device is flash Enter < Storage Device Operation > to select device. 3. Press Enter at the prompt for password. The EXTENDED-BOOTWARE menu appears.
Option Tasks Reference Display files on the current storage medium. Set a Comware image file as <4> File Control the main or backup startup software image. See "Managing files." Delete files to free storage space. <5> Restore to Factory Default Configuration Restore the factory-default configuration. This option is available only if password recovery capability is disabled. See "Restoring the factory-default configuration.
If console users forget their console login passwords, they can skip login authentication or the current configuration file to configure new passwords. If password recovery capability is disabled, console users must restore the factory-default configuration before they can configure new passwords. Restoring the factory-default configuration deletes the next-startup configuration files. To enhance system security, disable password recovery capability.
Upgrading Comware software through the console port You can upgrade the Comware software through the console port or modify the baud rate of the console port from the Serial submenu. To upgrade Comware software through the console port, enter 2 in the EXTENDED-BOOTWARE menu to access the Serial submenu.
1. Enter 3 in the EXTENDED-BOOTWARE menu to access the Ethernet submenu.
Table 18 Setting file transfer parameters Field Description '.' = Clear field Press the dot (.), and then press Enter to clear the setting for a field. '-' = Go to previous field Press the hyphen (-), and then press Enter to return to the previous field. Ctrl+D = Quit Press Ctrl + D to exit the Ethernet parameter settings menu. Protocol (FTP or TFTP) Set the file transfer protocol to FTP or TFTP. Load File Name Set the name of the file to be downloaded.
Table 19 FILE CONTROL submenu options Option Task <1> Display All File(s) Display all files on the current storage medium. <2> Set Image File type Set the type of an .ipe Comware software image file. <3> Set Bin File type Set the type of a .bin Comware software image file. <4> Delete File Delete a file from the current storage medium. <0> Exit To Main Menu Return to the EXTENDED-BOOTWARE menu.
|1 119947264 Feb/27/2013 15:08:22 N/A |0 Exit flash:/newest.ipe | | ============================================================================ 2. Enter the number of the file you are working with. Enter file No.:1 Modify the file attribute: ============================================================================ |<1>+Main | |<2>+Backup | |<0> Exit | ============================================================================ Enter your choice(0-2):1 3.
flash:/12900-CMW710-SYSTEM-R1106.bin Modify the file attribute: ============================================================================ |<1>+Main | |<2>+Backup | |<0> Exit | ============================================================================ Enter your choice(0-2):1 This operation may take several minutes. Please wait.... Set the file attribute success! Deleting a file To delete a file when the storage medium is insufficient: 1. Enter 3 in the FILE CONTROL menu.
Restoring the factory-default configuration CAUTION: Performing this task can cause all next-startup configuration files to be permanently deleted. To restore the factory-default configuration from the EXTENDED-BOOTWARE menu, make sure password recovery capability is disabled. If the capability is enabled, you cannot perform the task. Disabling password recovery capability can protect your system from unauthorized console access to configuration.
|<2> Restore Full BootWare | |<3> Update BootWare By Serial | |<4> Update BootWare By Ethernet | |<0> Exit To Main Menu | ============================================================================ Enter your choice(0-4): Table 20 BootWare Operation menu options Option Tasks <1> Backup Full BootWare Back up the entire BootWare image. When the BootWare image is corrupted, you could use the backup image for recovery. Recover the entire BootWare image.
|<3> Set The Default Boot Device | |<0> Exit To Main Menu | ============================================================================ Enter your choice(0-3): Table 21 DEVICE CONTROL menu options Option Task <1> Display All Available Nonvolatile Storage Device(s) Display all available storage media. <2> Set The Operating Device Set the current storage medium. All file operations performed using BootWare menus are performed on the current storage medium.
If Xmodem is used, verify that the baud rate is the same on the console port and the HyperTerminal. If TFTP is used, verify that you entered the correct TFTP server IP address, filename, and file path. If FTP is used, verify that you entered the correct FTP server IP address, filename, file path, and FTP username and password. 4. Verify that FTP or TFTP server software is running and has correct settings. 5. Verify that the flash memory is sufficient for storing the downloaded files. 6.
Support and other resources Contacting HP For worldwide technical support information, see the HP support website: http://www.hp.
Conventions This section describes the conventions used in this documentation set. Command conventions Convention Description Boldface Bold text represents commands and keywords that you enter literally as shown. Italic Italic text represents arguments that you replace with actual values. [] Square brackets enclose syntax choices (keywords or arguments) that are optional. { x | y | ... } Braces enclose a set of required syntax choices separated by vertical bars, from which you select one.
Network topology icons Represents a generic network device, such as a router, switch, or firewall. Represents a routing-capable device, such as a router or Layer 3 switch. Represents a generic switch, such as a Layer 2 or Layer 3 switch, or a router that supports Layer 2 forwarding and other Layer 2 features. Represents an access controller, a unified wired-WLAN module, or the switching engine on a unified wired-WLAN switch. Represents an access point.
Index ACRSU Software file naming conventions,1 A Software types,1 Accessing the BASIC ASSISTANT menu,37 Accessing the BootWare menu,33 U C Upgrade methods,1 Upgrading BootWare from the BootWare menus,24 Contacting HP,51 Conventions,52 Upgrading Comware software from the BootWare menus,15 R Upgrading from the CLI,2 Related information,51 Using the BASIC-BOOTWARE menu,34 Using the EXTENDED-BOOTWARE menu,37 S 54