
Installation Guide for fl Modules 2007-02

ProCurve Switch fl Modules
Installing and Removing mini-GBICs
Installing and Removing mini-GBICs
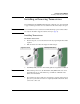
You can remove or install a mini-GBIC from the 10-port mini-GBIC Module
without having to power off the switch. Use only ProCurve mini-GBICs. The
following mini-GBICs are supported by the 10-port mini-GBIC module (as of
this printing):
■ Gigabit-SX LC mini-GBIC (J4858B)
■ Gigabit-LX LC mini-GBIC (J4859B)
■ Gigabit-LH LC mini-GBIC (J4860B)
■ Gigabit 1000Base-T mini-GBIC (J8177B)
Caution Use only the supported genuine ProCurve mini-GBICs with your switch.
Non-ProCurve mini-GBICs are not supported. Should you require additional
ProCurve mini-GBICs, contact your ProCurve Networking Sales and Service
Office or authorized dealer.
Installing a mini-GBIC
WARNING The ProCurve fiber optic mini-GBICs are Class 1 laser devices. Avoid
direct eye exposure to the beam coming from the transmit port.
Although ProCurve mini-GBICs use slightly different release mechanisms,
the installation procedure is the same for all types.
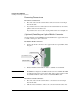
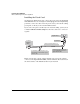
To install a mini-GBIC in the 10-Port mini-GBIC Module:
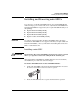
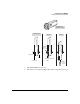
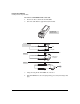
1. Position the mini-GBIC as shown in the following illustration. Note that
the release mechanism is on the left of the receptacle.
2. Insert the mini-GBIC into the receptacle until it locks into position.
27