
Quick Start Guide for Option Cards - 2003-07

HP PROCURVE SECURE ACCESS 700WL SERIES
O
PTION CARD QUICK START GUIDE
This document guides you through the basic steps needed to install your HP ProCurve Option Card. If you
have any problems during installation, see the
HP ProCurve Secure Access 700wl Series Installation Guide
.
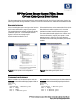
BROWSER INTERFACE
Prior to installing the option card, go to the “Version
and License Information” page on your system.
This page displays the network modules physically
installed in your unit. In the example shown in
Figure 1, the unit has a single 4-port
10/100 module installed in slot 3.
Figure 1: Initial system card configuration
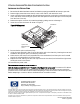
Follow the directions on the reverse side of this Quick
Start Guide to install the option card. Once the
hardware has been installed, reboot the system.
The new module should appear in the “Version and
License Information” page of your system. In the
example shown in Figure 2, Slot 2 now displays
information about the newly-installed 4-port 10/100
module.
Figure 2: After adding new option card
COMMAND LINE INTERFACE
Before installation of the second option card, the
show slots command should display output similar to:
show slots
Slots: 3
System Board: 2 Ethernet ports
Slot 1: Empty
Slot 2: Empty
Slot 3: 4 Ethernet ports
After installation of the new 4-port 10/100 module, the
show slots command should display output similar to:
show slots
Slots: 3
System Board: 2 Ethernet ports
Slot 1: Empty
Slot 2: 4 Ethernet ports
Slot 3: 4 Ethernet ports
HP ProCurve Secure Access 700wl Series OPTION CARD QUICK START GUIDE
http://www.hp.com/go/hpprocurve