Installation and Reference Guide HP J3233A HP J3234A HP J3247A HP J3248A HP AdvanceStack 100Base-T Hub-12TX, Hub-12TXM, and Switch Modules
© Copyright 1997 Hewlett-Packard Company All Rights Reserved Reproduction, adaptation, or translation without prior written permission is prohibited, except as allowed under the copyright laws.
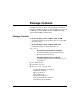
Package Contents Carefully unpack the contents of the package and verify them against the checklist given below. This checklist applies to both the HP AdvanceStack 100Base-T Hub-12TXM and the HP AdvanceStack 100Base-T Hub-12TX.
HP Hub-12TX/Hub-12TXM Installation and Reference Guide æ One 0.2 meter Stacking Cable. Used for connecting hubs together into a stack via the Stacking Ports. Provides both data and management channels. æ One serial cable. Used for VT-100 console interface configuration and for out-of-band and SLIP management. æ Installation manual æ Warranty booklet Please inform your reseller immediately should there be any wrong, missing, or damaged parts.
Quick Installation Hewlett-Packard’s Hub-12TX/Hub-12TXM models each contain 12 Fast Ethernet 100Base-TX, RJ-45 (MDI-X) ports, one MDI cascade port, and one Expansion Slot for an optional connection using 10/100TX and 100FX Switch Port Module. The design built into the front display panel and configuration options provides a friendly interface that simplifies installation and network troubleshooting.
HP Hub-12TX/Hub-12TXM Installation and Reference Guide Note: When connecting hubs with the Stacking Cable, they are all part of the same collision domain by default. Also if a Hub-12TXM is present, all of the hubs are managed by it. 6. Isolate any hubs you want to remove from the stack’s collision domain. For the Hub-12TXM, use the Hub Configuration screen in the VT-100 console interface. Select the System Configuration option from the main menu and press Return.
HP Hub-12TX/Hub-12TXM Installation and Reference Guide • Install the Switch Port Module on a non-isolated hub in the stack and run a connection from the Switch Port Module to a station port on the isolated hub. When connecting a hub to the 10/100TX Switch Port Module, the maximum cable length is 100 meters. This is a bridged connection and keeps the collision domain on the isolated hub separate from the main collision domain of the other hubs in the stack.
HP Hub-12TX/Hub-12TXM Installation and Reference Guide Special Considerations to Note The following are special considerations to note: • When connecting an end node to the Switch Port on the Switch Port Module, the maximum cable length is 100 meters for twisted-pair cable, and two kilometers for fiber. Refer to Chapter 2 for a more detailed description of the maximum cable length permitted.
HP Hub-12TX/Hub-12TXM Installation and Reference Guide • Make sure you connect the stack (main collision domain) to the extended network. If you have hubs in the stack that are isolated, be certain to use a station port of a hub that is NOT isolated in order to connect the stack collision domain to the extended network. • A network management station on the extended network should be able to access a Hub-12TXM in the stack in order to manage all the devices in the stack’s collision domain.
About this Guide This guide is designed for the experienced network installer. It describes how to install and operate the HP AdvanceStack 100Base-T Hub-12TX/Hub-12TXM system. After reading this manual, you should be able to use the front display panel and configure options to manage all your network connections.
Contents Chapter 1: Product Overview 1-1 Introduction to Fast Ethernet Brief Description of the Hub-12TX/Hub-12TXM Hub-12TX Hub-12TXM Switch Port Modules Network Management Software Distinguishing Features of the HP Hub-12TX/Hub-12TXM Features of the HP AdvanceStack Hub-12TX/Hub-12TXM Features of HP AdvanceStack Switch Port Modules Data Switching with the Switch Port Modules Switching Technology Configuration Options for the Switch Port Modules Switching Methods 1-1 1-1 1-3 1-3 1-4 1-4 1-5 1-6 1-8 1-9 1-
HP Hub-12TX/Hub-12TXM Installation and Reference Guide xii Chapter 3: Setting up Network Connections 3-1 Special Architecture Used for the Hub-12TX/Hub-12TXM Isolation Architecture Stacking Cable Management Channel Hub ID Setting Using Management Agents SNMP Backup Agent Backup Links Function Security Features Sample Network Configurations Connecting Hubs to the Stack Isolating Specific Hub Connections Isolating Multiple Hubs Extending the Network with Alternate Connections Linking the Stack to a Manage
HP Hub-12TX/Hub-12TXM Installation and Reference Guide Configuring the SNMP Agent Configuring SNMP Communities Configuring IP Trap Receivers Configuring IPX Trap Receivers Configuring Hub Parameters Hub Configuration Hub ID Configuration Configuring Port Parameters Configuring Hub Ports Configuring the Switch Port Module Port Intrusion Control Defining Backup Ports System Statistics Stack Statistics Hub Statistics Port Statistics Statistics for Hub Ports Statistics for Switch Port Module Downloading System
HP Hub-12TX/Hub-12TXM Installation and Reference Guide Port Status Indicators Link/Traffic Partition/Disable Diagnostic Test Indicators Network Connections Station Ports Cascade Port Console Port Rear Panel Components Power Socket Stacking Ports In Out 5-7 5-7 5-8 5-9 5-10 5-10 5-10 5-10 5-12 5-12 5-13 5-13 5-13 Appendix A: Troubleshooting A-1 Diagnosing Hub Indicators System Diagnostics Power and Cooling Problems Installation Transmission Mode Cabling LAN Adapters Physical Configuration System Integrit
HP Hub-12TX/Hub-12TXM Installation and Reference Guide Appendix D: Product Specifications Product Specifications Appendix E: Regulatory Standards Mounting Precautions Power Precautions Safety Information Grounding Servicing Informations Concernant la sécurité Hinweise zur Sicherheit Considerazioni sulla sicurezza Consideraciones sobre seguridad Safety Information (Japanese) Safety Information (Chinese) Regulatory Statements FCC Class A Statement European Community Canada Appendix F: Product Support Servi
HP Hub-12TX/Hub-12TXM Installation and Reference Guide List of Figures Figure 2.1 Stacking Hubs without a Rack Figure 2.2 Mounting Hubs Using a Mounting Rack Figure 3.1 Attaching all Hubs to the Stack Collision Domain Figure 3.2 Linking Part of the Stack to the Stack Collision Domain with Straight-through, Category 5 Twisted-pair Cable Figure 3.3 Stacking Isolated Hubs with Straight-through, Category 5 Twisted-pair Cable Figure 3.
HP Hub-12TX/Hub-12TXM Installation and Reference Guide Figure 4.19 Figure 4.20 Figure 4.21 Figure 4.22 Figure 4.23 Figure 4.24 Figure 4.25 Figure 4.26 Figure 4.27 Figure 4.28 Figure 4.29 Figure 4.30 Figure 4.31 Figure 4.32 Figure 4.33 Figure 4.34 Figure 4.35 Figure 5.1 Figure 5.2 Figure 5.3 Figure 5.4 Figure 5.5 Figure B.1 Figure B.
HP Hub-12TX/Hub-12TXM Installation and Reference Guide Table 4.4 Table 4.5 Table 4.6 Table 4.7 Table 4.8 Table 4.9 Table 4.10 Table 4.11 Table 4.12 Table 4.13 Table 4.14 Table 4.15 Table 4.16 Table 4.17 Table 4.18 Table 4.19 Table 4.20 Table 4.21 Table 4.22 Table 4.23 Table 4.24 Table 4.25 Table 4.26 Table 4.27 Table 5.1 Table 5.2 Table 5.3 Table 5.4 Table 5.5 Table 5.6 Table 5.7 Table 5.8 Table 5.9 Table 5.10 Table 5.11 Table 5.12 Table 5.13 Table B.1 Table B.
HP Hub-12TX/Hub-12TXM Installation and Reference Guide Table B.3 Table B.4 Table B.5 Table B.6 Table B.
Chapter 1: Product Overview Introduction to Fast Ethernet Standard 10 Mbit/s Ethernet has served well for past generations of 286 and 386 machines performing simple file transfers. However, with the inevitable growth in corporate network size and the introduction of fully-functional 32-bit PC architectures, and operating systems running complex applications, 10 Mbit/s Ethernet has become a serious bottleneck.
HP Hub-12TX/Hub-12TXM Installation and Reference Guide can be monitored via SNMP protocol through any network management station. Moreover, the Hub-12TX/Hub-12TXM provides advanced network security features including “Intrusion Protection” which ensures that only designated workstations are able to transmit packets onto the network. Management access via the out-of-band serial port or in-band via Telnet is also password protected.
HP Hub-12TX/Hub-12TXM Installation and Reference Guide The specific components are the: Hub-12TX Fast Ethernet Stackable Hub with 12 100Base-TX Ports The Hub-12TX conforms to the IEEE 802.3u hub specification. It also collects port statistics and records events for system administration. Basic configuration is provided by the VT-100 console interface. This hub can be used in a standalone configuration to form a simple LAN networking two to 12 computers using the RJ-45 hub ports.
HP Hub-12TX/Hub-12TXM Installation and Reference Guide Switch Port Modules • 100Base-TX (HP J3247A AdvanceStack 10/100TX Switch Port Module) Provides one RJ-45 MDI-X port and one RJ-45 MDI port, of which only one can be used at a time. Transmission speed is automatically set to 10 or 100 Mbit/s via auto-sensing, and the mode is set to half or full duplex via auto-negotiation. • 100Base-FX (HP J3248A AdvanceStack 100FX Switch Port Module) Provides one SC type connector for 100Base-FX connection.
HP Hub-12TX/Hub-12TXM Installation and Reference Guide Distinguishing Features of the HP Hub-12TX/Hub-12TXM The HP Hub-12TX/Hub-12TXM provides the following key features: • Stack isolation architecture allowing the network to be split into multiple collision domains • Supports fault-tolerant configuration by allowing port backup links and agent backup • Supports management functions via SNMP • Supports VT-100 console management • Discovery and mapping features using HP AdvanceStack Assistant • The VT-10
HP Hub-12TX/Hub-12TXM Installation and Reference Guide Features of the HP AdvanceStack Hub-12TX/Hub-12TXM Features of the HP AdvanceStack Hub-12TX/Hub-12TXM are: General Features Basic Hub Functions • Transmits all incoming frames to the other hubs in the stack collision domain using the Stacking Cable • Automatically partitions and reconnects devices which experience excessive collisions • Jabber lockup protection provided by disabling any port that receives 64 Kbytes of continuous data, and re-enabling
HP Hub-12TX/Hub-12TXM Installation and Reference Guide • BOOTP support for dynamic address assignment • Flash ROM on board the Hub-12TXM for easily updating the SNMP agent, using either standard firmware updating software or HP’s Download Manager program, an agent downloading Windows program • Firmware update supported for the Hub-12TXM via out-of- band Xmodem file transfer through the serial port, or TFTP file transfer over the network Installation Features Easy Installation • Flexible installation for
HP Hub-12TX/Hub-12TXM Installation and Reference Guide Features of HP AdvanceStack Switch Port Modules Features of the HP AdvanceStack 10/100TX and 100FX Switch Port Modules are: Networking Flexibility (via Switch Port Modules) • One Expansion Slot supports optional slide-in Switch Port Modules for connection to 10Base-T, 100Base-TX or 100Base-FX (on a separate collision domain) • Transparent bridging (between stack and external device) via optional Switch Port Modules • Uses adaptive cut-through switchin
HP Hub-12TX/Hub-12TXM Installation and Reference Guide Data Switching with the Switch Port Modules Switching Technology The Switch Port Modules that plug into the Expansion Slot on the front panel of the AdvanceStack Hub-12TX/Hub-12TXM use advanced switching techniques to provide a high-speed network backbone. Each Switch Port Module acts as a two-port Ethernet switch which segments the stack from the extended network.
HP Hub-12TX/Hub-12TXM Installation and Reference Guide As a device functioning on the media access control (MAC) layer, the Switch Port Modules are protocol independent, and therefore compatible with TCP/IP, NetWare, DECnet and XNS protocols. They can provide a connection between conventional 10Base-T and high-speed 100Base-TX networks; or can serve as a bridge in a 100Base-TX or 100Base-FX environment.
HP Hub-12TX/Hub-12TXM Installation and Reference Guide Although cut-though switching is recommended as the fastest method for most applications, the other methods mentioned above are also supported by the Switch Port Modules to guarantee flawless performance. To ensure that you can manage any kind of network load, the modules use adaptive cut-through switching based on an algorithm. This method dynamically changes the way it handles data based on the current error rate.
Chapter 2: Installing the System This chapter describes how to install the HP AdvanceStack Hub-12TX/Hub-12TXM unit and establish network connections. You may install this hub on any level surface (e.g., a table or shelf) or in a standard equipment rack. However, please take note of the following minimum site requirements before you begin. Note: The Hub-12TX/Hub-12TXM does not support wall mounting.
HP Hub-12TX/Hub-12TXM Installation and Reference Guide Hardware Installation F This hub is suitable for desktop or rack-mount installation. A good location is at the center of all the devices you want to link, close to the extended network, and near a power outlet. These hubs can be stacked with other hubs using a mounting rack or directly on top of one another. Refer to the sections on Stacking Hubs without a Rack or Mounting Hubs in a Rack for a description of these methods.
HP Hub-12TX/Hub-12TXM Installation and Reference Guide Mounting Hubs in a Rack Please comply with the following instructions to ensure that your hub is securely mounted in the rack. 1. Use a standard EIA 19-inch rack. 2. Use a Phillips (i.e., cross-head) screwdriver to attach the brackets to the sides of the hub. 3. Position the hub in the rack by lining up the holes in the brackets with the appropriate holes on the rack, and then use the supplied screws to mount the hub in the rack. Figure 2.
HP Hub-12TX/Hub-12TXM Installation and Reference Guide Connecting the Hub System Remember to label all your connections at both ends of the cable to facilitate troubleshooting or future changes to network configuration. The AdvanceStack Hub-12TX/Hub-12TXM has 12 RJ-45 shielded ports (i.e., 100Base-TX) that support connections to 100 Mbit/s Fast Ethernet. Ports 1 - 12 (MDI-X) allow you to connect to devices such as a workstation, server, switch, or router.
HP Hub-12TX/Hub-12TXM Installation and Reference Guide 100W Category 5 shielded or unshielded twisted-pair cables with RJ-45 plugs at both ends. 2. Connect one end of the cable to the RJ-45 port of the network device, and the other end to any available (MDI-X) port on the hub. Just remember that if you use Port 12MDI-X, the cascade port (12MDI) cannot be used. When inserting an RJ-45 plug, be sure the tab on the plug clicks into position to ensure that it is properly seated.
HP Hub-12TX/Hub-12TXM Installation and Reference Guide Making a Connection via the MDI Cascade Port The Hub-12TX/Hub-12TXM is a Class I repeater. Class I repeaters cannot be cascaded to another hub in the same collision domain. The cascade port can only be connected to another device which breaks up the collision domain (e.g., an Ethernet switch). Stackable Fast Ethernet hubs are generally restricted to Class I repeater types due to the timing requirements for passing traffic through the Stacking Cable.
HP Hub-12TX/Hub-12TXM Installation and Reference Guide 10/100Base-TX - HP J3247A AdvanceStack 10/100TX Switch 100Base-FX Port Module - HP J3248A AdvanceStack 100FX Switch Port Module Note: The 10/100TX Switch Port Module automatically adjusts to 10 or 100 Mbit/s using auto-sensing. I Retain the face plate for possible future use. The Switch Port Modules are not hot-swappable. Be sure you power off the hub before installing or removing these modules.
HP Hub-12TX/Hub-12TXM Installation and Reference Guide on the target device (or vice versa). When inserting an RJ-45 plug, be sure the tab on the plug clicks into position to ensure that it is properly seated. Note that the length of twisted-pair cable should not exceed 100 meters. Connecting Fiber Optic Cabling - For the 100Base-FX module, prepare fiber optic cable with SC-type connectors at both ends. When connecting the module directly to an end-node device (e.g.
HP Hub-12TX/Hub-12TXM Installation and Reference Guide - When using fiber optic cabling, the maximum length between two hubs can be up to 2 kilometers. However, you must consider power loss when calculating the actual length of cable that can be used with your system. You can calculate power loss with the following formula: Distance Limit and Power Loss in Fiber Optics m = (p dB - i dB) c dB/km Variable m p dB i dB c dB/km Description cable length (kilometers) power budget intervening devices (e.g.
HP Hub-12TX/Hub-12TXM Installation and Reference Guide I When the 100Base-FX link is set for the full-duplex communications (i.e., a dedicated connection), cable length should not exceed 2 kilometers. However, when the link is set for half-duplex communications (i.e., a shared collision domain), cable length should not exceed 412 meters (IEEE 802.3u). Also cable length could be limited further by timing constraints depending on what devices exist in the same shared collision domain.
HP Hub-12TX/Hub-12TXM Installation and Reference Guide address is in the local collision domain, or forwarded if the destination is in a remote collision domain). Note: Devices connected to the Switch Port Module exist in a separate collision domain, and cannot be controlled by a management agent in the stack. Switching Functions - These modules also provide functions commonly found on an Ethernet switch. The scheme used to process data packets is automatically adjusted to optimize system performance.
HP Hub-12TX/Hub-12TXM Installation and Reference Guide Powering on the Hub 1. Plug one end of the power cord into a power outlet, and the other end into the power socket at the rear of the hub (in that order for reasons of safety). 2. Check the LED indicator marked Power on the front panel to see if it is on. 3. The hub performs a self-diagnostic test upon power-on. (Note that this test takes about 50 seconds to complete.) For details about the system self-diagnostic test, refer to the following section.
HP Hub-12TX/Hub-12TXM Installation and Reference Guide Hot Swap The AdvanceStack Hub-12TX/Hub-12TXM supports a “hot swap” capability that allows you to connect/disconnect hubs or media connectors from the system with minimal disruption to the network. You can remove any network cabling without affecting traffic passing across the internal repeater bus.
HP Hub-12TX/Hub-12TXM Installation and Reference Guide Verifying Port Status Check each connection by viewing the port status indicators listed below. (For a more detailed description on these indicators, refer to Chapter 5.) LED Link Color green State On Traffic Tx/Rx 1001 green green green Blinking Blinking On FDX green On Indication Port has established a valid network connection. The RJ-45 plug has been properly seated in the RJ-45 port. Traffic is traversing the port.
HP Hub-12TX/Hub-12TXM Installation and Reference Guide • Verify that you have not exceeded the specified limits for any attached media type as summarized in the following table: Media Type Twisted Pair Fiber Optic Maximum Length (meters) 100 412 (single switched link - at half duplex) 2000 (single switched link - at full duplex) 160 (with Class I repeater - TX/FX links only) 131 (with Class I repeater - if any T4 links present) 208 (with 1 Class II repeater - TX/FX links only) 111 (with 2 Class II repeate
Chapter 3: Setting up Network Connections This chapter outlines several sample configurations for a local area network utilizing specific features of a Hub-12TX/Hub12TXM stack. As described in Chapter 2, up to five Hub-12TX/Hub-12TXM units can be connected together using the Stacking Cable, which attaches to the Stacking Ports (on the rear panel), to create a complete hub stack. Hubs connected in this way form a single collision domain which extends across all hubs in the stack.
HP Hub-12TX/Hub-12TXM Installation and Reference Guide but need to be managed. In this way you can arrange network resources to balance traffic and thereby increase overall network efficiency. To combine the separate collision domains into an interconnected network, attach each hub to a switch or similar device, such as one of HP’s AdvanceStack switches, or use the optional Switch Port Modules. Stacking Cable Management Channel To manage other hubs by an SNMP agent (i.e.
HP Hub-12TX/Hub-12TXM Installation and Reference Guide Using Management Agents The Hub-12TXM includes an SNMP management agent. To add SNMP functionality to an entire stack, a Hub-12TXM must be included in the stack. You may include multiple agents in a stack to provide a fail-safe backup management agent. SNMP Backup Agent The AdvanceStack Hub-12TX/Hub-12TXM system supports a backup function for the management agent.
HP Hub-12TX/Hub-12TXM Installation and Reference Guide Backup Links Function The AdvanceStack Hub-12TX/Hub-12TXM system supports a backup link function (i.e., a redundant link), provided a Hub12TXM is included in the stack. A hub system can have up to 10 pairs of Backup Links. These links are configurable using the VT-100 console interface. When a primary link fails, the backup (i.e., secondary) link automatically takes over.
HP Hub-12TX/Hub-12TXM Installation and Reference Guide Sample Network Configurations The AdvanceStack Hub-12TX/Hub-12TXM hubs are designed to provide flexibility in configuring network connections. This hub can be used as a simple standalone hub or connected to other network interconnection devices in various configurations. This section includes sample applications, most of which take advantage of the hub’s isolation technique, using the Switch Port Modules.
HP Hub-12TX/Hub-12TXM Installation and Reference Guide Isolating Specific Hub Connections You can connect or isolate the hubs in a stack. In a stacked system, some hubs may be connected to the stack collision domain while others are isolated. In this example, hubs 1, 2, 3 and 4 are in the stack while hub 5 is isolated from the stack.
HP Hub-12TX/Hub-12TXM Installation and Reference Guide Isolating Multiple Hubs In this example, each isolated hub has its own collision domain. Hubs 1 to 5 are not transmitting network traffic to other hubs through the Stacking Cable. Figure 3.
HP Hub-12TX/Hub-12TXM Installation and Reference Guide Extending the Network with Alternate Connections You can extend your network by connecting any of the hubs in a stacked system to other compatible hubs via the Switch Port Module. In the diagram below, a standalone hub is connected to hub 3 in the stacked system using the Switch Port Module. However, remember that the Hub-12TXM agent can only manage hubs connected to it through the Stacking Cable. Figure 3.
HP Hub-12TX/Hub-12TXM Installation and Reference Guide Linking the Stack to a Management Station In a stacked system, connect the management station to either a Hub-12TXM or to a hub that is not isolated from the stack. Note that to manage the main collision domain, the management station cannot be connected to a hub that is isolated from the stack collision domain because it must communicate with the management agent on the Hub-12TXM.
HP Hub-12TX/Hub-12TXM Installation and Reference Guide Interconnecting Isolated Collision Domains Isolated collision domains within a stacked system can be combined into an interconnected network using the Switch Port Modules. For example, you can connect all of the different collision domains in the stack using several Switch Port Modules as shown below. Each Switch Port Module serves as a bridge between isolated collision domains in the stack.
HP Hub-12TX/Hub-12TXM Installation and Reference Guide Connecting Remote Stacks Fiber optic cable provides an advantage for inter-stack connections because it can be connected over greater distances. This enables multiple stacks in remote locations to be connected. The Hub-12TX/Hub-12TXM stacks can be connected by using the fiber port on the 100FX Switch Port Module.
HP Hub-12TX/Hub-12TXM Installation and Reference Guide Connecting to the Extended Network The stack can be connected to the extended network by attaching the Hub-12TX/Hub-12TXM to a device such as an HP AdvanceStack switch. The following figure shows a direct connection from a stacked hub’s MDI port to a 100Base-TX switch which is serving as a collapsed network backbone. Figure 3.
Chapter 4: Configuring the System Making the Connections Required for System Configuration The AdvanceStack Hub-12TX/Hub-12TXM provides a menudriven VT-100 console interface. This can be accessed by making a connection to the Console Port on the front of the hub (using a terminal or a computer running a terminal emulation program).
HP Hub-12TX/Hub-12TXM Installation and Reference Guide Direct Connection The Hub-12TX does not include a management agent. Configuration options for this model are therefore limited to direct connection only. Moreover, configuration via the Console Port on this model is limited to this hub only (i.e., the attached stack cannot be managed with this model).
HP Hub-12TX/Hub-12TXM Installation and Reference Guide Local Network Connection If you want to use HP AdvanceStack Assistant to discover the Hub-12TX/Hub-12TXM system, then first set up your Network Management Station (NMS). The NMS is the personal computer used to run your network management software. HP provides Windows and Unix-based network management through software called HP AdvanceStack Assistant. This Windows software comes with the hubs as part of the product offering.
HP Hub-12TX/Hub-12TXM Installation and Reference Guide Configuring the Remote Site At the remote site, connect the PC’s COM port (COM 1~4) to the modem’s serial port. Set terminal emulation type to VT-100, specify the port used by your PC (i.e., COM 1~4), and then set communications to 8 data bits, 1 stop bit, no parity, and 9600 bps. Also be sure you set the flow control to “none.
HP Hub-12TX/Hub-12TXM Installation and Reference Guide Configuring Your System You can configure the AdvanceStack Hub-12TX/Hub-12TXM using the VT-100 console interface. On-board configuration requires a terminal or a computer running a terminal emulation program as your working platform. There are three valid connection types to the hub: • Out of band connection The workstation, normally within the vicinity of the hub, is directly connected to the Console Port on the Hub-12TX/ Hub12-TXM.
HP Hub-12TX/Hub-12TXM Installation and Reference Guide From a Telnet connection Telnet into the target hub using its assigned IP address. From a remote modem connection Use a VT-100 terminal emulation package to connect to the Com port that is attached to the modem. Configure the connection for 9600 baud, 8 data bits, no parity bits, and 1 stop bit. Then dial in to the hub. If the screen is blank, press the key several times until the login screen appears.
HP Hub-12TX/Hub-12TXM Installation and Reference Guide Using the VT-100 Console Interface The Hub-12TX and Hub-12TXM both provide a menu-driven VT-100 console interface. The VT-100 console interface differs for the Hub-12TX and the Hub-12TXM. The connection types allowed and options provided are summarized below: • The Hub-12TX is designed as a manageable hub, without an on-board SNMP agent. Therefore, when an SNMP agent (i.e.
HP Hub-12TX/Hub-12TXM Installation and Reference Guide ************************************************** * HP J3234A AdvanceStack 100Base-T Hub-12TX * ************************************************** Hub Status ---------Hub ID : Isolate : 1 NO -------------------------------------------------* Command Menu * *------------------------------------------------* * c = Change password * * i = Change isolation status * * e = Set Exp slot port status * * h = Set Hub ID * * s = Save changed value(s) * * q = Ex
HP Hub-12TX/Hub-12TXM Installation and Reference Guide Configuring the Switch Port Module To configure the Switch Port Module, press “e”. The following menu will be displayed.
HP Hub-12TX/Hub-12TXM Installation and Reference Guide System Configuration for the Hub-12TXM and Stack With this interface you can define system parameters, manage and control stacked hubs and associated ports, and monitor network conditions. Set up a VT-100 console connection to the hub, and enter a user name and password. The default user names are “admin” (read/write access) or “guest” (read only access). No password is configured for the default configuration.
HP Hub-12TX/Hub-12TXM Installation and Reference Guide Field System Information System Configuration Statistics Download Console Security Connectivity Test Reboot Hub Exit Description Identifies the system. Network parameters, SNMP agent, hub, port and backup links configuration menus Displays for network, hub and port performance information Download new firmware by TFTP (network) or Xmodem (Console Port) Defines password for administrator and guest.
HP Hub-12TX/Hub-12TXM Installation and Reference Guide Menu items are briefly described in the following table. Field System Description System Object ID System Up Time System Name Contact Location Description Model name of the hub unit Object identifier as defined in MIB II Length of time the Hub-12TXM management agent has been running Name assigned to the hub system Contact person for the system Specifies area or location where the system resides Table 4.
HP Hub-12TX/Hub-12TXM Installation and Reference Guide Menu items are briefly described in the following table. Field Network Configuration SNMP Configuration Hub Configuration Port Configuration Port Intrusion Control Backup Links Description Configures IP, IPX and SNMP parameters Configures communities, as well as IP and IPX trap managers. Isolates/attaches a hub to the stack; sets bootup option; and also sets protocol status for SNMP/IP and SNMP/IPX.
HP Hub-12TX/Hub-12TXM Installation and Reference Guide Menu items are briefly described in the following table. Field IP Configuration IP Address Subnet Mask Gateway IP Serial IP IP Protocol IPX Configuration IPX Frame Type Internal IPX Network IPX Protocol Update EEPROM Description The hub system may be run on SNMP protocol over UDP/IP transport protocol. In this environment, all systems on the Internet, such as network interconnection devices and management stations are assigned an IP address.
HP Hub-12TX/Hub-12TXM Installation and Reference Guide Configuring the SNMP Agent When using SNMP-based network management software, you must specify basic parameters that control access to the system. Use the SNMP Configuration menu to display the following screen parameters: HP J3233A AdvanceStack 100Base-T Hub-12TXM SNMP Configuration ------------------------Back to Previous Menu SNMP Communities ... IP Trap Receivers ... IPX Trap Receivers ... Send Authentication Fail Trap : YES Back to previous menu.
HP Hub-12TX/Hub-12TXM Installation and Reference Guide Configuring SNMP Communities Access to the hub’s on-board management agent via network management software is controlled with community strings. Use the SNMP Communities command to edit community strings and access rights as shown below: HP J3233A AdvanceStack 100Base-T Hub-12TXM SNMP Communities ------------------------Back to Previous Menu Community Name 1. 2. 3. 4. 5.
HP Hub-12TX/Hub-12TXM Installation and Reference Guide Configuring IP Trap Receivers When the hub experiences an unusual event, a message is issued to all listed network managers. Networks compliant with Internet Protocol (IP) can pass trap messages to IP Trap Receivers as shown below: HP J3233A AdvanceStack 100Base-T Hub-12TXM IP Trap Receivers -----------------------Back to Previous Menu IP Address 1. 2. 3. 4. 5. 6. 7. 8. 9. 10. 0.0.0.0 0.0.0.0 0.0.0.0 0.0.0.0 0.0.0.0 0.0.0.0 0.0.0.0 0.0.0.0 0.0.0.0 0.
HP Hub-12TX/Hub-12TXM Installation and Reference Guide Configuring IPX Trap Receivers When the hub experiences an unusual event, a message is issued to all listed network managers. Networks compliant with Internetwork Packet Exchange (NetWare IPX) protocol can pass trap messages to IPX Trap Receivers as shown below: HP J3233A AdvanceStack 100Base-T Hub-12TXM IPX Trap Receivers -----------------------Back to Previous Menu IPX Address 1. 2. 3. 4. 5. 6. 7. 8. 9. 10.
HP Hub-12TX/Hub-12TXM Installation and Reference Guide Configuring Hub Parameters Select Hub Configuration under the System Configuration menu to configure any hub in the stack. This menu is used to configure the hub and SNMP agent. Use the following menu to select the required hub, or to change the numeric identifier for any hub in stack. HP J3233A AdvanceStack 100Base-T Hub-12TXM Hub Configuration ----------------------------------------Back to Previous Menu Hub 1 Configuration ... Hub 2 Configuration ..
HP Hub-12TX/Hub-12TXM Installation and Reference Guide Hub Configuration To configure a hub, select it from the list shown above. The following Hub Configuration menu will appear, allowing you set parameters for the base hub unit and the SNMP agent for a Hub-12TXM. HP J3233A AdvanceStack 100Base-T Hub-12TXM Hub Configuration ----------------------------------------Back to Previous Menu Hub ID Name Type Isolated : 1 : : J3233A-002 : NO Position H/W Ver F/W Ver : 1 : 0 : 1.00 H/W Ver F/W Ver : 4 : 1.
HP Hub-12TX/Hub-12TXM Installation and Reference Guide Entity SNMP Agent Field Bootup Option Description Specifies bootup method as NORMAL - Use on-board ROM code and default IP address. TFTP DOWNLOAD - Get system code from TFTP server (and use default IP address). This process is repeated each time power to the hub is reset. BOOTP GET IP - Get IP address from server (and use on-board ROM code). BOOTP DOWNLOAD - Get IP address and system code from server. Image is stored in temporary memory.
HP Hub-12TX/Hub-12TXM Installation and Reference Guide Configuring Port Parameters Select Port Configuration under the System Configuration menu to configure the ports for any hub in the stack. Select the port type for the required hub from the following menu.
HP Hub-12TX/Hub-12TXM Installation and Reference Guide HP J3233A AdvanceStack 100Base-T Hub-12TXM Port Configuration -----------------------------Back to Previous Menu Hub ID : Port ID 1. 2. 3. 4. 5. 6. 7. 8. 9. 10. 11. 12.
HP Hub-12TX/Hub-12TXM Installation and Reference Guide HP J3233A AdvanceStack 100 Base-TX Hub-12TXM Exp Slot Port Configuration ------------------------------Hub ID : Back to Previous Menu Position : 1 1 Name : Type : 100BASE-TX Link State : DOWN Speed : 10M Admin Status Duplex Mode : ENABLED : AUTO NEGOTIATION Oper Status : ENABLED Duplex In Use : NEGOTIATED HALF-DUPLEX Back Pressure : DISABLED Forwarding Mode : STORE AND FORWARD Forwarding In Use : STORE AND FORWARD Back to previous menu.
HP Hub-12TX/Hub-12TXM Installation and Reference Guide Port Intrusion Control Select Port Intrusion Control on the System Configuration menu to restrict access for any port to an authorized source address. Select the required hub from the following menu. HP J3233A AdvanceStack 100Base-T Hub-12TXM Port Intrusion Control ------------------------------Back to Previous Menu Hub 1 Ports Intrusion Control ... Hub 2 Ports Intrusion Control ... Hub 3 Ports Intrusion Control ... Hub 4 Ports Intrusion Control ...
HP Hub-12TX/Hub-12TXM Installation and Reference Guide Menu items are briefly described in the following table. Field Hub ID Position Port ID Authorized MAC Address Intrusion Action Description Hub identifier within the stack. The physical position in the stack (as determined by its position from the top of the Stacking Cable). Selects any station port (1~12) on the hub. Defines the MAC address that is authorized to attach to this port.
HP Hub-12TX/Hub-12TXM Installation and Reference Guide Menu items are briefly described in the following table. Field Set Primary Port Hub Port Backup Port Hub Port Port Backup Status Description Identifier for up to 10 backup port pairs. Pair member serving as the primary link. Hub ID for the master port. Port identifier for the master port. Pair member serving as the backup link. Hub ID for the backup port. Port identifier for the backup port. Each backup pair can be set to Enabled or Disabled.
HP Hub-12TX/Hub-12TXM Installation and Reference Guide Menu items are described in the following table. Field Stack Statistics Hub Statistics Port Statistics Description Displays network performance for the whole stack. Displays network performance for each hub. Displays network performance for each port. Table 4.16 Statistics Menu Stack Statistics From the Statistics menu select Stack Statistics to access this information. An example menu is shown below.
HP Hub-12TX/Hub-12TXM Installation and Reference Guide Displayed items are briefly described in the following table. Field Frames Bytes Collisions Alignment Errors CRC Errors Total Errors Symbol Errors Description Number of frames passing through the stack. Number of bytes passing through the stack. Number of simultaneous node transmissions detected by the stack. Number of mis-synchronized data packets detected by the stack. Number of Ethernet Cyclic Redundancy Check errors detected by the stack.
HP Hub-12TX/Hub-12TXM Installation and Reference Guide errors), you should take appropriate measures to resolve the problem. Screen statistics are not automatically refreshed from the agent. Select Refresh Statistics to update the displayed values. HP J3233A AdvanceStack 100Base-T Hub-12TXM Hub Statistics -------------------------Back to Previous Menu The values displayed have been accumulated since the last system reboot.
HP Hub-12TX/Hub-12TXM Installation and Reference Guide Port Statistics Displays statistics for any port in the stack. Select the required port from the following menu.
HP Hub-12TX/Hub-12TXM Installation and Reference Guide HP J3233A AdvanceStack 100Base-T Hub-12TXM Screen statistics are not automatically refreshed from the agent. Select Refresh Statistics to update the displayed values. Port Statistics --------------------------Back to Previous Menu The values displayed have been accumulated since the last system reboot.
HP Hub-12TX/Hub-12TXM Installation and Reference Guide Statistics for Switch Port Module Statistics for the Switch Port Module include the basic Ethernet variables shown below. HP J3233A AdvanceStack 100Base-T Hub-12TXM Screen statistics are not automatically refreshed from the agent. Select Refresh Statistics to update the displayed values. Exp Slot Statistics ----------------------------Back to Previous Menu The values displayed have been accumulated since the last system reboot.
HP Hub-12TX/Hub-12TXM Installation and Reference Guide Downloading System Software Select Download from the Main menu to download new firmware updates into the hub. You may upgrade firmware from a server attached to the local network via TFTP, or remotely via a serial link using Xmodem. An example of this menu is shown below. HP J3233A AdvanceStack 100Base-T Hub-12TXM Download ------------------------Back to Previous Menu TFTP Download ... Xmodem Download ... Back to previous menu.
HP Hub-12TX/Hub-12TXM Installation and Reference Guide agent will not accept it. Also be sure that you have already set the required bootup option for the target hub under the Hub Configuration menu. Download status is indicated by messages at the bottom of the screen. Firmware is first loaded into a temporary buffer. If you selected download for permanent use, it will then be transferred to nonvolatile memory.
HP Hub-12TX/Hub-12TXM Installation and Reference Guide Xmodem Download Enter Xmodem Download under the Download menu to download firmware to the hub. The Xmodem protocol is used to transfer binary files over a PC connection (i.e., using terminal emulation or modem access software). Specify the download mode and select Start Download. Open the file transfer utility in your terminal emulation or modem access program, specify the filename, and then start file transfer.
HP Hub-12TX/Hub-12TXM Installation and Reference Guide HP J3233A AdvanceStack 100Base-T Hub-12TXM Xmodem Download ----------------------Back to Previous Menu Download Mode : TEMPORARY Start Download Back to previous menu. to confirm, to back to Main Menu Figure 4.29 Xmodem Download Menu Menu items are briefly described in the following table. Field Download Mode Start Download Description You can upload to permanent flash ROM or temporary storage in RAM (for test purposes only).
HP Hub-12TX/Hub-12TXM Installation and Reference Guide The Console Security menu is shown below. HP J3233A AdvanceStack 100Base-T Hub-12TXM Console Security ------------------------Back to Previous Menu User Passwords User Type Admin : Guest : User Name Password admin guest Console Timeout Status Delay Time : ON : 10 Minutes Back to previous menu. to confirm, to back to Main Menu Figure 4.30 Console Security Menu Menu items are briefly described in the following table.
HP Hub-12TX/Hub-12TXM Installation and Reference Guide Connectivity Test Use the Connectivity Test menu to perform checks on the connection between the Hub-12TXM and another designated device on the network. There is an IP and IPX Ping Test, plus a Link Test. For the Link Test, the designated device is identified by its MAC address, and for the Ping test it is identified by its network (IP or IPX) address. Packets are sent from the Hub-12TXM to the designated device which then returns a reply.
HP Hub-12TX/Hub-12TXM Installation and Reference Guide HP J3233A AdvanceStack 100Base-T Hub-12TXM IP Ping Test -----------------------------Back to Previous Menu Destination Station Address : 0.0.0.0 Number of Repetitions (1-65535) : 0 Timeout in Seconds (1-100) : 0 Successes : Failures : 0 0 Start Test Stop Test Back to previous menu. to confirm, to back to Main Menu Figure 4.32 IP Ping Test Menu Menu items are briefly described in the following table.
HP Hub-12TX/Hub-12TXM Installation and Reference Guide The IPX Ping Test menu is shown below. HP J3233A AdvanceStack 100Base-T Hub-12TXM IPX Ping Test -----------------------------Back to Previous Menu Destination Station Address : 00000000:000000-000000 Number of Repetitions (1-65535) : 0 Timeout in Seconds (1-100) : 0 Successes : Failures : 0 0 Start Test Stop Test Back to previous menu. to confirm, to back to Main Menu Figure 4.
HP Hub-12TX/Hub-12TXM Installation and Reference Guide The Link Test menu is shown below. HP J3233A AdvanceStack 100Base-T Hub-12TXM Link Test -----------------------------Back to Previous Menu Destination Station Address : 000000-000000 Number of Repetitions (1-65535) : 0 Timeout in Seconds (1-100) : 0 Successes : Failures : 0 0 Start Test Stop Test Back to previous menu. to confirm, to back to Main Menu Figure 4.
HP Hub-12TX/Hub-12TXM Installation and Reference Guide Rebooting the Hub Use the Reboot Hub command under the Main Menu to reset the agent and all devices managed by the agent. The hardware configuration for the agent and system tests are displayed on the VT-100 console, similar to the messages shown in the following example.
Chapter 5: Hardware Reference Before connecting any network device to this hub, please review Chapter 2 for information on system installation, Chapter 3 for a brief look at common network architectures, and Chapter 4 for information on system configuration via the menu-driven VT-100 console interface. This chapter describes the hardware features of the AdvanceStack Hub-12TX/Hub12TXM.
HP Hub-12TX/Hub-12TXM Installation and Reference Guide Indicator Panel The front panel includes comprehensive indicators for monitoring the hub. It displays the status of the network connections for each port, the hub’s connection to the stack, and the status of each on-board SNMP agent. A quick glance can provide critical information, such as if a problem exists on the network. The following sections describe the function of each indicator. Figure 5.
HP Hub-12TX/Hub-12TXM Installation and Reference Guide There are two optional Switch Port Modules as described under Connecting to a Switch Port Module in Chapter 2. The indicators provided with each module are described below. Figure 5.3 HP J3247A for 100Base-TX Figure 5.4 HP J3248A for 100Base-FX LED Color 1001 Green FDX Green Col Yellow State ON OFF ON OFF BLINKING Link Tx Green Green ON BLINKING Rx Green BLINKING Indication Port is set at 100Mbit/s. Port is set at 10Mbit/s.
HP Hub-12TX/Hub-12TXM Installation and Reference Guide Managed Color: Function: Green Indicates a valid connection between hub and agent LED State Indication Hub-12TX Indication Hub-12TXM ON Hub has a valid connection with an Hub Agent is active. Agent through the Stacking Port. OFF Hub is in a standalone N/A configuration, or does not have a valid connection to an Agent. BLINKING Hub Agent has failed. Table 5.
HP Hub-12TX/Hub-12TXM Installation and Reference Guide Console Color: Function: Green Indicates a connection to a management console LED Activity ON Indication Agent has a valid RS-232 serial port, or Telnet connection to a management console and a user is logged in. No user is logged in via a management console connection. OFF Table 5.
HP Hub-12TX/Hub-12TXM Installation and Reference Guide For example, if network utilization reaches 1%, the LED labeled 1 will light. However, if network utilization rises above 1% (e.g., 30%), the LED labeled 30 and all the other LEDs before it (i.e., 1, 5, and 15) will light in rapid succession. These LEDs monitor the share of valid network frames transmitted by the stack (or this hub, if isolated) within a 100Mbit/s bandwidth.
HP Hub-12TX/Hub-12TXM Installation and Reference Guide F When more than 64 consecutive collisions occur on the cable segment connected to a port, that port is automatically partitioned by the hub. The hub automatically reconnects this port when a data packet longer than 512 bits (normal) is transmitted or received by the partitioned port without collision. This applies to all STP station ports and the cascade port. Port Status Indicators There are 12 pairs of port status indicators.
HP Hub-12TX/Hub-12TXM Installation and Reference Guide traffic passing through the port. The network manager can easily determine the activity on a port by viewing this LED. Partition/Disable Color: Function: Yellow Indicates port has been partitioned due to network error or intentionally disabled. State ON Condition Indication Partitioned Indicates port has been partitioned due to an abnormal network condition. OFF OK Port is in good condition.
HP Hub-12TX/Hub-12TXM Installation and Reference Guide Diagnostic Test Indicators After power on, the hub automatically performs a diagnostic test of hardware components. The diagnostic tests display results for the Hub-12TX/Hub-12TXM repeater board via the Partition/Disable LEDs on the front panel. Test results for the Hub12TXM management agent can only be seen via the VT-100 console interface. The following table shows how test results for the repeater board are indicated by the Partition/Disable LEDs.
HP Hub-12TX/Hub-12TXM Installation and Reference Guide Network Connections The front panel on the Hub-12TX/Hub-12TXM provides the following network options: • Connections to end-node devices using RJ-45 station ports. • Cascaded connection to a compatible switch or router using the cascade port. • Extended network connection using the Switch Port Modules for 10/100Base-TX or 100Base-FX. Station Ports The hub has 12 RJ-45 station ports that can be used to connect end-node devices (e.g.
HP Hub-12TX/Hub-12TXM Installation and Reference Guide program, you can access the Hub-12TX/Hub-12TXM VT-100 console interface. This console interface can be used to configure the attached hub or stack, and to upgrade system firmware. Complete details on how to set up a connection to the serial port and how to use the VT-100 console interface are included in Chapter 4. Note: Configuration options provided for the Hub-12TX are limited because this model does not include an agent.
HP Hub-12TX/Hub-12TXM Installation and Reference Guide Rear Panel Components The rear panel is similar for both models. The figure below shows the rear panel, which includes a power socket and two Stacking Ports used for stacking up to five hubs. For easier management and control of the hub, familiarize yourself with the ports and power socket provided on the rear panel of the hub. Figure 5.5 Rear Panel Power Socket The power socket accepts AC power from 100 to 240V at 50 to 60 Hz.
HP Hub-12TX/Hub-12TXM Installation and Reference Guide Stacking Ports The unit has two Stacking Ports labeled In and Out for combining the hub with other compatible hubs to form a single hub stack (up to a maximum of five hubs). The Stacking Cable that comes with this package is used specifically for these ports. Only hubs connected through the In and Out Stacking Ports can be managed by a network management agent (Hub-12TXM).
Appendix A: Troubleshooting Diagnosing Hub Indicators The AdvanceStack Hub-12TX/Hub-12TXM can be easily monitored through its comprehensive panel indicators. These indicators assist the network manager in identifying problems the hub may encounter. This section describes common problems you may encounter and possible solutions. Symptom: Link indicator does not light up (green) after making a connection. Network interface (e.g., a LAN adapter on the attached device), network cable, or hub port is defective.
HP Hub-12TX/Hub-12TXM Installation and Reference Guide functioning properly. If any component fails the diagnostic test, contact your HP-authorized reseller for assistance. System Diagnostics Power and Cooling Problems If the Power indicator does not turn on when the power cord is plugged in, you may have a problem with the power outlet, power cord, or internal power supply as explained in the previous section.
HP Hub-12TX/Hub-12TXM Installation and Reference Guide and plugging it back in again, or by resetting the power), the port will try to reestablish communications with the attached device via auto-negotiation. If auto-negotiation fails, then communications are set to half duplex by default. Based on this type of industry-standard connection policy, if you are using a full-duplex device that does not support auto-negotiation, communications can be easily lost (i.e.
HP Hub-12TX/Hub-12TXM Installation and Reference Guide Physical Configuration If problems occur after altering the network configuration, restore the original connections, and try to track the problem down by implementing the new changes, one step at a time. Ensure that cable distances and other physical aspects of the installation do not exceed 100Base-TX specifications (refer to Chapter 2). System Integrity As a last resort verify the hub’s integrity with a power-on reset.
Appendix B: Pin Assignments RJ-45 Port Hub Figure B.1 RJ-45 Connector (on the Hub Side) Cable RJ-45 station ports (MDI-X) can be attached to any devices that use a standard network interface (e.g., a workstation, server or router). RJ-45 cascade ports (MDI) can be cascaded to a station port on similar networking devices (e.g., another switch or router).
HP Hub-12TX/Hub12-TXM Installation and Reference Guide DB9 Serial Port Pin Description The DB9 serial port on the front panel is used to connect the hub to a management device. The VT-100 console interface can be accessed from a terminal, a PC running a terminal emulation program, or from a remote location via a modem connection.
HP Hub-12TX/Hub12-TXM Installation and Reference Guide Hub’s 9-Pin Serial Port to PC’s 9-Pin COM Port Hub’s 9-Pin Serial Port 1 DCD 2 RXD 3 TXD 4 DTR 5 SGND 6 DSR 7 RTS 8 CTS 9 RI Cable Wiring PC’s 9-Pin COM Port 1 DCD 2 RXD 3 TXD 4 DTR 5 SGND 6 DSR 7 RTS 8 CTS 9 RI Table B.
HP Hub-12TX/Hub12-TXM Installation and Reference Guide Hub’s 9-Pin Serial Port to PC’s 25-Pin DTE Port Hub’s 9-Pin Serial Port 1 DCD 2 RXD 3 TXD 4 DTR 5 SGND 6 DSR 7 RTS 8 CTS 9 RI Cable Wiring PC’s 25-Pin DTE Port 4 RTS 3 TXD 2 RXD 6 DSR 7 SGND 20 DTR 5 CTS 8 DCD 22 RI Table B.
HP Hub-12TX/Hub12-TXM Installation and Reference Guide Hub’s 9-Pin Serial Port to Modem’s 25-Pin DCE Port Hub’s 9-Pin Serial Port 1 2 3 4 5 6 7 8 9 Modem’s 25-Pin DCE Port < ---------- DCD ---------< ---------- RXD --------------------- TXD -------- > ------------ DTR -------- > ----------- SGND --------< ---------- DSR --------------------- RTS -------- > < --------- CTS ----------< ----------- RI ------------ 8 3 2 20 7 6 4 5 22 Table B.
Appendix C: Modem Configuration Before installing the modems (one attached to the hub’s console port and one attached at the user end to a terminal or PC), configure them by connecting, one at a time, to a PC or terminal and issuing the appropriate AT command. Then install the modems in the appropriate locations, one connected to the Hub-12TXM and one connected to a PC or terminal.
HP Hub-12TX/Hub-12TXM Installation and Reference Guide Practical Peripherals PM288MT II V.
Appendix D: Product Specifications Product Specifications Hub Board Access Method Standards Conformance Communication Rate Communication Mode Media Supported Number of Ports Configuration Indicator Panel Microprocessor Fault Tolerance Dimensions Power Requirements Temperature Humidity Certification Emissions Immunity Safety Product Specifications CSMA/CD, 100 Mbit/s IEEE 802.
HP Hub-12TX/Hub-12TXM Installation and Reference Guide Hub Stack Expansion Expansion Interface Configuration Isolation Up to 5 modules (60 ports) Stacking Cable Automatic hub-ID and bus termination Supports hub isolation from the stack Switching Port Access Method Standards Conformance Communication Rate CSMA/CD, 100 Mbit/s IEEE 802.
Appendix E: Safety and Regulatory Statements This chapter covers the following topics: ■ mounting precautions ■ power precautions ■ safety and regulatory statements Mounting Precautions When you put a hub into a rack, follow these mounting precautions: • The rack or cabinet should be adequately secured to prevent it from becoming unstable and/or falling over.
HP Hub-12TX/Hub-12TXM Installation and Reference Guide Power Precautions Follow these precautions when unplugging and plugging in power to the hub. Caution If your installation requires a different power cord than the one supplied with the hub, be sure to use a power cord displaying the mark of the safety agency that defines the regulations for power cords in your country. The mark is your assurance that the power cord can be used safely with the hub.
HP Hub-12TX/Hub-12TXM Installation and Reference Guide Safety Information Documentation reference symbol. If the product is marked with this symbol, refer to the product documentation to get more information about the product. WARNING A WARNING in the manual denotes a hazard that can cause injury or death. CAUTION A CAUTION in the manual denotes a hazard that can damage equipment.
HP Hub-12TX/Hub-12TXM Installation and Reference Guide Informations concernant la sécurité Symbole de référence à la documentation. Si le produit est marqué de ce symbole, reportez-vous à la documentation du produit afin d'obtenir des informations plus détaillées. WARNING Dans la documentation, un WARNING indique un danger susceptible d'entraîner des dommages corporels ou la mort. CAUTION Un texte de mise en garde intitulé CAUTION indique un danger susceptible de causer des dommages à l'équipement.
HP Hub-12TX/Hub-12TXM Installation and Reference Guide Hinweise zur Sicherheit Symbol für Dokumentationsverweis. Wenn das Produkt mit diesem Symbol markiert ist, schlagen Sie bitte in der Produktdokumentation nach, um mehr Informationen über das Produkt zu erhalten. WARNING Symbol für Dokumentationsverweis. Wenn das Produkt mit diesem Symbol markiert ist, schlagen Sie bitte in der Produktdokumentation nach, um mehr Informationen über das Produkt zu erhalten. CAUTION Symbol für Dokumentationsverweis.
HP Hub-12TX/Hub-12TXM Installation and Reference Guide Considerazioni sulla sicurezza Simbolo di riferimento alla documentazione. Se il prodotto è contrassegnato da questo simbolo, fare riferimento alla documentazione sul prodotto per ulteriori informazioni su di esso. WARNING La dicitura WARNINGdenota un pericolo che può causare lesioni o morte. CAUTION La dicituraCAUTION denota un pericolo che può danneggiare le attrezzature.
HP Hub-12TX/Hub-12TXM Installation and Reference Guide Consideraciones sobre seguridad Símbolo de referencia a la documentación. Si el producto va marcado con este símbolo, consultar la documentación del producto a fin de obtener mayor información sobre el producto. WARNING Una WARNING en la documentación señala un riesgo que podría resultar en lesiones o la muerte. CAUTION Una CAUTION en la documentación señala un riesgo que podría resultar en averías al equipo.
HP Hub-12TX/Hub-12TXM Installation and Reference Guide Safety Information (Japanese) E-8 Safety and Regulatory Statements
HP Hub-12TX/Hub-12TXM Installation and Reference Guide Safety Information (Chinese) Safety and Regulatory Statements E-9
HP Hub-12TX/Hub-12TXM Installation and Reference Guide Regulatory Statements FCC Class A Statement (for U.S.A. Only) This equipment has been tested and found to comply with the limits for a Class A digital device, pursuant to Part 15 of the FCC Rules. These limits are designed to provide reasonable protection against harmful interference when the equipment is operated in a commercial environment.
HP Hub-12TX/Hub-12TXM Installation and Reference Guide European Community This equipment complies with ISO/IEC Guide 22 and EN55022 Class A with unshielded cables and EN55022 Class B with shielded cables. Note: With unshielded cables this is a Class A product. In a domestic environment, this product may cause radio interference, in which case the user may be required to take adequate measures. Canada This product complies with Class A Canadian EMC requirements.
Appendix F: Product Support Services Hewlett-Packard offers support through the use of automated electronic services including: • World Wide Web • HP Network Phone-In Support (NPS) • HP FIRST FAX Retrieval Service World Wide Web http://www.hp.com/go/network_city From this web site you can view information about HP’s complete networking product line.
HP Hub-12TX/Hub-12TXM Installation and Reference Guide To access HP FIRST, dial one of the following phone numbers: Location Phone Number U.S. and Canada Only Dial 1 (800) 333-1917 with your fax machine or touch-tone phone and press 1. Dial 1 (208) 344-4809 from your fax machine and press 9. To receive a list of currently available documents, enter document number 19941. The information you requested will be sent to you by return fax. Outside the U.S.
Glossary 100Base-TX IEEE’s specifications for 100Mbit/s Ethernet using 2-pairs of Category 5 twisted-pair cable. The Hub-12TX/Hub-12TXM models require 100W STP or UTP cable. 100Base-FX IEEE’s specifications for 100Mbit/s Ethernet using multimode fiber optic cable. The 100FX Switch Port Module must be used to support fiber optic cable with SC-type connectors. BOOTP Boostrap protocol used to load the operating system for devices connected to the network.
HP Hub-12TX/Hub-12TXM Installation and Reference Guide Ethernet A network communication system developed and standardized by DEC, Intel, and Xerox, using baseband transmission, CSMA/CD access, logical bus topology, and coaxial cable. The successor IEEE 802.3 standard provides for integration into the OSI model and extends the physical layer and media with repeaters and implementations that operate on fiber optics, baseband, and twisted-pair.
HP Hub-12TX/Hub-12TXM Installation and Reference Guide MDI Port (Medium Dependent Interface) MDI is the IEEE standard for the twisted-pair interface to 10Base-T (or 100Base-TX) . This RJ-45 port can be used with straight-through cable to connect the hub to a network interconnection device, such a switch. Pin-out assignments are shown in Appendix B.
HP Hub-12TX/Hub-12TXM Installation and Reference Guide SNMP (Simple Network Management Protocol) The application protocol offering network management services in the Internet suite of protocols. Stacking Ports SCSI ports found at the back of the Hub-12TX/Hub-12TXM labeled In and Out. These ports are used for linking the hub to other compatible hubs using HP’s Stacking Cable. Star Topology Physical connections for RJ-45 ports are limited to a star configuration (i.e.
Index A Accessing the VT-100 Console Interface • 4-5 Applications Connecting Remote Stacks • 3-11 Connecting to the Extended Network • 3-12 Extending the Network with Alternate Connections • 3-8 Interconnecting Isolated Collision Domains • 3-10 Isolating Multiple Hubs • 3-7 Isolating Specific Hub Connections • 3-6 Linking the Stack to a Management Station • 3-9 B Backup Links • 3-4 Backup Port Parameters • 4-26 Bridging Functions • 2-10 Bytes • 4-29 C Cascade Port • 5-11 Changing User Passwords • 4-37 Col
HP Hub-12TX/Hub-12TXM Installation and Reference Guide Switch Port Module • 5-2 Tx • 5-3 Utilization • 5-5 Installation Mounting Hubs in a Rack • 2-3 Stacking Hubs without a Rack • 2-2 Installing a Switch Port Module • 2-7 Installing an SNMP Backup Agent • 2-13 Installing the System • 2-1 Interhub • 5-3 IP Trap Receivers • 4-17 IPX Trap Receivers • 4-18 Isolation Architecture • 3-1 F Filtering Packets • 1-9 Flash ROM • 4-35 Forwarding Packets • 1-9 H Hardware Installation • 2-1 Hardware Reference • 5-1 Ho
HP Hub-12TX/Hub-12TXM Installation and Reference Guide Partition • 4-23, 5-8 Passwords Changing • 4-35 Pin Assignments Console Port • B-2 Crossover Cable • B-1 Hub’s 9-Pin Serial Port to Modem’s 25-Pin DCE Port • B-5 Hub’s 9-Pin Serial Port to PC’s 25-Pin DTE Port • B-4 Hub’s 9-Pin Serial Port to PC’s 9-Pin COM Port • B-3 RJ-45 Port • B-1 Port Attachment 10/100BASE-TX • 2-7 100BASE-FX • 2-7 Port Backup • 3-4 Port Intrusion Control • 4-25 Port Parameters • 4-22 Port Statistics • 4-31 Port Status Verifying •
HP Hub-12TX/Hub-12TXM Installation and Reference Guide System Configuration • 4-12 Making the Connections for • 4-1 System Configuration Options Direct Connection • 4-2 Local Network Connection • 4-3 Local Network Telnet Connection • 4-2 Network Connection • 4-2 Remote Connection • 4-3 System Information • 4-11 System Operation Verifying • 2-14 System Statistics Alignment Errors • 4-29, 4-30, 4-32 Auto Partitions • 4-32 Collisions • 4-29, 4-30, 4-32 CRC Errors • 4-29, 4-30 Data Rate Mismatch • 4-32 FCS Erro
HP Software Product License Agreement Attention: Use of the software is subject to the HP software license terms documented below. Using the software indicates your acceptance of these terms. If you do not accept these terms, you may return the software and the products with which the software is supplied for a full refund. Hewlett-Packard Software License Terms The following Terms govern your use of the Software unless you have a separate written agreement with HewlettPackard (HP).
HP J3233A HP J3234A HP J3247A HP J3248A E0697-R01 5966-5120