
Field Replaceable Units (FRU) Guide, HP Advanced and Extended Services zl Modules 2011-11


Table Of Contents
6
Hardware Replacement Procedures
HDD Replacement Procedure
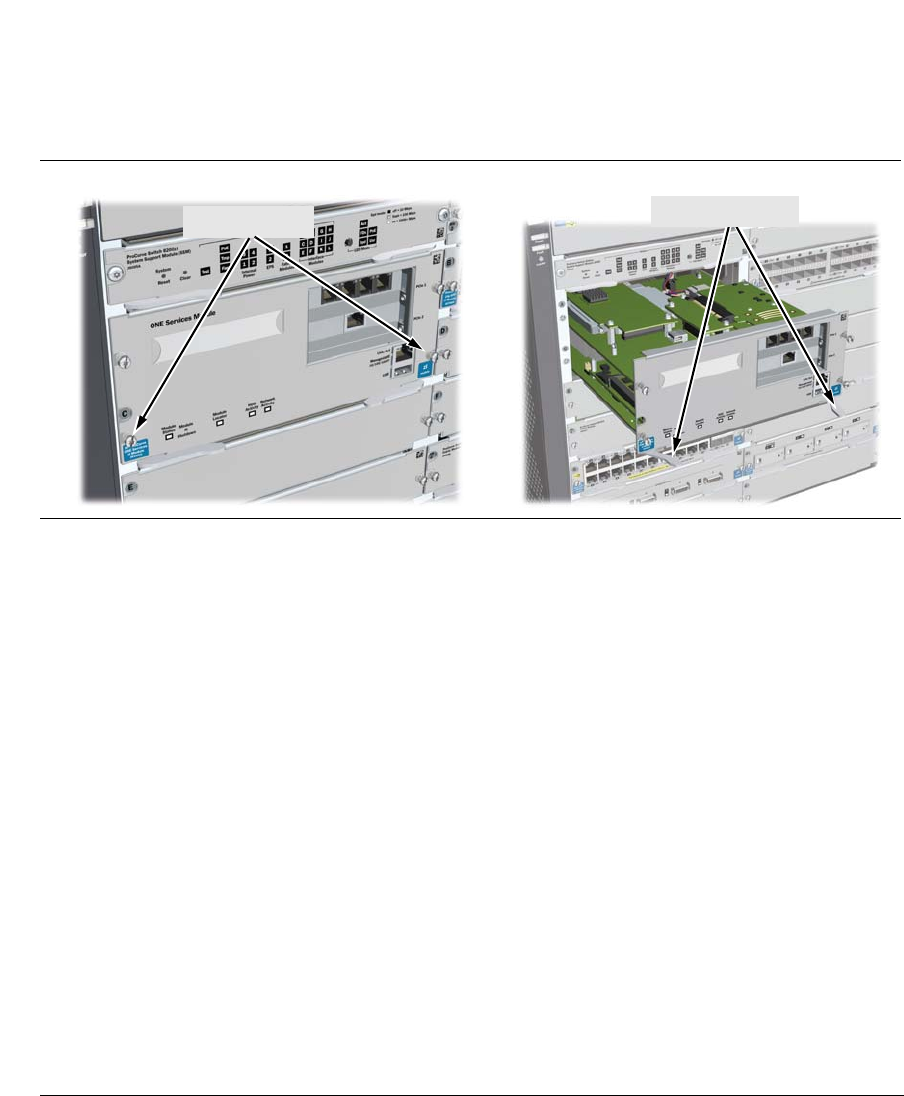
1. Using either a flat-bladed or Torx T-10 screwdriver loosen the retaining
screws securing the module.
2. Using the extractor handl
es, pull the module out from the slot(s). Avoid
touching any of the components or circuitry on any of the boards.
1.
Retaining Screws
2.
Extractor Handles
Figure 4a. Steps for Replacing the Module’s Disk Drive(s)
At this point an HDD located on the Uppe
r Deck is accessible. To access the
HDD on the Lower Deck, turn the module over. In the meantime, if the chassis
is still operational, use slot cover(s) to cover the slot(s) that are emptied by
the removal of the module, to ensure proper switch cooling.
Note:
The illustrations show an HDD on the Lower Deck, but the replacement
procedures for an HDD on the Upper Deck are essentially identical.
3. Using a Cross Recess Type 1 No.1 (Phi
llips tip) screwdriver remove the
four retaining screws holding the HDD.