
Getting Started Guide 2007-07


10
Getting Started
Step 2 - Boot up the system.
1. For zl switch LED indications during boot up, refer to the zl switch
Installation and Getting Started Guide supplied with the switch. When
the switch completes self-test, the Power LED stays on, and the Fault,
Locator, and Test LEDs are off.
2. The port LEDs on the switch modules go through their self-test.
After self-test, if a port is connected to an active network device, its Link
LED stays on and its Mode LED behaves according to the mode selected.
In the default mode (Activity), the Mode LED should flicker showing
network activity on the port.
If the ports are not connected to active network devices, the LEDs will
remain off.
3. On the Module, the Locate Ports and LED Mode LEDs initially turn on. The
Module Status LED will turn initially turn on (red) to start the bootup
process, and then will turn off.
After self-test and bootup have successfully completed, the Module Status
LED will turn on (green), and the LED Mode LEDs may flicker showing
activity on the Uplink and Downlink ports.
4. On a Radio Port, both LEDs blink about once every 5 seconds, indicating
that the Radio Port is adopted and ready for use.
For details on the LEDs behavior of the radio ports, refer to the Radio Port
Installation and Getting Started Guide for the respective models (210,
220, and 230).
Step 3 - Determine Module IP address.
The Module IP address is set automatically by a DHCP server or by a manual
setting via CLI commands.
1. By default, the Module obtains an IP address from a DHCP server. These
DHCP services may be provided from a network provider or from a local
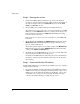
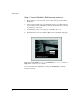
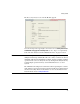
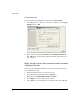
DHCP server. To determine the IP address of the Module, connect a PC
or terminal to the console port on the ProCurve zl Switch and open a
console session. The following is a sample start up screen.