
HP ProCurve Threat Management Solution Implementation Guide 2009-05

3-38
HP ProCurve Network Immunity Manager with a Third-Party IDS/IPS
Step 2: Detect Threats
Subtask: Configure Detection Options
You can configure detection options and actions to control how the Cisco 4200 Series Sensor
detects malicious traffic on your network and responds to it. You can configure three types of
options:
■ Signature definitions—Signatures are templates that describe malicious behavior on
the network, such as the behavior of viruses and other malware, and define responses to
those behaviors. If a packet matches a signature, the sensor responds with the defined
action. You can use signature definitions as they are, or you can modify them to better suit
your needs.
■ Event action rules—These rules shape the action the sensor takes when an event occurs.
■ Anomaly detections—Anomalies are departures from normal behavior. Anomaly detec-
tion allows the sensor to infer events when there is no signature for comparison.
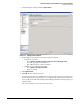
To set detection parameters, complete the following steps:
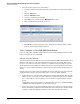
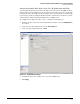
1. Click Configuration in the toolbar.
1. At the bottom of the navigation bar, click the Policies tab to display the policy configuration
options.
2. Determine if you will use the default policies or create new policies.
The sensor comes with default policies for signature definitions, event action rules, and
anomaly detections. These policies are named sig0, rules0, and ad0, respectively.
You might want to create a custom policy if you want to alter a copy of the default policy
while leaving the original policy undisturbed.
If you want to edit the default policies, continue with step 4. If you want to create a new
policy, continue with the next step.
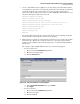
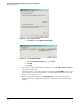
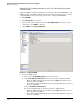
3. Create a custom policy:
a. In the navigation bar, select the type of policy you want to create: Signature Definitions,
Event Action Rules, or Anomaly Detections.
b. In the right pane, click Add. An Add Policy window is displayed.
c. Type a name for the new policy.