
HP ProCurve Threat Management Solution Implementation Guide 2009-05

3-68
HP ProCurve Network Immunity Manager with a Third-Party IDS/IPS
Step 2: Detect Threats
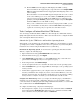
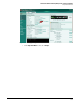
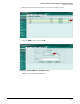
Figure 3-68. Interface View Showing SNMP Enabled
6. Repeat these steps for each interface you will connect to the network. If you change your
network topology and reconfigure the ports on the UTM device, remember to enable SNMP
for any interfaces you add.
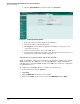
You can test your communications setup by checking to see whether PCM+ discovers the UTM
device. Complete the following steps:
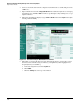
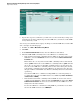
1. In PCM+, click Tools > Manual Discovery Wizard.
2. Click Next.
3. In the Enter Device Information window, enter the UTM device’s IP address.
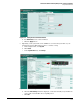
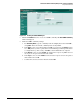
4. Match the PCM+ SNMP community name to the UTM device’s community name:
• If the default read and write community names in PCM+ are the same as those in the
UTM device, leave the Use Defaults check box selected in the Device Communication
Parameters line.
This would be the case if you have left the PCM+ community names at their default
values of public and have also set the UTM device community names to public. It would
also be the case if you have set the PCM+ community names to specific values and
have also set the UTM device community names to those same values. (Note that the
read and write community names for the UTM device are always the same; therefore,
this option will not work if PCM+ uses different community names for read and write
operations.)
Note that the UTM device communicates using SNMP v2, so either the primary or
secondary discovery version for PCM+ must be set to SNMP v2 (in Tools > Preferences
> Device Access > SNMP).
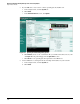
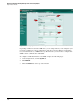
• If the default read and write community names in PCM+ are not the same as those
configured on the UTM device, make sure that the Use Defaults check box in the Device
Communication Parameters line is not selected. You will enter the UTM device’s com-
munity names in another window.
Because the UTM device communicates using SNMP v2, you will also need to make
sure that the SNMP version is set to SNMPv1/v2.