
HP ProCurve Threat Management Solution Implementation Guide 2009-05

3-92
HP ProCurve Network Immunity Manager with a Third-Party IDS/IPS
Step 2: Detect Threats
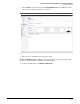
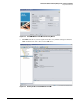
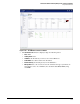
4. In the Configure SNMP window that is displayed, configure:
• Get Community Name: public
• Trap Community Name: public
• Host 1: the IP address of the server running PCM+
Figure 3-97. Configuring SNMP Parameters
5. Click OK.
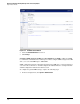
6. Click Accept at the top of the System > Administration window.
PCM+ and your UTM device should now be able to communicate. To test communications
with PCM+:
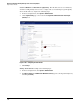
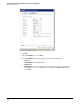
1. In PCM+, click Tools > Manual Discovery Wizard.
2. Click Next.
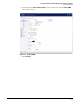
3. In the Enter Device Information window, type the UTM device’s IP address.
4. The SNMP community names in PCM+ must match those you configured in the UTM
device.
• If the default read and write community names in PCM+ match those you configured
in the device, leave selected the Use Defaults check box in the Device Communication
Parameters line.
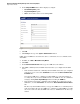
Note that the UTM device communicates using SNMP v2, so either the primary or
secondary discovery version for PCM+ must be set to SNMP v2. You can confirm this
setting by clicking Tools > Agent Manager and then clicking the SNMP tab.
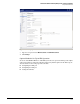
• If the default read and write community names in PCM+ do not match those in the
UTM device, clear the Use Defaults check box in the Device Communication Parameters
line.
The discovery wizard will then allow you to type the UTM device’s community names
in the next window. Because the UTM device communicates using SNMP v2, you will
also need to make sure that the SNMP version is set to “SNMPv1/v2” in the discovery
wizard.