
HP ProCurve Threat Management Solution Implementation Guide 2009-05


3-114
HP ProCurve Network Immunity Manager with a Third-Party IDS/IPS
Step 2: Detect Threats
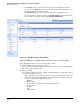
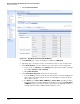
2. Click Create Security Profile.
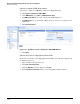
Figure 3-122. TippingPoint Create Security Profile Window
3. For Profile Name, type a name. For example, you might type NIM-related.
4. Optionally, type a description to help you remember the purpose of the security profile.
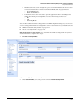
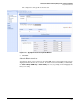
5. Under Virtual Segments, select the traffic that you want to protect this security profile.
a. Select at least one Incoming and one Outgoing virtual segment. For example, you might
select 1A for Incoming and 1B for Outgoing.
b. Click Add to table below.
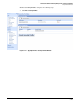
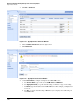
6. Under Profile Details (Advanced), edit the subcategory settings.
a. Leave the Enable option selected for the subcategories that you want the TippingPoint
IPS to apply to the virtual segments you selected. For highest security, leave all the
subcategories enabled.
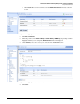
b. For Actions, select Permit + Notify + SNMP Trap or Permit + Notify, depending on which
TippingPoint IPS you are using. (TippingPoint 210E does not offer the Permit + Notify
+ SNMP Trap option.) Selecting one of these options allows the TippingPoint IPS to
forward suspicious traffic to NIM for further analysis or action.