
HP ProCurve Threat Management Solution Implementation Guide 2009-05

4-68
HP ProCurve Network Immunity Manager with HP ProCurve Security Devices
Step 2: Detect Threats
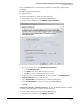
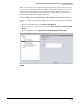
3. When the Welcome window is displayed, click Next.
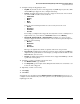
Figure 4-47. PCM+ Signatures Wizard (for TMS zl Module)
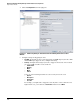
4. Scroll through the list to view the signatures the IPS uses. Notice that each threat is
assigned one of the following threat levels:
• Critical
• Severe
•Minor
• Warning
• Information
In the next section, you will configure an action for each threat level.
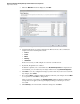
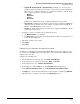
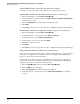
5. By default, all signatures are enabled.
To disable a signature, select it and then select Disable IPS Signatures. If a signature has
been disabled, you can enable it by selecting it and then selecting Enable IPS Signatures.
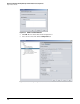
6. Click Next to save any configuration changes you have made. If you do not need to make
any changes, click Cancel.
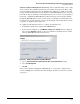
7. If you clicked Next, a summary window is displayed. Review your changes and click Next
to accept them or click Back to change them.
After you approve your changes, the Applying Settings window is displayed. When the
changes have been applied, a message is displayed telling you that the process was
successful.
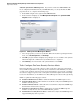
8. Click Summary to view the details of what was changed or click Close.