
HP Survivable Branch Communication zl Module powered by Microsoft Lync Planning and Design Guide 2011-02

4-89
Example Solutions
Solution
35. To finish the PSTN Wizard, close the window using the X in the top right
corner of the window.
36. Once the Media Gateway is running, connect your PSTN interface or
interfaces to the carrier equipment. Use the standard cables specified for
your card (refer to the installation guide for that card).
Important On a T1/E1 card with multiple interfaces, the card uses the clock signal from
the first interface (Port 1) to support echo cancellation. If this interface does
not have an active T1/E1 circuit, the echo canceller uses a free-run clock that
is not synchronized with the other T1/E1 interfaces. The echo canceller might
not work properly, degrading the audio quality.
The interfaces on the cards are numbered from left to right. Therefore, to
ensure high audio quality, always connect the left interface first. If you want
multiple connections, you can then select any other interfaces.
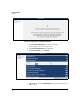
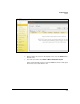
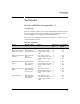
37. Next check the channel status to verify that the PSTN circuits are up and
ready for calls. In the PSTN Configuration page, click Channel Status.
Figure 4-82. Setup Wizard—PSTN Line Status Page
Because you have connected your interfaces to the PSTN, the channels for
your lines should be blue and marked I (for Idle).
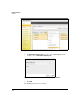
38. Click the X in the top right corner to return to the PSTN Configuration page.
39. In this solution, you are connecting a data device (such as a fax machine
or modem) to an FXS port.
Note A FAX Sync cable must be installed, physically connecting the E1/T1 card to
the analog card.
Follow these steps:
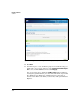
a. Under Advanced, click PSTN Configuration.