
HP VPN Firewall Appliances Attack Protection Configuration Guide


23
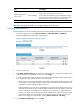
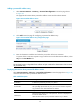
Task Remarks
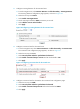
3. Adding a protected IP address
entry
At least one method is required.
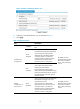
You can add protected IP address entries by either of the methods:
• Static—Add entries manually. By default, no such entries are
configured in the system.
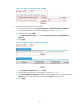
• Dynamic—Select Intrusion Detection > Traffic Abnormality > SYN
Flood, and then select the Add protected IP entry to TCP Proxy check
box. After the configuration, the TCP proxy-enabled device
automatically adds protected IP address entries when detecting SYN
flood attacks. For more information, see "Configuring traffic
ab
normalit
y detection."
You can configure a maximum of 256 protected IP addresses for each
security zone through Web.
4. Configure to automatically
add a protected IP address
entry
5. Displaying information about
protected IP address entries
Optional.
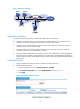
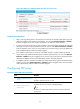
Performing global TCP proxy setting
1. From the navigation tree, select Intrusion Detection > TCP Proxy > TCP Proxy Configuration to enter
the page shown in Figure 25.
2. In the Global Configuration area, select Unidirection or Bidirection for TCP proxy.
3. Clic
k Apply.
Figure 25 TCP proxy configuration
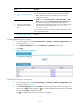
Enabling TCP Proxy for a security zone
1. From the navigation tree, select Intrusion Detection > TCP Proxy > TCP Proxy Configuration to enter
the page as shown in Figure 25.
2. In the Zone Configuration area, click Enable to enable the TCP pro
xy feature for a target zone.
The icon in the Status column changes to , which indicates that the TCP proxy feature is enabled.
You can click Disable to disable the feature.
The icon indicates that the TCP proxy feature is disabled.