
HP VPN Firewall Appliances VPN Configuration Guide


47
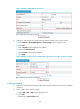
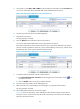
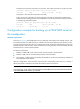
Figure 52 Verifying the configuration result on Firewall A (3)
Configuring a P2MP GRE tunnel at the CLI
Configuring a P2MP GRE tunnel
Follow these guidelines when you configure a P2MP GRE tunnel:
• Two or more P2MP GRE tunnel interfaces cannot share the same source address.
• If you specify a source interface for a P2MP GRE tunnel interface, the tunnel interface takes the
primary IP address of the source interface as its source address.
• You can enable or disable the checksum function at both ends of the tunnel.
{ If checksum is enabled at the local end but not at the remote end, the local end calculates the
checksum of a packet to be sent but does not check the checksum of a received packet.
{ If the checksum function is enabled at the remote end but not at the local end, the local end
checks the checksum of a received packet but does not calculate the checksum of a packet to be
sent.
• When configuring a route through the tunnel, you are not allowed to set up a static route whose
destination address is in the subnet of the tunnel interface. Instead, you can do one of the following:
{ Configure a static route, using the address of the subnet that the original packet is destined for
as its destination address and the address of the peer tunnel interface as its next hop.
{ Enable a dynamic routing protocol on both the tunnel interface and the firewall interface
connecting the private network, so that the dynamic routing protocol can establish a routing
entry that allows the tunnel to forward packets through the tunnel.
Configuration prerequisites
On each of the peer devices, configure an IP address for the interface to be used as the source interface
of the tunnel interface (for example, a VLAN interface, an Ethernet interface, or a loopback interface),
and make sure that this interface can communicate with the interface used as the source interface of the
tunnel interface on the peer device correctly.
Configuration procedure
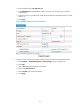
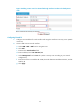
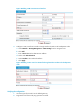
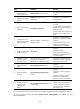
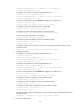
To configure a P2MP GRE tunnel:
Ste
p
Command
Remarks
1. Enter system view.
system-view N/A