HP SECBLADEIII-CMW520-R3819P05 Release Notes © Copyright 2014 Hewlett-Packard Development Company, L.P. The information contained herein is subject to change without notice. The only warranties for HP products and services are set forth in the express warranty statements accompanying such products and services. Nothing herein should be construed as constituting an additional warranty. HP shall not be liable for technical or editorial errors or omissions contained herein.
Contents Version information ·················································································································1 Version number··························································································································1 Version history ····························································································································1 Hardware and software compatibility matrix ·············································
List of Tables Table 1 Version history ................................................................................................................................... 1 Table 2 HP SecBlade product family matrix.............................................................................................. 1 Table 3 Hardware and software compatibility matrix ............................................................................ 2 Table 4 MIB updates ...................................................
This document describes the features, restrictions and guidelines, open problems, and workarounds for version R3819P05. Before you use this version in a live network, back up the configuration and test the version to avoid software upgrade affecting your live network. Use this document in conjunction with the documents listed in "Related documentation." Version information Version number HP SecBlade FW Enhanced Comware software, Version 5.
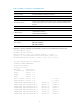
Table 3 Hardware and software compatibility matrix Item Specifications Product family HP/H3C SecBlade FW Enhanced series Memory 16 GB Flash 4 MB BootWare version Version 1.20 or higher (Note: Execute the command display version command in any view to view the version information. Please see Note 2) System software SECBLADEIII-CMW520-R3819P05.
Upgrading restrictions and guidelines None. Hardware feature updates None. Software feature and command updates None. MIB updates Table 4 MIB updates Item MIB file Module Description SECBLADEIII-CMW520-R3819P05 New Modified SECBLADEIII-CMW520-R3819P01 New Modified SECBLADEIII-CMW520-R3819 New / / / Modified / / / Operation changes None. Restrictions and cautions 1. USB is not supported. 2. The Web interface can display a maximum of 5000 sessions.
Condition: This symptom occurs if the Layer-3 subinterface or Layer-3 aggregate subinterface are created before the two cards enter synchronization state. Workaround: Configure the two cards to enter synchronization state, and then create the Layer-3 subinterface or Layer-3 aggregate subinterface.
Resolved problems in R3819 201308300271 Symptom: A PC running Win7 obtains an incorrect DNS server address from the DHCP server on the SecBlade card. Condition: This symptom occurs if multiple DHCP address pools are configured, and the PC's MAC address is bound to a static address pool on the SecBlade card. 201308290004 Symptom: The SecBlade card unexpectedly reboots during a CRL acquisition operation.
201306190471 Symptom: After traffic matches NAT444 rules on an interface, the SecBlade card does not create NAT444 entries for the traffic. Condition: This symptom might occur if the interface has two NAT444 rules that each reference an ACL. The two ACLs specify a common source IP address but different destination IP addresses.
HP VPN Firewall Appliances Command References-6PW101 Obtaining documentation To find related documents, browse to the Manuals page of the HP Business Support Center website: http://www.hp.com/support/manuals Contacting HP For worldwide technical support information, see the HP support website: http://www.hp.
Appendix A Feature list Hardware features Table 5 SecBlade FW series hardware features SecBladeIII SecBladeIII (10500/11900/7500) (12500) Dimensions (H × W × D) 40.1 × 399.2 × 376.8 mm (1.58 × 15.72 × 14.83 in) 40.1 × 399.2 × 498.8 mm (1.58 × 15.72 × 19.64 in) Weight 3.9 kg (8.60 lb) 4.8 kg (10.58 lb) Max.
Category Features Packet filter Access control based on security zones Time-based access control ASPF Firewall Virtual firewall Anti-DoS/DDoS URL Filter Static and dynamic blacklist P2P HTTP/SMTP/POP3/FTP/Telnet packet content filtering Attack log Blacklist log Security management Session log Binary format log Traffic measurement and analysis Security events statistics Address pool ACL-based NAT Easy IP NAT NAT Server NAT with ALG, including FTP, DNS, QQ, MSN, H323, NBT, ILS, RTSP, SQLNET, SIP, and RS
Category Features Static routing RIP-1/RIP-2 IP routing OSPF BGP Policy-based routing ICMPv6 TCP6 UDP6 RAWIP6 Ping6 Basic protocol DNS6 TraceRT6 Telnet6 FIB6 DHCPv6 client DHCPv6 relay RIPng OSPFv3 IPv6 BGP4+ Routing & Multicast Static routing Policy-based routing PIM-SM PIM-DM NAT-PT IPv6 tunneling IPv6 packet filter Security RADIUS DS-Lite IPv6 ASPF IPv6 ALG (ICMP6, FTP) IPv6 security policy group VRRP VRRP Session failover High availability Stateful failover IPSec failover Asymmetric path C
Category Features Console AUX Telnet, SSH, FTP, and TFTP Command line interfaces Command level configuration Detailed debug information Tracert and ping Configuration management Log and file management User interface Web Login and authentication Web configuration SNMPv3/v1/v2C NTP 11
Appendix B Upgrading software The following matrix shows the HP 20Gbps VPN Firewall Module and hosting device compatibility: 20Gbps VPN Firewall Module Hosting device LSU1FWCEA0 10500 switches 11900 switches 7500 switches LST1FW3A1 12500 switches The software upgrade procedure is the same for both vpn firewall modules. This chapter uses the LST1FW3A1 module installed in an 12508 to describe how to upgrade software from the CLI, Web interface, and BootWare menus.
Upgrade methods To upgrade system software, use one of the following methods: Upgrading system software from the CLI Upgrading system software from the Web interface Upgrading system software from BootWare menus To upgrade the BootWare, use either of the following methods: Upgrading the BootWare from the CLI Upgrading the BootWare from BootWare menus You must reboot the firewall module after a system software or BootWare upgrade. A device reboot interrupts services.
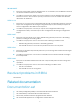
Figure 1 Setting up the upgrade environment Ethernet cable TFTP/FTP Server Console cable Upgrading system software Upgrading system software from the CLI You can use TFTP or FTP on the firewall module to access the TFTP or FTP server to back up or download software files for software upgrades. Using TFTP to upgrade system software 1. Back up the system software image and configuration files: a. Use the save command in any view to save the running configuration to the .cfg startup configuration file.
Directory of cfa0:/ 0 -rw- 19790016 Apr 26 2000 12:12:22 main.bin 1 -rw- 5230 Apr 26 2000 13:03:28 system.xml 2 -rw- 957 Apr 26 2000 13:03:30 startup.cfg 3 drw- - Apr 26 2000 12:00:02 logfile 4 -rw- 891 Apr 26 2000 12:00:00 default_ca.cer 5 -rw- 1411 Apr 26 2000 12:00:00 default_local.cer 6 drw- - Apr 26 2000 12:00:04 seclog 252164 KB total (213314 KB free) File system type of cfa0: FAT32 c. Use the tftp put command in user view to upload main.
File will be transferred in binary mode Downloading file from remote TFTP server, please wait...\ TFTP: 23446448 bytes sent in 66 second(s). File downloaded successfully. b. Use the boot-loader command in user view to specify fw_card.bin as the main startup image file. boot-loader file fw_card.bin main This command will set the boot file. Continue? [Y/N]:y The specified file will be used as the main boot file at the next reboot on slot 0! c.
[FIXED PORT] GE0/2(Hardware)Ver.A, (Driver)1.0, (Cpld)3.0 [FIXED PORT] XGE0/1(Hardware)Ver.A, (Driver)1.0, (Cpld)3.0 [FIXED PORT] XGE0/2(Hardware)Ver.A, (Driver)1.0, (Cpld)3.0 Using FTP to upgrade system software 1. Back up the startup system software image and configuration files: a. Use the save command in any view to save the running configuration to the .cfg startup configuration file. save The current configuration will be written to the device.
d. Use the put command in FTP client view to upload main.bin to the FTP server. [ftp] put main.bin 227 Entering passive mode (192,168,0,2,26,0) 125 Using existing data connection 226 Closing data connection; File transfer successful. FTP: 19790016 byte(s) sent in 14.605 second(s), 1355.00Kbyte(s)/sec. [ftp] e. Use the put command in FTP client view to upload startup.cfg and system.xml to the FTP server. [ftp] put startup.
d. Use the display boot-loader command in user view to verify that the file has been specified as the main startup system software image file. display boot-loader The boot file used this time:cfa0:/main.bin attribute: main The boot file used next time:cfa0:/fw_card.bin attribute: main Failed to get the backup boot file used next time! Failed to get the secure boot file used next time! e. Use the reboot command in user view to reboot the firewall module.
Upgrading system software from the Web interface CAUTION: Do not perform any operation on the Web interface while the system is upgrading software. The first time you log in to the firewall module from the Web interface, you can use the default login information. After login, create a Web login account of the management level and delete the default Web login account to ensure device security. For more information, see HP VPN Firewalls Appliance Device Getting Started Guide.
Table 8 Configuration items Item Description Click Browse to set the path to the .bin system software image file. File Set the file attribute: Main—The image is the primary image. The system always attempts to load the main image at startup in preference to the backup image. File Type Backup—The image is the backup image. It is used only if the primary image is corrupted or not available. 7.
cfa0 Size : 247MB CPLD_A Version : 1.0 CPLD_B Version : 3.0 CPLD_C Version : 1.0 PCB Version : Ver.A BootWare Validating... Press Ctrl+B to enter extended boot menu... 2. Press Ctrl+B at the prompt. The following message appears: BootWare password: Not required. Please press Enter to continue. 3. Press Enter to access the EXTEND-BOOTWARE menu. Password recovery capability is enabled. Note: The current operating device is cfa0 Enter < Storage Device Operation > to select device.
Item Description Restore the factory defaults. <5> Restore to Factory Default Configuration This option is available only if password recovery capability is disabled. CAUTION: Use this option with caution. This option will delete the current configuration file and restarts the firewall module with the factory configuration. Start the firewall module with the factory default configuration.
Table 10 Ethernet submenu options Item Description Download a system software image to the SDRAM through the Ethernet port and run the image. <1> Download Application Program To SDRAM And Run 2. This option is available only if password recovery capability is enabled. <2> Update Main Application File Upgrade the main system software image. <3> Update Backup Application File Upgrade the backup system software image. <4> Update Secure Application File Upgrade the secure system software image.
Field Gateway IP Address 3. Description Set a gateway IP address if the firewall module is on a different network from the server. Choose an option from options 1 to 4 in the Ethernet submenu. For example, to upgrade the main system software image, enter 2. Loading..................................................................... ............................................................................ .........................Done! 31911744 bytes downloaded! Updating File cfa0:/main.bin...........
Table 12 Serial submenu options Item Description <1> Download Application Program To SDRAM And Run 2. Download a system software image to the SDRAM through the serial port and run the image. This option is available only if password recovery capability is enabled. <2> Update Main Application File Upgrade the main system software image. <3> Update Backup Application File Upgrade the backup system software image. <4> Update Secure Application File Upgrade the secure system software image.
Figure 4 Setting firewall module properties 6. Select 115200 from the Bits per second list, and click OK.
7. Select Call > Call to reestablish the connection. Figure 6 Reestablishing the connection 8. Press Enter in the BootWare interface.
Figure 7 File transmission dialog box 12. Click Send. Figure 8 File transfer progress 13. When the Serial submenu appears after the file transfer is complete, enter 0 at the prompt to return to the EXTEND-BOOTWARE menu. Download successfully! 19790016 bytes downloaded! Input the File Name:main.bin Updating File cfa0:/main.bin.............................................. .....................................................
|<5> Modify Serial Interface Parameter | |<0> Exit To Main Menu | ============================================================================ Enter your choice(0-5): 14. Enter 1 in the EXTEND-BOOTWARE menu to boot the system. 15. If you are using a download rate other than 9600 bps, change the baud rate of the terminal to 9600 bps. If the baud rate has been set to 9600 bps, skip this step. Upgrading the BootWare You can upgrade the BootWare from the CLI or BootWare menus.
|<2> Restore Full BootWare | |<3> Update BootWare By Serial | |<4> Update BootWare By Ethernet | |<0> Exit To Main Menu | ============================================================================ Enter your choice(0-4): Table 13 BootWare operation submenu options Item Description <1> Backup Full BootWare Back up the entire BootWare. <2> Restore Full BootWare Restore the entire BootWare. <3> Update BootWare By Serial Upgrade the BootWare through the serial port.
: Server IP Address :192.168.0.2 Local IP Address :192.168.0.1 Gateway IP Address :0.0.0.0 For more information about the fields, see Table 11 . 4. To upgrade the entire BootWare, enter 1 on the Ethernet submenu.
Item Description Upgrade the basic section of the BootWare. <3> Update Basic BootWare 2. <4> Modify Serial Interface Parameter Modify Serial port settings. <0> Exit To Main Menu Return to the BootWare menu. Enter 1 to upgrade the entire BootWare. Please Start To Transfer File, Press To Exit. Waiting ...CCCCCCCCCCCCCCCCCCCCCCCCC... 3. In the HyperTerminal window, select Transfer > Send File.
Updating Extend BootWare...........Done! ======================================== |<1> Update Full BootWare | |<2> Update Extend BootWare | |<3> Update Basic BootWare | |<4> Modify Serial Interface Parameter | |<0> Exit To Main Menu | ============================================================================ Enter your choice(0-4): 5.
============================================================================ ============================================================== |Note:the operating device is cfa0 | |<1> Display All File(s) | |<2> Set Application File type | |<3> Delete File | |<0> Exit To Main Menu | ============================================================================ Enter your choice(0-3): Changing the attribute of a system software image System software image file attributes include main (M),
Deleting files When storage space is insufficient, you can delete files to free up storage space. To delete files: 1. Enter 3 in the File Control submenu. Deleting the file in cfa0: 'M' = MAIN 'B' = BACKUP 'S' = SECURE 'N/A' = NOT ASSIGNED ============================================================================ |NO. Size(B) Time Type Name 6819 Feb/03/2012 10:39:24 N/A |2 207865 Dec/07/2011 17:43:38 N/A cfa0:/logfile/~/logfile.log | |3 1271 Feb/03/2012 10:39:26 M+B cfa0:/startup.