
Management and Configuration Guide (Includes ACM xl) 2005-12


4-34 ProCurve Secure Access 700wl Series Management and Configuration Guide
Configuring Rights
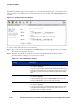
The Edit Time Window page is almost identical to the New Time Window page, except that the name
and port selections are displayed for the Time Window you have selected, and a
Save As Copy button is
available.
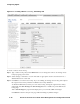
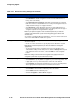
Figure 4-19. Adding a New Time Window
To create or edit a Time Window, do the following:
Step 1. Type a name for this Time Window in the Name field. You can change the name of an existing
Time Window by typing a new name.
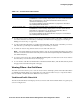
Step 2. Select the Time Window specification using the settings described in Table 4-13 below.
The Time Window settings you can select are as follows:
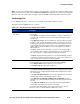
Table 4-13. New Time Window Settings
Setting Description
Valid Dates Specify a Time Window by calendar dates:
• The default is Any date
• To specify a range of dates, click the From radio button and then select
the beginning and ending dates using the drop-down fields. To specify a
single date, select the same value for both the beginning and ending
dates.
Valid Days Specify a Time Window by days of the week:
• The default is Any day
• To specify particular days, click the Selected days radio button, then
check the individual days of the week you want to include.
Valid Times • Specify a Time Window by hours of the day:
• The default is Any time
• To specify a range of time, click the From radio button and then select
the beginning and ending times using the drop-down fields. You can
specify the range in 5-minute increments.