HP ProCurve PCM+ Agent with ONE zl Module Installation and Getting Started Guide
© Copyright 2009 Hewlett-Packard Development Company, L.P. The information contained herein is subject to change without notice. All Rights Reserved. This document contains proprietary information, which is protected by copyright. No part of this document may be photocopied, reproduced, or translated into another language without the prior written consent of HewlettPackard.
Contents Getting Started Introduction . . . . . . . . . . . . . . . . . . . . . . . . . . . . . . . . . . . . . . . . . . . . . . . . . . . 1-1 Overview . . . . . . . . . . . . . . . . . . . . . . . . . . . . . . . . . . . . . . . . . . . . . . . . . . . . . . 1-1 Deploying PCM+ Agents . . . . . . . . . . . . . . . . . . . . . . . . . . . . . . . . . . . . . . 1-2 Initiating Communication . . . . . . . . . . . . . . . . . . . . . . . . . . . . . . . . . . . . 1-2 Setup . . . . . . . . . . . . . . . . . . .
Contents Configuring a Server-Initiated Connection . . . . . . . . . . . . . . . . . . . . . Connecting to the PCM+ Agent Module . . . . . . . . . . . . . . . . . . . . Managing the Private Network . . . . . . . . . . . . . . . . . . . . . . . . . . . . . . . PConfiguring the Agent to Enable a Proxy . . . . . . . . . . . . . . . . . . 1-32 1-33 1-33 1-33 Using the Application Menu Interface Introduction . . . . . . . . . . . . . . . . . . . . . . . . . . . . . . . . . . . . . . . . . . . . . . . . . . .
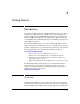
1 Getting Started Introduction The audience for this document is network administrators who need to deploy an HP ProCurve Manager Plus 3.10 (PCM+) remote Agent, using the HP ProCurve PCM+ Agent with ONE zl Module (J9496A) or by loading the HP ProCurve PCM+ Agent Application on an HP ProCurve Open Network Ecosystem (ONE) Services zl Module (J9289A), and establishing communication with a PCM+ 3.10 Server. The network administrator is expected to be familiar with PCM+ 3.10 and Agent operation.
Getting Started Overview with ONE zl Module (J9496A) ships with the HP ProCurve PCM+ Agent Application pre-installed on a ProCurve ONE Services zl Module. If you already have a ProCurve ONE Services zl Module, you install the HP ProCurve PCM+ Agent Application to run on it. In this guide, a ProCurve ONE Services zl Module running the HP ProCurve PCM+ Agent Application is referred to as a PCM+ Agent Module. Deploying PCM+ Agents Starting with PCM+ 3.
Getting Started Setup NOTE A PCM+ 3.10 Server will support any combination of Server-initiated and Agent-initiated connections. Remote Agents that initiate the connection must all use the same port, encryption type, and server password. The “Example PCM+ Agent Module Deployment” on page 1-27, shows a remote Agent communicating through a firewall to a PCM+ 3.10 Server. A Client outside the firewall can manage devices behind the firewall using a proxy configured on the PCM+ Agent Module.
Getting Started Setup NOTE The PCM+ Agent Application supports the following Web browsers: ■ Microsoft Internet Explorer 6.0 sp1 ■ Microsoft Internet Explorer 7 ■ Microsoft Internet Explorer 8 ■ Mozilla Firefox 3.5 Verifying the Switch Software Version Before you begin the installation process, you should check the host switch software and ensure that it is running a version that supports the ONE Services zl Module and HP ProCurve PCM+ Agent Application.
Getting Started Setup Services OS Context and Product OS Context The HP ProCurve PCM+ Agent Application is just one of the applications that you can purchase and install on a ONE Services zl Module.The ONE Services zl Module is designed to support a variety applications for your network. (For a list of supported applications, see http://www.procurve.com/one/applications/index.htm.) Only one application can be installed and activated at one time.
Getting Started Setup The ONE Services zl Module supports a variety of applications—although only one application can be running at a time. If a single ONE Services zl Module is installed in the switch, the application is assigned index number 2. If multiple ONE Services zl Modules are installed in the switch and they are running different applications, each application is assigned a different index number, based on the order in which the modules boot.
Getting Started Setup For example, if you want to enter the Services OS for a module that is installed in slot C, enter: hostswitch# services c 1 or hostswitch (config)# services c 1 You are now in the Services OS context, and you should see a prompt that is similar to the following: hostswitch(services-module-C:HD)# The “HD” indicates that you are in the Services OS context and that the module is booted to the Services OS.
Getting Started Setup Verify the Services zl Module OS Version The ONE Services zl Module must be running Services OS software version 1.0.081219 or greater. To view the software version, complete the following steps: 1. From either the manager-level or the global configuration context of the host switch’s CLI, enter the following command to move to the Services OS context: hostswitch# services 1 2.
Getting Started Setup 2. On your USB drive, create the following directory: /services/images/ The USB drive requires at least 1 GB of available space. 3. NOTE Extract the image file you downloaded and copy it to the /services/images/ directory on the USB drive. Make sure you retain the compressed file’s original directory structure. If your USB drive has a directory named /images, the image will not be found by the module. Rename or delete the /images directory before continuing. 4.
Getting Started Setup Copies the entire image directory into the /mnt/part/hd_data/ images/ directory on the module’s hard disk. f. 5. Let the copy procedure complete. This might take several minutes. Confirm that the image folder was correctly copied to the hard disk by entering the following command: Syntax: show images Displays complete file names of all software images stored on the module’s hard disk. The output should show the image file you downloaded and copied from the USB drive. 6.
Getting Started Setup 10. Remove the USB drive from the module. To continue, go to “Activating the PCM+ Agent Application” on page 1-12. Using the Network to Install the Application Complete the following steps: 1. From the switch CLI, Configuration context add the PCM+ Agent Module Port 2 (2) as an untagged member of the VLAN used by the FTP server.
Getting Started Setup 5. Check the images repository to verify that the application was downloaded to the Services Module: hostswitch(services-module-C:HD)# show images ------------ Image Repository --------------1) PCM_Agent_J0000A_090803_1322 Activating the PCM+ Agent Application Before you begin to use the PCM+ Agent Module, you must activate the software by completing the following tasks. Step-by-step instructions for each task are provided in the sections that follow. 1.
Getting Started Setup 2. From the host switch’s manager-level context, enter the Services OS context: hostswitch # services 1 You should see a prompt that is similar to the following: hostswitch(services-module-C:HD)# The “HD” in the prompt indicates that the Services zl Module is booted to the Services OS. 3.
Getting Started Setup 5. Click Device Software License. Figure 1-1. Registering PCM+ Agent Application on the My ProCurve Portal 6. For Registration ID, type the product registration ID, then, click Next. 7. For Enter Hardware ID, type or copy the activation hardware ID and click Next. 8. Review the license agreement. Then select I agree to the license terms and click Next. The product license key is generated and displayed in the My Software window.
Getting Started Setup 2. Install the product license key by typing the following command: Syntax: licenses install activation Installs the product license key on the switch. Replace with the product license key that was generated when you registered PCM+ Agent Module on the My ProCurve portal.
Getting Started Setup 3. You will be returned to the host switch’s CLI. If you want to view the progress of the reboot process, enter the following commands in succession: Syntax: show services Displays the current status of the module and the version of the operating systems running on the module. Replace with the letter of the chassis slot in which the module is installed. Syntax: repeat Repeatedly executes the previous command you entered.
Getting Started Configuring PCM+ Agent Module Configuring PCM+ Agent Module To begin, a PCM+ Agent Module’s ports must be placed in the correct switch VLANs and an IP address must be assigned to the module. Configuring PCM+ Agent Module Ports Assign the PCM+ Agent Module’s two ports as untagged members of two separate VLANs: Module Port Mode VLAN requirements 1 untagged 1. Must be a different VLAN than the one used by port . VLAN 2 untagged 1.
Getting Started Configuring PCM+ Agent Module PCM+ Agent Application’s Application Main Menu is displayed: 1. 2. 3. 4. 5. 6. 0. -----------------------| HP PCM Agent Main Menu | -----------------------Configuration Diagnostics Start Agent Stop Agent Reboot Help Exit Type the number of your selection (0-6): Figure 1-2. 1. PCM+ Agent Application Application Main Menu Press 1 for Configuration and then 1 for IP Configuration.. -------------------| IP Configuration | -------------------1. DHCP 2.
Getting Started Establishing PCM+ Server Communication Confirming Network Connection to Server From the HP PCM Agent Main Menu 1. Enter 2 for Diagnostics. 2. Enter 1 for Ping. Now enter the IP address of the PCM+ Server. If you are unable to connect to the PCM+ Server, check to see that the default gateway for the switch can be accessed from the VLAN containing the PCM+ Agent Module’s port 2 as an untagged member. Default Agent Settings The following defaults are set in the Agent.
Getting Started Establishing PCM+ Server Communication tials (if the defaults are not used). For more information, see the chapter “Managing and Configuring Agents” in the HP ProCurve Manager Network Administrator's Guide Version 3.10 The PCM+ 3.10 Server does not automatically connect to remote Agents, so you must either configure the PCM+ 3.10 Server to initiate connections with the remote Agent or configure the remote Agent to initiate connections with the PCM+ 3.10 Server.
Getting Started Establishing PCM+ Server Communication • Verify that the Agent Initiates Connection check box in Agent Manager is unchecked. By default the PCM+ Agent Module is configured not to initiate a connection. • Confirm the Agent Group for this Agent. Once you activate an Agent, you cannot change its Agent Group. The screen below highlights the above settings. 2. Enter the PCM+ Agent Module’s IP address.
Getting Started Establishing PCM+ Server Communication 3. 1-22 Use the Server Setup tab to confirm the Server Password being used is procurve (the default). Use the default values for the Port (51111) and Encryption (SSL).
Getting Started Establishing PCM+ Server Communication 4. Return to the Agents tab and use the Tools button to display the Tool menu. 5. Use the Ping tool to confirm a network connection to the PCM+ Agent Module. 6. Use the Test agent credentials tool to confirm the Agent’s credentials match those on the Server. 7. Click the Discovery tab and configure the Seed Address for the Agent. 8. Use the DeviceAccess and Proxy tabs to configure the Agent, as required. 9. Activate the Agent.
Getting Started Establishing PCM+ Server Communication 10. Using the Managed Subnet tab on the Discovery tab in Agent Manager, select the subnets managed by the Agent. PCM+ Agent Module Initiated Connection Once you have assigned an IP address the PCM+ Agent Module, you can access the Agent’s Web browser interface by entering the following URL in a browser: https://:8080 where is the PCM+ Agent Module’s IP address; 8080 is the default port.
Getting Started Establishing PCM+ Server Communication connection, all remote agents must use the same port, encryption type, and server password. If you require changes to the default Server settings, make them on the Server Setup tab in Agent Manager. Note the changes you make so that you can make the same changes on the Agent’s Web browser interface’s Agent Credentials and Agent Connection pages. 2. Verify that the check box Allow new agents to connect is checked, as shown below. 3.
Getting Started Establishing PCM+ Server Communication 1-26 5. Configure the PCM+ Agent Module settings. For more information on the settings, see “Agent-initiated Connections” in the chapter “Configuring and Managing Agents” in the HP ProCurve Manager Network Administrator's Guide Version 3.10. 6. When the Agent has connected to the Server, the Agent State, displayed on the Agent Identity page, shows User activation required.
Getting Started Example PCM+ Agent Module Deployment Example PCM+ Agent Module Deployment The following example shows a PCM+ Agent Module managed through a firewall by a PCM+ 3.10 Server. The PCM+ Agent Module is in a private network, that is, a network that uses IP addresses that are “unambiguous within an enterprise, but may be ambiguous between enterprises” (see RFC 1918, Address Allocation for Private Internets (February 1996)). The PCM+ 3.
Getting Started Example PCM+ Agent Module Deployment ■ If there is a Management VLAN on the private network, the PCM Agent should be a member of the Management VLAN. Any subnets in the private network with devices to be managed by the Agent must be accessible from the Management VLAN, or the VLAB containing the Agent. ■ A subnet can be managed by only one Agent within an Agent Group.
Getting Started Example PCM+ Agent Module Deployment Example Network Configuration The logical structure of the network is presented in Figure 1-4 below. Figure 1-4. Example Network - Logical Presentation Firewall Protection: ProCurve TMS zl Module A TMS zl Module, located in switch Slot D, provides a stateful firewall for the private network. The TMS zl Module also performs network address translation (NAT). The TMS zl Module has an interface (42.167.195.22) to the public network and the PCM+ 3.
Getting Started Example PCM+ Agent Module Deployment PCM+ Agent Module Overview The PCM+ Agent Module is located in switch Slot C. Port C2 is an untagged member of VLAN 25 in the private network, a VLAN in Zone1. If the private network has a Management VLAN, port c2 should be an untagged member of that VLAN. If subnets are used in the private network it must be configured to allow communication between the PCM+ Agent Module and any devices to be managed.
Getting Started Example PCM+ Agent Module Deployment Firewall Access Policies. Traffic between the PCM+ 3.10 Server (External) and the PCM+ Agent Module (Zone1) goes through the TMS zl Module (Self). These policies allow the traffic through the firewall. External to Self Action From To Service Source Destination Permit Traffic External Self ICMP 42.167.195.21 42.167.195.23 Permit Traffic External Self TCP/Port 8080 42.167.195.21 42.167.195.
Getting Started Example PCM+ Agent Module Deployment Configuring a Server-Initiated Connection By default, both the PCM+ 3.10 Server and the Agent are set for a Serverinitiated connection. For details, refer to “PCM+ 3.10 Server Initiated Connection” on page 1-20.Access to the Agent Web browser interface is not required in a Server-initiated connection. NAT Policies. The External to Self policies NAT traffic the PCM+ 3.10 Server to the PCM+ Agent Module.
Getting Started Example PCM+ Agent Module Deployment Connecting to the PCM+ Agent Module The PCM+ 3.10 Server, outside the firewall, establishes communication with the PCM+ Agent Module, behind the firewall, using 42.167.195.23 as the IP address of the Agent. This IP address (42.167.195.23) appears in the Agent Manager as the Agent’s IP address. The Agent Web browser interface shows the Agent’s private network address.
Getting Started Example PCM+ Agent Module Deployment When configuring an Agent to use a proxy, you must configure your Web browser to use a Proxy auto-configuration file to be able to open device Web configuration pages. The file is located at: http://:8040/pac/pcm_autoproxy.pac Replace with the IP address of your PCM+ 3.10 Server. For example, if your Server is located at 42.167.133.110 you would place the following URL http://42.167.133.
2 Using the Application Menu Interface Introduction The Product OS CLI on the PCM+ Agent Module is a men-driven console application that provides configuration and management tools for the PCM+ Agent Application. This interface is primarily used for the following: ■ Configuring the PCM+ Agent Module IP address ■ Changing the PCM+ Agent Module SSH Login Password ■ Stopping and Starting the Agent ■ Diagnostic tools and Agent status information Agent configuration and management, like all PCM+ 3.
Using the Application Menu Interface Introduction The main menu appears below: 1. 2. 3. 4. 5. 6. 0. -----------------------| HP PCM Agent Main Menu | -----------------------Configuration Diagnostics Start Agent Stop Agent Reboot Help Exit Type the number of your selection (0-6): Menu Navigation Choose the sub-menu or action you wish to access by typing its number at the prompt. On each sub-menu screen, prompts are used to enter choices or required information.
Using the Application Menu Interface Introduction 1st Level Menu 2nd Level Menu Entry Name Default gateway DNS address Entry Type Standard IP notation Standard IP notation Example/Comments 10.2.10.1 192.168.22.7 0. Back to Configuration Menu 2. Erase PCM Agent Configuration Agent Password Server Password Port Encryption Type Initiate Connection are reset to default values. See “Default Agent Settings” on page 1-19. The Agent IP address is not reset.
Using the Application Menu Interface Introduction 1st Level Menu 2nd Level Menu Entry Name 3. System Information 4. Export Support Information USB TFTP 5. Show Debug Information Entry Type Standard IP notation Example/Comments Displays: JRE Version Host Name OS Type PCM Agent Version Agent IP Address Agent CPU, Memory Utilization System Memory Usage Creates a .tar file of system information that can be used by Support. USB drive must be at least 64 MB.
Using the Application Menu Interface Introduction Reboot This reloads the PCM+ Agent Module and restarts the Agent. Help Quick access to information about the sub-menus and actions available from the HP PCM Main Menu. Exit Returns to the switch CLI.
(This page intentionally left blank)
3 Troubleshooting Symptom / Solution Symptom: When I try to register the hardware ID of a module at the HP ProCurve Portal to get the activation license, the portal says Invalid hardware ID. Why could this be? Solution: Check if the switch that has the ProCurve ONE Services zl Module has firmware version K13.71 or greater. Symptom: When I try to go to the Product OS context by keying the command services c 2, I get an error that says Invalid Application.
Troubleshooting Symptom / Solution Solution: Make sure the registration ID used to get the license key from the My ProCurve portal matches the product’s registration ID. Symptom: I am able to ping the PCM+ 3.1 Server from the Agent and viceversa, but the Server is not able to connect to the Agent. Solution: 3-2 • Make sure you have selected the Use default check-box for passwords in the Agent Manager window. (If you want to use custom passwords, do so after the first connection.
Troubleshooting Symptom / Solution • Make sure the Server password in Agent manger is set to default (see below) 3-3
Troubleshooting Symptom / Solution • From the switch CLI Manager or Global Configuration context, issue the following command for a PCM+ Agent Module in slot C, services c name pcm-agent to get the HP PCM Agent Main Menu.Type 2 to access the Diagnostics menu, then another 2 to show the Connection Status. 1. 2. 3. 4. 5. 0.
Troubleshooting Symptom / Solution • Unlicensed=Unlicensed. There is no license available on the Server for this Agent (only for PCM Agents). • SYNCH_FAILED=Synchronized Failed. A fatal error occurred while synchronizing with the Server (contact your HP support representative if this continues). • Startup_failed=Startup Failed. The Agent framework cannot be started (contact HP support if this persist). • Running=Connected to Server. The Agent has connected to the PCM+ 3.
(This page intentionally left blank)
Index A activation hardware ID … 1-12 C CLI Product OS … 1-17 Services OS … 1-5 F firewall Before You Begin … 1-27 overview … 1-27 ports for PCM use … 1-28 requirements … 1-28 I Image Product … 1-7 L licenses activate … 1-12 product activate … 1-12 install … 1-14 M manage through a firewall … 1-27 O ONE Services zl Module … 1-1 access CLI … 1-6 product index number … 1-6 Services OS context … 1-5 verify switch recognizes … 1-5 OS context … 1-5 P PCM 3.
product registration ID … 1-12 S Services OS context accessing … 1-6 prompt … 1-7 version … 1-8 show images … 1-12 SSH through a firewall … 1-31 switch HP ProCurve 5400zl Series … 1-3 HP ProCurve 8200zl Series … 1-3 software version … 1-4 checking … 1-4 U USB drive mount … 1-9 preparing … 1-9 unmount … 1-10 Index – 2
HP ProCurve Datacenter Connection Manager Controller Management and Configuration Guide (This page intentionally left blank)
Technology for better business outcomes To learn more, visit www.hp.com/go/procurve/ © Copyright 2009 Hewlett-Packard Development Company, L.P. The information contained herein is subject to change without notice. The only warranties for HP products and services are set forth in the express warranty statements accompanying such products and services. Nothing herein should be construed as constituting an additional warranty.