
PCM+ Agent with ONE zl Module Installation and Getting Started Guide 2009-11

1-11
Getting Started
Setup
10. Remove the USB drive from the module.
To continue, go to “Activating the PCM+ Agent Application” on page 1-12.
Using the Network to Install the Application
Complete the following steps:
1. From the switch CLI, Configuration context add the PCM+ Agent Module
Port 2 (<slot ID>2) as an untagged member of the VLAN used by the FTP
server.
Example: If your FTP server is a member of VLAN 2 and your PCM+ Agent
Module is in switch slot C, use the following command:
hostswitch (config)# vlan 2 untagged c2
Note: PCM+ Agent Module Port 1 (<slot ID>1) must not be an untagged
member of the same VLAN as Port 2 and the FTP server.
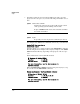
2. Access the module’s Service OS CLI:
hostswitch# services c 1
3. Assign an IP address to the module using DHCP or a static IP address:
hostswitch(services-module-C:HD)# ip dhcp
or
hostswitch(services-module-C:HD)# ip address <IP-ADDR/MASK-
LENGTH>
If necessary, use the following command to specify a default gateway:
hostswitch(services-module-C:HD)# ip default-gateway <IP-ADDR>
4. Download the PCM+ Agent Application:
hostswitch(services-module-C:HD)# download ftp <ip address>
[<path>]<image>
For example:
hostswitch(services-module-C:HD)# download ftp 192.168.10.10
PCM_Agent_J0000A_090803_1322
Syntax: download ftp <IP address> [<path>]<image>
Downloads the named image from the FTP server located at
<ip address>.to the ONE Services zl Module.