
Riverbed® Steelhead® RiOS® Application Installation and Getting Started Guide 2010-10
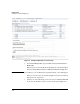
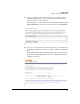
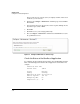
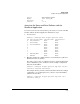
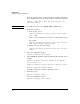
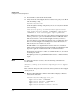
Table Of Contents
- 1: Overview
- 2: Hardware Installation
- 3: Getting Started
- Initial Configuration
- Configure the Steelhead Application
- A: EMC Regulatory Statements
- B: Waste Electrical and Electronic Equipment (WEEE) Statements
- C: Hardware Components
- D: Software Components

3-27
Getting Started
Configure the Steelhead Application
Serial: XXXYYYXXXYYYXXXYY
Model: 1050 (1050_ZM)
Revision: A
Version: 6.1.0
Associate the Zones and Zone Policies with the
Steelhead Application
You can now associate the zones and zone polices that you created on the HP
zl switch with the Steelhead Application. Follow these steps.
1. View the zones:
amnesiac (config)# show in-path procurve zones
id switch-zone-name SH-zone-name SH Interface
0 InternalZone None None
1 RouterZone None None
2 SteelheadZone None None
3 None None
4 None None
5 None None
6 None None
7 None None
8 SWITCH_SELF None None
9 BYPASS None None
2. Map the zone ID of the configured zones to a network interface. (The zone
ID is listed in the left column.)
Note that you do not have to assign the zone that contains the Extended
Services zl Module’s port to an interface. In the example configuration,
this is the SteelheadZone.
amnesiac (config)# in-path procurve map zone id <ID>
interface <network interfaces>
For example, the lan0_0 interface is the internal network. For the example
configuration, you would map the lan0_0 interface to the InternalZone,
which has the zone ID 0.
amnesiac (config)# in-path procurve map zone id 0
interface lan0_0