
ProLiant BL p-Class GbE Interconnect Switch Menu-driven Interface Reference Guide
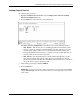
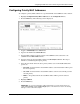
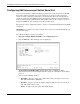
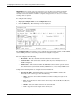
Table Of Contents
- HP ProLiant BL p-Class GbE Interconnect Switch Menu-driven Interface Reference Guide
- Notice
- Contents
- About This Guide
- Chapter 1: Overview
- Chapter 2: Configuring the GbE Interconnect Switch using the Menu-driven Interface
- Overview
- Saving Changes
- Managing User Accounts
- Configuring the Remote Management IP Interface Settings
- Displaying Basic GbE Interconnect Switch Information
- Configuring Advanced GbE Interconnect Switch Features
- Configuring Port Settings
- Configuring Bandwidth
- Configuring Spanning Tree Protocol
- Configuring Static (Destination Address) Filtering Table
- Configuring VLANs
- Configuring GVRP
- Configuring IGMP Snooping
- Configuring Port Trunking
- Configuring Port Mirroring
- Configuring Thresholds for Broadcast, Multicast, DA-Unknown Storm Prevention or Monitoring
- Configuring Class of Service, Default Port Priority, and Traffic Class
- Configuring Port Security
- Configuring Priority MAC Addresses
- Configuring GbE Interconnect Switch Serial Port
- Configuring GbE Interconnect Switch Date and Time
- Monitoring GbE Interconnect Switch Functions
- Configuring SNMP/RMON Manager
- Using System Utilities
- Rebooting the GbE Interconnect Switch
- Logging Out
- Index

Configuring the GbE Interconnect Switch using the Menu-driven Interface
— Stop Bits—Toggle to specify the number of bits that indicate when a serial word
ends. The default value is 1 bit.
— Auto-Logout—Toggle to specify the length of time a management session can be
idle. When this time has expired, the GbE Interconnect Switch management agent
will disconnect the user. The default value is 10 minutes.
— Serial Port For—Toggle to select Console or SLIP. Complete the following fields
for SLIP settings:
— Local IP Address—Type the local IP address of the SLIP connection.
— Remote IP Address—Type the remote IP address of the SLIP connection.
— MTU—Type the maximum transfer unit (MTU) that specifies the size of the
transferring IP packets. The default value is 1006.
3. After making your changes, highlight APPLY.
4. Press the Enter key.
IMPORTANT: To save the configuration settings permanently, you must enter them into NVRAM
using the Save Changes option on the main menu. Refer to the “Saving Changes” section earlier
in this chapter.
Configuring GbE Interconnect Switch Date and Time
The GbE Interconnect Switch can maintain the current date and time. This information
displays on the management interfaces and is used to record the date and time of interconnect
switch events in the history log.
When a new GbE Interconnect Switch is first booted up, the firmware clock starts at zero (0)
and counts the seconds since bootup. In order for the clock to display the real date and time,
you must either
•
•
•
•
•
Manually set the date and time on the interconnect switch, or
Enable Simple Network Time Protocol (SNTP) on the GbE Interconnect Switch, and then
set the SNTP parameters.
SNTP allows the switch to synchronize its real time to the network time. When SNTP is
enabled, the GbE Interconnect Switch sends a request to a primary SNTP server in each
period of a specified polling interval asking for the Greenwich Mean Time (GMT). If the
primary SNTP server is not available, the request is sent to a secondary SNTP server.
When SNTP is enabled, the following events cause the GbE Interconnect Switch to request
the date and time through SNTP:
The polling interval time expires.
Changes are made to the configuration settings for Daylight Saving Time, time zone,
SNTP Server 1 or Server 2, or polling interval.
SNTP state is changed from disabled to enabled.
HP ProLiant BL p-Class GbE Interconnect Switch Menu-driven Interface Reference Guide 2-49