
HP Intelligent Provisioning User Guide


Completing initial configuration and registration tasks
When using Intelligent Provisioning for the first time, follow the onscreen prompts to perform the
following tasks:
1. Setting Preferences (“Step 1: Setting Intelligent Provisioning preferences” (page 8))
2. Activating Intelligent Provisioning (“Step 2: Activating Intelligent Provisioning” (page 10))
3. Registering for Insight Remote Support (“Step 3: Registering for Insight Remote Support” (page
10))
NOTE: Storage controller information is not displayed in System Information in these initial three
configuration pages.
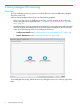
Step 1: Setting Intelligent Provisioning preferences
The Set Preferences screen appears automatically the first time Intelligent Provisioning runs on a
server.
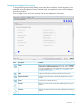
1. Choose your interface language and keyboard language.
2. Read the End User License Agreement (EULA).
• To continue using Intelligent Provisioning, click Accept.
Included in the EULA is a link for ancillary software, which contains a list of open source
and proprietary software developed or obtained through third parties. This link and all
other links in the EULA are not enabled, but can be accessed if entered into a browser.
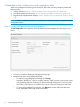
• To cancel using Intelligent Provisioning, click Reboot to exit the utility and reboot the
server. Intelligent Provisioning remains accessible.
8 Using Intelligent Provisioning