HP ProLiant ML310 G3 Storage Server installation guide This guide provides installation and configuration information for the HP ProLiant ML310 G3 Storage Server with Microsoft® Windows® Storage Server 2003 R2.
Legal and notice information © Copyright 2006 Hewlett-Packard Development Company, L.P. Hewlett-Packard Company makes no warranty of any kind with regard to this material, including, but not limited to, the implied warranties of merchantability and fitness for a particular purpose. Hewlett-Packard shall not be liable for errors contained herein or for incidental or consequential damages in connection with the furnishing, performance, or use of this material.
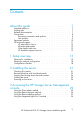
Contents About this guide . . . . . . . . . . . . . Intended audience . . . . . . . . . Getting help . . . . . . . . . . . . Related documentation . . . . . . . . Conventions . . . . . . . . . . . . Document conventions and symbols Text symbols . . . . . . . . . . Equipment symbols . . . . . . . . . HP technical support . . . . . . . . . HP subscriber’s choice . . . . . . HP-authorized reseller . . . . . . Other helpful web sites . . . . . HP hardware support services . . 1 Setup overview . . . . . . . .
Configuring the server on the network . . . 37 5 Complete system configuration . . . . . . 41 A Configuring storage server for Web access (optional) . . . . . . . . . . . . . . . . 43 Index 45 Before you begin . . . . . . . . . . . . . . . . . . . . . . Running the Rapid Startup Wizard . . . . . . . . . . . . . . . Additional configuration tasks . . . . . . . . . . . . . . . . . Setting up an Internet connection 4 . . . . . . . . . . . . . . . . . . . . . . . . . . . . . . . .
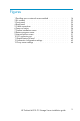
Figures 1 Deciding upon a network access method 2 Kit contents . . . . . . . . . . . . 3 Front panel . . . . . . . . . . . . 4 Back panel . . . . . . . . . . . . 5 Cable connections . . . . . . . . . 6 Power on button . . . . . . . . . . 7 Finalize installation screen . . . . . . 8 Restore progress screen . . . . . . . 9 Internet options screen . . . . . . . . 10 iLO connector port . . . . . . . . . 11 Rapid Startup Wizard . . . . . . . 12 Automatic configuration settings . . . 13 Proxy server settings . .
Tables 1 2 3 4 6 Document conventions . . . . . . . Network Access methods . . . . . Installation and Configuration checklist Server configuration worksheet . . . . . . . . . . . . . . . . . . . . . . . . . . . . . . . . . . . . . . . . . . . . . . . . . 9 . 17 . 19 .
About this guide This guide provides information for setting up and configuring the following HP ProLiant storage server models: • • • • HP HP HP HP ProLiant ProLiant ProLiant ProLiant ML310 ML310 ML310 ML310 G3 G3 G3 G3 320GB Storage Server 640GB Storage Server 1TB Storage Server 2TB Storage Server In addition to being printed and included in your product kit, this guide is also provided as a PDF printable document on the HP ProLiant Storage Server Documentation CD.
• HP ProLiant ML310 G3 Storage Server administration guide • HP Integrated Lights-Out 2 User Guide These documents are available on the Documentation CD or they can be obtained at http://www.hp.com/go/support Select your product, then click Technical documentation under the Support section.
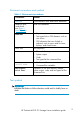
Document conventions and symbols Table 1 Document conventions Convention Element Blue text Cross-reference links and e-mail addresses Medium blue, underlined text (http:// www.hp.
CAUTION: Indicates that failure to follow directions could result in damage to equipment or data. IMPORTANT: Provides clarifying information or specific instructions. NOTE: Provides additional information. TIP: Provides helpful hints and shortcuts. Equipment symbols The following equipment symbols may be found on HP ProLiant storage server hardware. WARNING! Any enclosed surface or area of the equipment marked with these symbols indicates the presence of electrical shock hazards.
WARNING! Any surface or area of the equipment marked with these symbols indicates the presence of a hot surface or hot component. Contact with this surface could result in injury. WARNING: To reduce the risk of personal injury from a hot component, allow the surface to cool before touching. WARNING! Power supplies or systems marked with these symbols indicate the presence of multiple sources of power.
HP subscriber’s choice HP strongly recommends that customers sign up online using the Subscriber’s choice web site: http://www.hp.com/go/e-updates • Subscribing to this service provides you with e-mail updates on the latest product enhancements, newest versions of drivers, and firmware documentation updates, as well as instant access to numerous other product resources. • After signing up, you can quickly locate your products by selecting Business support, and then Storage under Product Category.
that trigger with every event. Most system components have the capability of sending hundreds of state events during normal operation. SEA and OSEM are designed to filter these component events and only notify customers and/or HP Services when action needs to be taken to resolve or prevent an outage. As designed they will not report all events. Other utilities are available to monitor real time system state.
About this guide
1 Setup overview Your HP ProLiant storage server comes pre-installed with the Windows® Storage Server™ 2003 R2 operating system. Windows Storage Server 2003 R2 extends the Windows Storage Server 2003 operating system, providing a more efficient way to manage and control access to local and remote resources.
DHCP Access? y/n Yes No Direct Attach* (mandatory) Remote Browser Remote Desktop Direct Attach* Integrated Lights-Out *Direct Attach requires display, keyboard, and mouse.
Table 2 Network Access methods Access method I.E. 5.5 (or later)? Storage server desktop? HP ProLiant Rapid Startup Wizard? Notes Direct attachment No Yes Indirectly from the storage server desktop. Requires a monitor, mouse, and keyboard. Remote browser Yes No Directly from the HP ProLiant Storage Server Management console. Does not display the storage server desktop. Remote desktop No Yes Indirectly from the storage server desktop. Windows remote desktop capability required on client.
Planning a network configuration You use the Rapid Startup Wizard to configure your storage server. This wizard is displayed automatically when you first start your system, immediately after you are prompted to install system updates.
Table 3 Installation and Configuration checklist Steps Reference 1. Unpack server, check kit contents, and become familiar with front and back panels of storage server. Locate and write down serial number of storage server. See "Checking kit contents" on page 21. 2. Complete rail installation instructions. See the HP ProLiant rail installation instructions, if applicable. 3. Connect cables; (optional) connect a keyboard, mouse, and monitor; power on server, and log in to the server.
Setup overview
2 Installing the server To install your HP ProLiant storage server, follow the instructions in the sections below: • Checking kit contents • Becoming familiar with front/back panels • Cabling the server • Powering on the server Checking kit contents Remove the contents, making sure you have all the components shown in the figure below. If components are missing, contact HP technical support.
1 2 6 3 4 ProLia nt 5 Essent ial s Inte gra ted Lig hts -Out Advan ced Pack 5054 Figure 2 Kit contents 1 HP ProLiant ML310 G3 Storage Server (with operating system preloaded) 4 HP ProLiant Storage Server System Installation and Recovery DVD 2 Power cord 5 End User License Agreement 3 Product Documentation and, Safety and Disposal Documentation CD 6 ProLiant Essentials Integrated Lights-Out Advanced Pack Becoming familiar with front/back panels Become familiar with the function of the
1 6 5 2 4 3 HP ProLiant ML310 fp_components Figure 3 Front panel 1 Media bays (bezel blanks) 4 USB connectors (2) 2 Power On/Standby button 5 Bezel lock 3 Hard drive bays 6 CD-ROM drive HP ProLiant ML310 G3 Storage Server installation guide 23
1 2 3 4 5 6 8 7 9 rp_components Figure 4 Back panel 1 Power cord connector 6 USB connectors (2) 2 Mouse connector 7 RJ-45 Ethernet connector 3 Keyboard connector 8 Parallel port connector 4 Serial connector 9 RJ-45 connector (iLO) 5 Video connector Locating and writing down the serial number Before completing the installation portion of this guide, locate and write down the storage server’s serial number, which may be needed to access the HP Storage Server Management console later on
Cabling the server Connect the cables in the sequence shown in the figure below. 6 2 1 5 4 3 Figure 5 Cable connections 1 Keyboard 4 Network cable 2 Mouse 5 Monitor 3 iLO cable 6 Power cable NOTE: Connecting the power cord illuminates the green NIC LEDs. Connecting the power cord also restores the storage server to whatever previous powered state it was last in. This could result in the server powering up, the fans operating, and the power indicator coming on.
Powering on the server Power on the server after connecting the cables. 1. Power on server by pushing the I/O button (1). The power LED (2) illuminate. 1 2 HP ProLiant ML310 5060 Figure 6 Power on button 2. Insert the HP ProLiant Storage Server System Installation and Recovery DVD into the storage server disk drive to finalize the operating system installation and updates.
Figure 7 Finalize installation screen HP ProLiant ML310 G3 Storage Server installation guide 27
4. During reboot, you see the screen below. The storage server performs the following actions: • Restore image. • Copy files. • Prepare system settings. • Boot Windows and finalize setup. Figure 8 Restore progress screen CAUTION: Do not interrupt the reboot sequence; it takes a considerable amount of time. By now you should have determined the access method for your storage server. For more information, see "Planning for installation" on page 15. 5.
3 Accessing the HP Storage Server Management console Before accessing the HP Storage Server Management console, verify that the storage server is completely installed in the rack, and that all cables and cords are connected. To access the HP Storage Server Management console, you can use these access methods: Direct attach Remote browser Remote desktop HP Integrated Lights-Out (iLO) To connect directly to the storage server without using the network.
To connect the storage server to a network using the direct attach method 1. Log in to the HP ProLiant Storage Server Management console with the default user name administrator and the password hpinvent. NOTE: You can change the administrator name and password when you configure the server using the "Rapid Startup Wizard" on page 40. 2. To complete network configuration using the Rapid Startup Wizard, see "Configuring the server on the network" on page 37.
Figure 9 Internet options screen 2. On the Security screen, select Internet or Local intranet web content zone, then click Custom Level. 3. Scroll down to locate the ActiveX Controls and plug-ins settings. 4. At Download signed ActiveX controls settings, select Enable to enable ActiveX or Prompt to launch a notice requiring approval before ActiveX is enabled. 5. Click OK to close the Security Settings dialog box. 6. If prompted Are you sure you want to change the security settings for this zone click YES.
7. On the Internet Options dialog box, click OK to finish. To connect the storage server to a network using the remote browser method 1. On the remote client machine open Internet Explorer and enter https:// and the serial number of the storage server followed by a hyphen (-), and then:3202. For example, https://D4059ABC3433-:3202 Press Enter. NOTE: You can substitute the IP address for the serial number, if you are connected through DHCP. 2. Click OK on the Security Alert prompt. 3.
2. Enter the serial number of the storage server in Computer box and click Connect. NOTE: You can substitute the IP address for the serial number, if you are connected through DHCP. 3. Log in to the HP ProLiant Storage Server Management console with the default user name administrator and the password hpinvent. NOTE: You can change the administrator name and password when you configure the server using the "Rapid Startup Wizard" on page 40. 4.
Using the Integrated Lights-Out 2 method The HP iLO 2 management processor provides multiple ways to configure, update, operate, and manage servers remotely. The HP ProLiant storage server comes preconfigured with iLO 2 default factory settings, including a default user account and password. If iLO 2 is connected to a network running DNS or DHCP, you can use it immediately without changing any settings.
To quickly setup iLO 2 using the default settings for iLO 2 Standard and iLO 2 Advanced features, follow the steps below 1. Ensure that a network cable is connected to the iLO port (1) located on the back of the storage server. 1 5049 Figure 10 iLO connector port NOTE: This connection method is easiest when the connection is to a DHCP-supported network. 2. If not using dynamic DHCP (IP addressing), use the iLO 2 RBSU to input a static IP address. 3.
4. Change the default user name and password on the administrator account to your predefined selections. 5. Set up your user accounts, if using the local accounts feature. 6. Activate advanced features by entering a license key. 7. Install the iLO 2 device drivers. 8. Access the HP Storage Server Management console using the Remote Console method to access Windows. NOTE: Once this Remote Console feature is enabled, the user can get access to the storage server’s login screen.
4 Configuring the server on the network Before you begin When first powering on the storage server you need to have some configuration data readily available to complete the Rapid Startup Wizard. Complete the Server configuration worksheet and use the data collected to initialize the storage server. Table 4 Server configuration worksheet Configuration Worksheet Administrative Identity User name Change system administrator’s user name, which is set by default to administrator.
Configuration Worksheet System location Any text string, such as a location or phone number. For example, Floor #3, Financial Services Bldg. Community name No. 1 The community name is used for network authentication when sending outgoing SNMP messages. Trap destination No. 1 The IP address of a management computer that will receive SNMP messages from the storage server using the above community name. Community name No. 2 Same as above. Trap destination No. 2 Same as above.
Configuration Worksheet DNS server A Domain Name System (DNS) server name is required to provide for domain name to IP address resolution. WINS server A Windows Internet Naming Service (WINS) server name is required to determine the IP address associated with a particular network computer. Server Name Server name Assign a unique name to the storage server. This name identifies the storage server on the network.
Running the Rapid Startup Wizard The Rapid Startup Wizard is only displayed during the initial setup process. This wizard guides you through the configuration process.
5 Complete system configuration Additional configuration tasks The physical installation and basic configuration for the HP ProLiant storage server is complete. Additional settings and configuration tasks specific to the storage server role can be found in the HP ProLiant ML310 G3 Storage Server administration guide on the HP ProLiant Storage Server Documentation CD.
Complete system configuration
A Configuring storage server for Web access (optional) Setting up an Internet connection Before running Windows 2003 R2 operating system updates, you must set up an Internet connection for the storage server. There are two methods for configuring an Internet connection: • Internet Explorer to use automatic configuration • Internet Explorer to use a proxy server To configure Internet Explorer to use automatic configuration 1.
2. Under Proxy server, click the Use a proxy server for your LAN check box. Figure 13 Proxy server settings 3. In the Address box, type the IP address of the proxy server. 4. In the Port box, type the port number that is used by the proxy server for client connections (by default, 8080). 5. Click the Bypass proxy server for local addresses check box if you do not want the proxy server computer to be used when you connect to a computer on the local network (this may speed up performance). 6.
Index A accessing HP Storage Server Management console, 29 ActiveX enabling, 30 audience, 7 authorized reseller HP, 12 C cable installation, 25 configuration completing system configuration, 41 Internet, 43 network, 18 server, 37 worksheet, 37 conventions document, 9 equipment symbols, 10 text symbols, 9 D default login, 30 DHCP, 37 document conventions, 9 related documentation, 7 E equipment symbols, 10 H hardware support services, 12 help, obtaining, 7 host configuration protocols, DHCP and non-D
P planning configuration checklist, 18 installation, 15 network access method, 15 network configuration, 18 power on server, 26 R Rapid Setup Wizard, 40 related documentation, 7 remote browser method connecting to network, 32 remote desktop method connecting to network, 32 S serial number, 24 server cabling, 25 front and back panels, 22 installation, 21 46 power on, 26 set up Internet, 43 setting up overview, 15 startup collecting information, 37 Subscriber’s choice HP, 12 symbols in equipment, 10 sy