
Quick Setup with Red Hat Linux 7.1 on the Compaq ProLiant ML330 and ProLiant ML330e Servers

"Quick Setup" with Red Hat Linux 7.1 on the Compaq ProLiant ML330 and ProLiant ML330e Servers 5
1528-0501A-WWEN
Installing Red Hat 7.1 Linux
For this “Quick Setup” guide we will be using the Red Hat 7.1 Linux CD-ROM. Normally, when
doing server installations you do not need to install X window (or the GUI interface), but for the
purposes of this document we will be configuring the X window system.
We will also use the Automatic Partitioning available in Red Hat 7.1. These partitions will be
automatically created. If you would like additional information on partitioning your hard drive is
available at, http://www.redhat.com/support/docs/howto
or you can review the Red Hat 7.1 Linux
documentation.
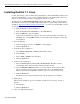
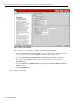
1. To begin the Red Hat 7.1 Linux installation.
a. Insert the Red Hat Linux CD-ROM into your CD-ROM drive.
b. Select the OK button and press [Enter].
At this time, the installation program probes your system and attempts to identify your
CD-ROM drive. Use the HELP sidebar to the left of the GUI to help guide you through
the installation.
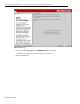
2. Select the language.
a. Select the language you use (i.e., English or other language).
b. Click the Next button.
3. Set the Keyboard configuration.
a. Select Model of keyboard or Generic (with number of keys).
b. Select Layout.
c. Select enable or disable for the dead keys.
d. Click the Next button.
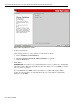
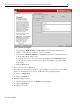
4. Set the mouse configuration.
a. Select the mouse type for your system or Generic mouse. Red Hat 7.1 Linux
automatically discovers the following mouse Types: PS2 and bus.
b. Select the Emulate 3 Buttons checkbox to use a two-button mouse as if it had three
buttons (pressing both mouse buttons simultaneously). If you are installing the X
Window System Select the Emulate 3 Buttons option to use a three-button mouse.
c. Click the Next button.
The Welcome Screen appears with information about registering your software.
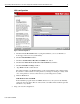
5. Install options.
The following installation options are available: workstation, server, laptop, custom, or
upgrade.
a. Select Server.
b. Click the Next button.
6. Select your disk partitioning type.