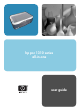
hp psc 1310 series all-in-one user guide
hp psc 1310 series all-in-one
© Copyright 2004 Hewlett-Packard Development Company, L.P. The information contained herein is subject to change without notice. Reproduction, adaptation or translation without prior written permission is prohibited, except as allowed under the copyright laws. Adobe and the Acrobat logo are either registered trademarks or trademarks of Adobe Systems Incorporated in the United States and/or other countries. Portions Copyright © 1989-2003 Palomar Software Inc.
contents 1 quick start . . . . . . . . . . . . . . . . . . . . . . . . . . . . . . . . . . . . . . . . . 1 front panel overview . . . . . . . . . PictBridge camera port overview front panel status lights . . . . . . . use your hp psc with a computer 2 ............................ ............................ ............................ ............................ 1 3 3 6 load originals and load paper . . . . . . . . . . . . . . . . . . . . . . . . . . 11 load originals . . . . . . . . . . . . . . .
contents prepare your hp psc for shipment . . . . . . . . . . . . . . . . . . . . . . . . . . .41 hp distribution center . . . . . . . . . . . . . . . . . . . . . . . . . . . . . . . . . . . .43 9 warranty information . . . . . . . . . . . . . . . . . . . . . . . . . . . . . . . . . 45 duration of limited warranty . . . . . . . . . . . . . . . . . . . . . . . . . . . . . . .45 warranty service . . . . . . . . . . . . . . . . . . . . . . . . . . . . . . . . . . . . . . .45 warranty upgrades . . . . . . .
get help This User Guide contains information on using your HP psc and provides additional troubleshooting assistance for the installation process. The User Guide also contains information on how to order supplies and accessories, technical specifications, support, and warranty information. The table below lists additional sources of information for your HP psc. help description Setup Guide The Setup Poster provides instructions for setting up and configuring your HP psc.
help description Dialog-box help (Windows only) For Windows: Use one of the following ways to find information on a specific feature: • Right-click on the feature viii • Select the feature and press F1 • Select the ? in the upper-right corner then click on the feature hp psc 1310 series
quick start quick start 1 Your HP psc can be used for making copies and printing photos from a PictBridge-compliant camera without turning on your computer. You can do more with your HP psc by using the HP Director software that you installed on your computer during the initial setup. The HP Director includes troubleshooting tips, product-specific help, and enhanced copy, scan, and photo functionality. For more information on the use of the HP Director, see use your hp psc with a computer on page 6.
chapter 1 quick start 1 3 4 2 5 6 7 8 9 10 feature 1 purpose On/Resume: turns the HP psc on and off. Also, resumes a copy or print job after a jam or other error. If the HP psc is in an error state, you can turn it off by pressing On/Resume for 3 seconds. Warning! When the HP psc is off, a minimal amount of power is still supplied to the device. Unplug the power cord to completely disconnect the power supply to the HP psc.
quick start PictBridge camera port overview Note: Do not use this port to connect your HP PSC to your computer. Also, do not connect any other USB device, such as a mouse, keyboard, or photo card reader to this port. For more information on printing from your PictBridge camera, see print from a camera on page 17.
quick start chapter 1 on light (green) black copy color copy explanation area area (backlight) (backlight) what to do? Light is blinking. Light is on. Light is on. Your HP PSC is processing Wait for your HP PSC to finish processing the job. a print, scan, or maintenance job. Light is blinking. Light is blinking. Light is on. Your HP PSC is processing Wait for your HP PSC to a black-and-white copy finish processing the job. job. Light is blinking. Light is on. Light is blinking.
quick start check paper light check print explanation cartridge light what to do? Light is on. Light is blinking. Light is off. The paper tray is empty, • Load paper, or remove the paper jam. the HP psc has a paper jam, or the paper size • Change paper in paper setting and paper in paper tray to correct size. tray are not the same. • Change paper size on the computer software. Then press On/ Resume to continue. Light is on. Light is off. Light is blinking.
quick start chapter 1 on light (green) check paper light check print explanation cartridge light Light is blinking. Light is blinking. Light is blinking. what to do? 1 An error caused the HP psc to stop functioning. 2 Turn the HP psc off and then on. Restart your computer. 3 If the problem is not corrected, unplug the HP psc and plug it in again. If the problem persists, contact HP.
quick start 2 1 3 4 quick start 12 5 6 7 8 9 10 11 feature purpose user guide 1 Status: select this feature to display the current status of your HP psc. 2 Settings: select this feature to view or change various settings for your HP psc, such as print, scan, or copy. 3 Help: select this feature to access the HP Image Zone Help, which provides software help, a product tour, troubleshooting information for your HP psc, and HP psc product-specific help.
chapter 1 open the hp director for Macintosh users quick start Use one of the following methods to launch or access the HP Director, depending on which Macintosh OS you are using. open the hp director (all-in-one) using Macintosh OS X If you are using Macintosh OS X, the HP Director (All-in-One) is launched automatically during the HP Image Zone software installation, and causes the HP Director (All-in-One) icon to be created in the Dock for your device.
quick start feature purpose HP Gallery: use this feature to display the HP Gallery to view and edit images. 5 More Applications: use this feature to select other applications on your computer. 6 HP on the Web: use this feature to select an HP website. 7 HP Help: use this feature to select a source for help with your HP psc. 8 Settings: use this feature to change device settings.
quick start chapter 1 10 feature purpose 2 Select Device: use this pull-down list to select the HP device you want to use. 3 Scan document: use this feature to scan text and display it in the selected destination text editing software program. 4 Make Copies: use this feature to make a copy in black and white or color. 5 HP Gallery: use this feature to display the HP Gallery to view and edit images. 6 Settings: use this pull-down list to provide access to device settings.
load originals and load paper 2 You can copy and scan originals loaded on the glass. You can also print and copy onto a variety of paper types and paper sizes. It is important that you choose the right paper and make sure that it is loaded correctly and not damaged.
chapter 2 load an original photo on the glass You can make a copy of an original photo from the glass of your HP psc. It is important that you load the original photo on the glass properly to get the best possible copy. Load your original photo face down on the left front corner of the glass. Position the photo on the glass so the long edge of the photo is along the front edge of the glass. 2 Close the lid.
load originals and load paper Tap the stack on a flat surface to align the edges of the paper, and then check the paper for the following: – Make sure it is free of rips, dust, wrinkles, and curled or bent edges. – Make sure all the paper in the stack is the same size and type. 4 Insert paper into the paper tray with the print side down until it stops. To avoid bending the paper, make sure you do not push the paper in too far, or push too hard.
chapter 2 load envelopes Use the print feature of your word processing software to print to envelopes with your HP PSC. Use envelopes for printing only; copying on to an envelope is not recommended. Do not use shiny or embossed envelopes, or envelopes that have clasps or windows. You can load the paper tray with one or multiple envelopes. load originals & paper Note: Consult the help files in your word processing software for details on how to format text for printing on envelopes.
load originals and load paper recommended papers For the best print quality, use HP papers. Paper that is too thin, paper that has a slick texture, or paper that stretches easily can cause paper jams. Paper that has a heavy texture or does not accept ink can cause printed images to smear, bleed, or not be filled in completely. For more information about HP papers, check our website at: www.hp.
chapter 2 avoid jams load originals & paper To avoid jams, remove papers from completed print or copy jobs frequently from the paper tray. Excessive amounts of paper from completed print or copy jobs in the paper tray might back up into the HP psc and cause a paper jam. Also, for best results, use recommended papers, and load paper correctly. For more information see, recommended papers on page 15, and load letter or A4 paper on page 12.
print from a camera 3 This HP psc supports the PictBridge standard, which allows you to connect any PictBridge-compliant camera and print photos without using your computer. Check your camera’s user guide to see if it supports PictBridge capability. This section contains the following topics: • connect a camera on page 17 • print photos from your camera on page 17 connect a camera After you take photos with your PictBridge-compliant camera, you can print them immediately.
chapter 3 If your camera does not allow you to make settings, your HP PSC uses the following default settings: • Paper type is set to photo paper. Use letter or A4,or 4 by 6 inch (10 by 15 cm) tabbed photo paper when printing from the PictBridge port. • Paper size is detected by the HP PSC. • Number of images printed on each page is 1. PictBridge port Refer to your camera’s user guide for more information.
use the copy features 4 The HP psc enables you to produce high-quality color and black-and-white copies on plain paper. You can enlarge or reduce the size of an original to fit a specific paper size, including 4 by 6 inch (10 by 15 cm) photo paper.
chapter 4 adjust copy speed or quality The HP psc automatically copies in Best mode. This produces the highest quality copies for all paper. However, you can manually override this setting to copy in Fast mode. This produces copies more quickly and saves ink. The text is of comparable quality to copies produced using Best mode, but the graphics might be of lower quality. to make a copy from the front panel using the fast setting 1 Load your original face down on the left front corner of the glass.
use the copy features 2 Load 4 by 6 inch (10 by 15 cm) tabbed photo paper print side down in the paper tray, with the tab facing out towards you. 3 If your original is not 4 by 6 inches (10 by 15 cm), press the Size button to select Fit to Page. The HP psc will resize the original to 4 by 6 inches (10 by 15 cm) to create a borderless copy. 4 Press the Paper Type button to select Photo. This tells the HP psc that you have photo paper loaded in the paper tray.
chapter 4 3 Press the Size button to select Fit to Page. 4 Press Start Copy, Black or Start Copy, Color. stop copying ` To stop copying, press Cancel on the front panel. copy The HP psc immediately stops printing and releases the paper.
use the scan features 5 Scanning is the process of converting pictures and text into an electronic format for your computer. You can scan photos and text documents. Because the scanned image or text is in an electronic format, you can bring it into your word processor or graphics software program and modify it to suit your needs. You can do the following: • Scan photos of your kids and e-mail them to relatives, create a photographic inventory of your house or office, or create an electronic scrapbook.
chapter 5 3 Make any edits to the preview image in the HP Scan window. When you have finished, click Accept. The HP psc sends the scan to the HP Gallery, which automatically opens and displays the image. The HP Gallery has many tools that you can use to edit your scanned image. You can improve the overall image quality by adjusting the brightness, sharpness, color tone, or saturation. You can also crop, straighten, rotate, or resize the image.
order supplies order supplies 6 You can order print cartridges, recommended types of HP paper, and HP psc accessories online from the HP website. This section contains the following topics: • order media on page 25 • order print cartridges on page 25 • order other supplies on page 25 order media To order media such as HP Premium Paper, HP Premium Inkjet Transparency Film, HP Iron-On Paper, or HP Greeting Cards, go to: www.hp.com Choose your country/region, and then select Buy or Shopping.
chapter 6 order supplies To order HP psc software in other countries/regions, call the phone number for your countries/regions. The numbers listed below are current as of the publication date of this guide. For a list of current ordering numbers, go to the following website and choose your own country/region or language: www.hp.com/support 26 country/region number for ordering Asia Pacific 65 272 5300 Australia 61 3 8877 8000 New Zealand 0800 441 147 South Africa +27 (0)11 8061030 U.S.
maintain your hp psc 7 This section contains the following topics: • clean the glass on page 27 • clean the lid backing on page 27 • clean the exterior on page 28 • work with print cartridges on page 28 • self-maintenance sounds on page 36 clean the glass Dirty glass from fingerprints, smudges, hair, and so on slows down performance and affects the accuracy of features such as Fit to Page. 1 Turn off the HP psc, unplug the power cord, and raise the lid.
chapter 7 4 Dry the backing with a chamois or soft cloth. Caution! Do not use paper-based wipes as these might scratch the backing. 5 If this does not clean the backing well enough, repeat the previous steps using isopropyl (rubbing) alcohol, and wipe the backing thoroughly with a damp cloth to remove any residual alcohol. maintain your hp psc clean the exterior Use a soft cloth or slightly moistened sponge to wipe dust, smudges, and stains off the case.
maintain your hp psc print a self-test report If you are experiencing problems with printing, print a Self-Test Report before you replace the print cartridges. 1 Press and hold down Cancel. 2 Press Start Copy, Color. The HP psc prints a Self-Test Report, which might indicate the source of any problems you might be having.
chapter 7 Copper-colored contacts Plastic tape with pink pull tab (must be removed) maintain your hp psc Ink nozzles under tape Do not touch the copper-colored contacts or the ink nozzles replace the print cartridges The HP psc notifies you when you need to replace your print cartridges. Replace the print cartridges when you see faded text or if you experience print quality issues related to the print cartridges.
maintain your hp psc Note: It is normal to see ink buildup in the print cartridge slots. 4 Remove the new print cartridge from its packaging and, being careful to touch only the bright pink plastic tab, gently remove the plastic tape to uncover the ink nozzles. maintain your hp psc Caution! Do not touch the copper-colored contacts or ink nozzles. After you have removed the plastic tape, install the print cartridge immediately to prevent the ink from drying in the nozzles.
chapter 7 You can also refer to the label that is located on the inside of the printcarriage access door for information on installing the print cartridges. maintain your hp psc 7 Close the print-carriage access door. Within a few minutes, a print cartridge alignment page prints. You will need to align the print cartridges. For information on aligning the print cartridges, see align the print cartridges on page 33.
maintain your hp psc ` To remove the print cartridge from the print cartridge protector, press down and back on the top of the print cartridge protector to release the print cartridge, then slide the print cartridge out of the print cartridge protector. After you install or replace a print cartridge, the HP psc automatically prints a print cartridge alignment sheet. This might take a few moments. You can also align the print cartridges at any time from the HP Director.
maintain your hp psc chapter 7 4 Place the print cartridge alignment sheet face down on the left front corner of the glass. Make sure the top of the sheet is on the left side as shown below. 5 Press Scan. The HP psc aligns the print cartridges. Note: During alignment the button LED blinks until the procedure is finished. This takes about 30 seconds. to align the print cartridges from the hp director for Macintosh users 1 From the HP Director, choose Settings, and then choose Maintain Printer.
maintain your hp psc clean the print cartridge contacts Clean the print cartridge contacts only if the Self-Test Report shows streaks. Caution! Do not remove both print cartridges at the same time. Remove and clean each print cartridge one at a time. Make sure you have the following materials available: • Dry foam rubber swabs, lint-free cloth, or any soft material that will not come apart or leave fibers.
chapter 7 maintain your hp psc 11 Place the print cartridge alignment sheet face down on the left front corner of the glass. Make sure the top of the sheet is on the left side as shown below. 12 Press Scan. The HP psc aligns the print cartridges. Note: During alignment the button LED blinks until the procedure completes. This takes about 30 seconds. self-maintenance sounds During the life of your product you might hear various mechanical sounds. This is a normal part of your device’s self-maintenance.
get hp psc 1310 series support 8 Hewlett-Packard provides Internet and phone support for your HP psc.
chapter 8 call in North America during warranty Call 1-800-HP-INVENT. US phone support is available in both English and Spanish languages 24 hours a day, 7 days a week (days and hours of support might change without notice). This service is free during the warranty period. A fee might apply outside the warranty period.
get hp psc 1310 series support Web and email support are available in the following languages: – Dutch – English – French – German – Italian – Portuguese – Spanish – Swedish For all other languages, support information is available in English. 3 Contact your local HP dealer. If your HP psc has a hardware failure, take it to your local HP dealer for a solution. Service is free during the limited warranty period. After the warranty period, you will be quoted a service charge. 4 Call HP support.
chapter 8 Alternatively, you can ask your dealer or call HP at the phone number provided in this booklet. As part of our constant efforts to improve our phone support service, we advise you to check our website on a regular basis for new information regarding service features and delivery.
get hp psc 1310 series support hp technical support country/region hp technical support Greece 801 11 22 55 47 South Africa, Outside Republic +27 11 258 9301 Greece, Outside Greece +30 210 6073603 Spain www.hp.com/support Greece (Cyprus) 800 9 2649 Sweden www.hp.com/support Guatemala 1800-995-5105 Switzerland www.hp.
chapter 8 Note: When transporting your HP psc, make sure that the print cartridges have been removed, the HP psc has been properly shut down by pressing the On/Resume button, and you have allowed time for the print carriage to return to the home position and for the scanner to return to its parked position. 1 Turn on the HP psc. Disregard steps 1 through 7 if your HP psc will not turn on. You will not be able to remove the print cartridges. Proceed to step 8. 2 Open the print-carriage access door.
get hp psc 1310 series support hp distribution center To order HP psc software, a copy of the printed User Guide, a Setup Poster, or other customer-replaceable parts, do one of the following: • In the U.S. or Canada, call 1-800-HP-INVENT (1-800-474-6836). • In Latin America, call the appropriate number for your country/region (see call elsewhere in the world on page 39). • Outside of this country/region, go to this website: www.hp.
chapter 8 44 hp psc 1310 series
warranty information 9 Your HP psc comes with a limited warranty that is described in this section. Information about how to obtain warranty service and how you can upgrade your standard factory warranty is also provided.
chapter 9 Outside the U.S., please call your local HP Customer Support office. See call elsewhere in the world on page 39 for a list of international Customer Support numbers. returning your hp psc for service Before returning your HP PSC for service, you must call HP Customer Support. See hp customer support on page 37 for steps to take before calling Customer Support.
warranty information SPECIFICALLY DISCLAIM THE IMPLIED WARRANTIES OR CONDITIONS OF MERCHANTABILITY, SATISFACTORY QUALITY, AND FITNESS FOR A PARTICULAR PURPOSE. limitations of liability To the extent allowed by local law, the remedies provided in this Limited Warranty Statement are the Customer’s sole and exclusive remedies.
warranty information chapter 9 48 hp psc 1310 series
technical information 10 The technical specifications for your HP psc are provided in this section. Also, international regulatory information for your HP psc is supplied in this section.
chapter 10 * The writing area is offset from center by .21 inches (5.4 mm), which causes asymmetric top and bottom margins. physical specifications • Height: 6.68 inch (16.97 cm) • Width: 16.76 inch (42.57 cm) • Depth: 10.20 inch (25.91 cm) • Weight: 10 lb. (4.
technical information ENERGY STAR is a U.S. registered service mark of the U.S. EPA. As an ENERGY STAR partner, HP has determined that this product meets ENERGY STAR guidelines for energy efficiency. For more information on ENERGY STAR guidelines, see the following web site: www.energystar.gov paper use This product is suited for the use of recycled paper according to DIN 19309.
chapter 10 FCC statement The United States Federal Communications Commission (in 47 CFR 15.105) has specified that the following notice be brought to the attention of users of this product. Declaration of Conformity: This equipment has been tested and found to comply with the limits for a Class B digital device, pursuant to part 15 of the FCC Rules.
technical information notice to users in Japan (VCCI-2) notice to users in Korea declaration of conformity (European Union) The Declaration of Conformity in this document complies with ISO/IEC Guide 22 and EN45014. It identifies the product, manufacturer’s name and address, and applicable specifications recognized in the European community.
chapter 10 declaration of conformity According to ISO/IEC Guide 22 and EN 45014 Manufacturer’s name and address: Hewlett-Packard Company, 16399 West Bernardo Drive, San Diego, CA 92127-1899, USA Regulatory model number: SDGOB-0319 Declares that the product: Product name: HP PSC 1310 Series (Q5763A) Model number(s): PSC 1315 (Q5765A), 1315xi (Q5766A), 1315v (Q5767A), 1311 (Q5768A), 1312 (Q5769A), PSC 1317 (Q5770A), 1315 (Q5771A), 1318 (Q5772A) Power adapters: 0950-4466 Conforms to the following prod
11 HP Instant Share makes it easy to send photos that family and friends can view. Just take a photo or scan an image, select the photograph or image, and use the software on your computer to forward the media to an e-mail destination. You can even upload your photos (depending on your country/region) to an online photo album, or an online photo finishing service. With HP Instant Share, family and friends always get photos they can view—no more large downloads or images that are too big to open.
hp instant share (direct) chapter 11 use a scanned image For information on scanning an image, see use the scan features on page 23. 1 Load your original face down in the left front corner of the glass. 2 Press Scan. A preview image of the scan appears in the HP Scan window on the computer, where you can edit it. For more information about editing a preview image, see the onscreen hp image zone help that came with your software. 3 Make any needed edits to the preview image in the HP Scan window.
hp instant share setup and use Note: To send your e-mail message to multiple addresses, click How to email multiple people. 12 Click Next. The Add Captions screen appears. 13 Enter a caption for your digital image, and then click Next. Your image is uploaded to the HP Instant Share services website. After the image is uploaded, the Photos E-mailed screen appears. Your e-mail is sent with a link to a secure Web page that stores your image for 60 days. 14 Click Finish.
hp instant share (direct) chapter 11 You can now send the images as an e-mail attachment by following the prompts on your Macintosh. access the e-mail option from the hp director For more information on using the HP Director, see the onscreen hp image zone help that came with your software. 1 Open the HP Director and click HP Gallery (OS 9). OR Click HP Director in the Dock, and select HP Gallery from the Manage and Share section of the HP Director menu (OS X). The HP Gallery opens. 2 Select an image.
troubleshooting information 12 This section contains troubleshooting information for the HP PSC 1310 Series (HP psc). Specific information is provided for installation and configuration issues. References to our online troubleshooting help are provided for operational topics.
chapter 12 troubleshooting Task Tray software installation troubleshooting Use this section to solve any problems you might encounter while installing the HP psc software. problem possible cause and solution When I insert the CD- follow these steps ROM into my 1 From the Windows Start menu, choose Run. computer’s CD-ROM 2 In the Run dialog box, enter d:\setup.exe (if your CD-ROM drive is drive, nothing not assigned to drive letter d, use the appropriate drive letter), and happens then click OK.
troubleshooting information problem possible cause and solution A red X or yellow triangle appears on the USB connect prompt 1 Verify that the front panel cover is firmly adhered to the device, then unplug the HP psc and plug it in again. For more information on how to attach the front panel cover, see I received a message to attach the front panel cover on page 64. 2 Verify that the USB and power cables are plugged in.
chapter 12 problem possible cause and solution Some of the icons are If the essential icons do not appear, your installation might not be complete. The essential icons are scan picture, scan document, and missing in the hp image zone (Windows) or hp gallery (Macintosh). hp director If your installation is incomplete you might need to uninstall and then reinstall the software. Do QRW simply delete the HP psc program files from your hard drive.
troubleshooting information problem possible cause and solution Some of the icons are to uninstall from a Macintosh computer missing in the 1 Disconnect the HP psc from your computer. hp director 2 Double-click the Applications:HP All-in-One Software folder. FRQWLQXHG 3 Double-click HP Uninstaller. Follow the onscreen instructions. 5 After the software is uninstalled, disconnect your HP psc, and restart your computer.
chapter 12 hardware installation troubleshooting Use this section to solve any problems you might encounter while installing the HP psc hardware. problem possible cause and solution I received a message to The front panel cover is not attached, or it is attached incorrectly. attach the front panel to attach the front panel cover cover 1 Remove the adhesive backing from the front panel cover. step 2 troubleshooting step 1 2 Raise the lid of the HP psc.
troubleshooting information problem possible cause and solution The USB port is not connected Connecting your computer to your HP psc with a USB cable is straightforward. Simply plug one end of the USB cable into the back of your computer and the other into the back of the HP psc. You can connect to any USB port on the back of your computer.
chapter 12 hp instant share troubleshooting Basic HP Instant Share troubleshooting topics are covered in the table below. When you access the HP Instant Share website, online help is provided for any error messages encountered. error message possible cause and solution Can’t connect to the Internet Your computer is unable to connect to the HP Instant Share server after the Go Online screen appears. • Check your Internet connection and make sure you are online.
Index Numerics Japan, 38 Korea, 38 North America, 38 outside U.S.
Index O R order media, 25 other supplies, 25 print cartridges, 25 reduce copies, 21 regulatory notices, 51 Australian statement, 52 declaration of conformity (European Union), 53 declaration of conformity (U.S.
Visit the hp psc information center It has everything you need to get the most value from your HP psc. • Technical Support • Supplies and Ordering Information • Project Tips • Ways to Enhance Your Product www.hp.com/support © Copyright 2004 Hewlett-Packard Development Company, L.P. Printed on recycled paper. Printed in [country].