HP SC40Ge Host Bus Adapter Reference Guide Part Number 453010-001 September 2007 (First Edition)
© Copyright 2007 Hewlett-Packard Development Company, L.P. The information contained herein is subject to change without notice. The only warranties for HP products and services are set forth in the express warranty statements accompanying such products and services. Nothing herein should be construed as constituting an additional warranty. HP shall not be liable for technical or editorial errors or omissions contained herein.
Contents Configuration and operation .......................................................................................................... 4 About the adapter ..................................................................................................................................... 4 Starting the SAS BIOS configuration utility .................................................................................................... 4 Creating a RAID 0 volume........................................
Configuration and operation About the adapter The HP SC40Ge Host Bus Adapter preinstalled in the server is a low-profile, 64-bit PCIe adapter that supports SAS transfer rates up to 3 Gb/s and SATA transfer rates up to 1.5 Gb/s. You can configure up to two RAID volumes of ten drives each on this adapter by using the SAS BIOS configuration utility, as described in the remaining sections of this guide.
The SAS BIOS configuration utility can detect devices that the SAS BIOS cannot control (for example, tape drives and scanners). However, the configuration utility can still be used to modify certain parameters for these devices. Creating a RAID 0 volume In a RAID 0 volume, data is striped across multiple disk drives, combining the drives into one logical volume. This procedure maximizes storage capacity and performance.
Creating a RAID 1 volume In a RAID 1 volume, data is mirrored from one disk drive to another one. This procedure increases reliability by providing protection against the failure of a single drive. You can provide additional protection by configuring a RAID 1 volume with a hot spare. If a drive fails in such a configuration, data that was on the failed drive is rebuilt to the hot spare from the mirrored drive.
9. (Optional) To set this RAID 1 volume as the boot volume, select the SAS Topology option on the Adapter Properties screen and then, on the SAS Topology screen, set the boot volume. For more information, see "Selecting a boot disk (on page 9)." Viewing RAID volume properties 1. On the Adapter List screen, select an adapter. 2. On the Adapter Properties screen, select RAID Properties. The View Array screen is displayed, showing the properties of the first volume on the adapter. 3.
Synchronizing an array When a RAID 1 volume is synchronized, the data on the secondary drive of the mirror is updated by copying changed data from the primary drive. To start a synchronization, select Synchronize Array on the Manage Array screen, and then press Y. (To cancel a synchronization, press N.) Activating an array An array becomes inactive if, for example, it is removed from one controller or computer and moved to another one.
1. Restart the system. 2. Press the F8 key when prompted during system initialization. The BIOS configuration utility opens to the Adapter List screen. 3. Select the adapter. 4. Select RAID Properties>Manage Array>Manage Hot Spare. 5. Delete the second hot spare. The SAS Topology screen then reports the drive as Responding.
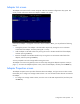
Adapter List screen The Adapter List screen is the first screen to appear when the SAS BIOS configuration utility opens. This screen provides information about each adapter installed in the system. If the host bus adapter is configured as the active boot controller in RBSU, you can perform the following actions: • Change the position of an adapter in the boot-order sequence by moving the cursor to the Boot Order field of the adapter, and then pressing the - or + key.
• To view information about devices connected to the adapter, move the cursor to the SAS Topology field, and then press the Enter key. RAID Properties screen One of the following screens is displayed when the RAID Properties link on the Adapter Properties screen is selected: • If no RAID volumes are currently configured, the Select New Array Type screen is displayed. • If at least one RAID volume is currently configured, the View Array screen is displayed.
Create New Array screen Use the Create New Array screen to select the disk drives for the new array. For a RAID 1 volume, choose one of the following options when adding the first disk: • To keep the existing data and migrate to a RAID 1 array, press M. Disk synchronization occurs. CAUTION: Pressing D deletes the data on all disks in the array. • To overwrite existing data and create a new RAID 1 array, press D. No synchronization occurs. After the volume is configured, press C to create the array.
• To create a new array, press C. Manage Array screen The Manage Array screen enables you to add or remove hot spares, synchronize an array, activate an array, or delete an array.
SAS Topology screen The SAS Topology screen provides basic information about each device connected to the adapter and provides the ability to identify the physical device in the system that corresponds to a device in the list. Scroll horizontally to view all the information listed for a device. To access this screen, select the SAS Topology link on the Adapter Properties screen. • To view detailed information about a device, move the cursor to the appropriate Device Identifier field, and then press Alt+D.
• To move back to the previous device, press Alt+P. This screen also provides access to the Format and Verify screens. To reach either of these screens, move the cursor to the appropriate field, and then press Enter. Device Format screen Use the Format screen to format a particular device. To access this screen, press Enter in the appropriate field on the Device Properties screen. CAUTION: After a format is started it cannot be paused or cancelled. To begin the format, press F.
Device Verify screen Use the Device Verify screen to verify a particular device. To access this screen, press Enter in the appropriate field on the Device Properties screen. Press Enter to begin the verify process. Press Esc to cancel the verify process at any time.
To access the Exit Menu screen, press Esc from any screen in the utility. If an option is not relevant or not available, it is deactivated.
Acronyms and abbreviations IML Integrated Management Log LBA logical block addressing NVRAM non-volatile memory RBSU ROM-Based Setup Utility SAS serial attached SCSI SATA serial ATA Acronyms and abbreviations 18