
HP Smart Array Controllers on HP ProLiant Servers User Guide


Upgrade and replacement procedures 77
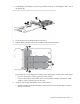
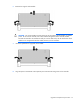
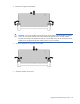
a.
Rotate the clip down over the cache module.
b. Firmly press both ends of the clip until they click into place beneath the controller board.
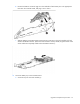
13. Install the controller in the server.
After installing a capacitor pack, you might see a POST message during reboot indicating that the array
accelerator (cache module) is disabled temporarily. This behavior is normal because the new capacitor pack
is likely to have a low charge. You do not need to take any action, because the recharge process begins
automatically after the capacitor pack is installed and the server is powered. The controller operates properly
while the capacitor pack recharges, although the performance advantage of the array accelerator is absent.
When the capacitor pack has been charged to a satisfactory level, the controller enables the array
accelerator automatically.
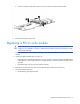
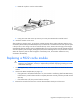
Replacing a P822 cache module
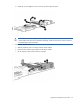
CAUTION: To prevent damage to electrical components, properly ground the server before
beginning any installation, removal, or replacement procedure. Improper grounding can cause
electrostatic discharge.
1. Close all applications, and then power down the server. This method flushes all data from the cache
module.
2. Observe the FBWC module LEDs (on page 26):
o If the green LED is off and the amber LED is on, the controller is transferring data from DDR memory
to flash memory. Wait for data transfer to complete (about 60 seconds), and then proceed with the
next step.
o If the amber LED is off, then proceed with the next step.
3. Remove the controller from the server. See the documentation that ships with the server.