
HP A9890A Smart Array 6402 Controller Installation Guide


Smart Array 6402 Controller HP-UX Installation
Verifying the Installation
Chapter 1
12
Verifying the Installation
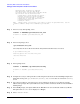
After the system reboots, verify that the installation was successful by following these steps:
Step 1. Issue the swlist command:
swlist
If the Smart Array Controller is installed correctly, the generated output will look similar to the
following:
When running HP-UX 11i v1 the generated output will look like this:
RAID-01 B.11.11.03 RAID SA; Supptd HW=A7143A/A9890A/A9891A
When running HP-UX 11i v2 the generated output will look like this:
RAID-01 B.11.23.02 RAID SA; Supptd HW=A7143A/A9890A/A9891A
When running HP-UX 11i v3 the generated output will look like this:
RAID-01 B.11.31.01 RAID SA; Supptd HW=A7143A/A9890A/A9891A
Step 2. Issue the ioscan -kfnd ciss command:
ioscan -kfnd ciss
If the Smart Array Controller software is installed correctly, the generated output will look similar
to this:
# ioscan -kfnd ciss
Class I H/W Path Driver S/W State H/W Type Description
========================================================================
ext_bus 4 0/3/1/0/4/0 ciss CLAIMED INTERFACE PCI-X SmartArray 6404 RAID Controller
/dev/ciss4
ext_bus 7 0/3/1/0/5/0 ciss CLAIMED INTERFACE PCI-X SmartArray 6404 RAID Controller
/dev/ciss7
ext_bus 6 0/5/1/0/4/0 ciss CLAIMED INTERFACE PCI-X SmartArray 6402 RAID Controller
/dev/ciss6
If the software is not installed correctly, re-install it using swinstall.