HP Smart Array P800 Controller for Integrity Servers Installation Guide HP-UX 11i v2 and 11i v3; OpenVMS 8.
© Copyright 2007 Hewlett-Packard Development Company L.P Legal Notices The information contained herein is subject to change without notice. The only warranties for HP products and services are set forth in the express warranty statements accompanying such products and services. Nothing herein should be construed as constituting an additional warranty. HP shall not be liable for technical or editorial errors or omissions contained herein.
Table of Contents About This Document ........................................................................................................5 Intended Audience.................................................................................................................................5 New and Changed Documentation in This Edition...............................................................................5 Publishing History............................................................................
Verifying the Firmware Update.................................................................................................29 HELP or ?.........................................................................................................................................30 Error Messages................................................................................................................................30 Verifying and Updating Enclosure Firmware Offline........................................
About This Document This document describes how to install HP Smart Array P800 Controllers on HP-UX 11i v2 and 11i v3, and OpenVMS 8.3. The latest version of this document is available at: http://docs.hp.com/en/netcom.html Intended Audience This document is for system and network administrators responsible for installing, configuring, and managing fault tolerant data storage. Administrators must know HP-UX operating system concepts, commands, and configuration. This document is not a tutorial.
UserInput Command Commands and other text that you type. A command name or qualified command phrase. Related Documents Additional information about the HP Smart Array Series Controller Family can be found at: http://docs.hp.com/en/netcom.html Other documents in this collection include: HP RAID Technology Overview HP Smart Array RAID Controllers Support Matrix RAID-01 (ciss) Mass Storage Driver Release Notes HP Encourages Your Comments HP encourages your comments concerning this document.
1 HP-UX Installation This chapter describes the installation process for the HP Smart Array P800 Controllers on HP-UX servers.
Table 1-1 Minimum Required HP-UX Versions for Smart Array SAS RAID Controllers Controller Operating System Minimum Required Version Smart Array P400 HP-UX 11i v2 B.11.23.0612 HP-UX 11i v3 B.11.31.0709 HP-UX 11i v2 B.11.23.0712 HP-UX 11i v3 B.11.31.0712 Smart Array P800 For information about the supported server models and HP-UX versions, see the HP Smart Array RAID Controllers Support Matrix at: http://docs.hp.com/en/netcom.html 2. 3. 4.
3. Select the PCIe slot to install the controller in. To determine the capabilities of the slots on your system, see one of the following documents: • I/O Slot Matrix - Entry Class Integrity Servers, at: http://docs.hp.com/en/hw.html • The documentation for your server, at: http://docs.hp.com/en/hw.html 4. 5. Carefully insert the controller into the PCIe slot. Install disks or other storage devices, if necessary.
IMPORTANT: Other controllers (host bus adapters) and slots in the system can be dependent on the controller that is targeted for replacement. For example, if the target controller has multiple channels, suspending or deleting drivers for the target PCIe slot also suspends individual drivers for the multiple hardware paths on the controller installed in that PCI slot. To replace a Smart Array P800 controller online, follow these steps: 1.
Verifying and Updating Controller Firmware Offline Follow the procedures in this section to verify that the correct adapter firmware version is installed before you boot the server. Firmware version requirements are found in the HP Smart Array RAID Controllers Support Matrix at: http://docs.hp.com/en/netcom.html WARNING! HP Smart Array P800 Controllers have specific adapter firmware version requirements for use in HP Integrity servers.
3. Compare the installed firmware version to the minimum recommended firmware version found in the HP Smart Array RAID Controllers Support Matrix at: http://docs.hp.com/en/netcom.html If the controller firmware meets the minimum recommended version, no further action is necessary. Downloading the Firmware Update To locate and download firmware for the Smart Array P800 Controller, follow these steps: 1. Go to the Business Support Center, at: http://www.hp.com/go/bizsupport 2. 3. 4. 5. 6. 7.
1. Prepare to run saupdate from the Offline Diagnostics CD or the EFI partition: • To run saupdate from the Offline Diagnostic CD: a. Download the firmware and copy it to the EFI partition. b. Place the Offline Diagnostic CD containing saupdate.efi in the CD drive before booting the system. c. Boot the system to the EFI Shell prompt. d. Locate the cdrom entry in the list of mapped devices, and change to the device by entering its associated fs number (for example, fs0) under EFI Shell prompt. e.
2. Use saupdate list to confirm that the correct firmware version is installed. See “Verifying the Controller Firmware” (page 11). For example: fs0:\EFI\TOOLS> saupdate list ******************************************************************************** Smart Array Offline Firmware Update Utility Version 2.06.10.03 (C) Copyright 2006 Hewlett-Packard Development Company, L.P.
1. Prepare to run saupdate from the Offline Diagnostics CD or the EFI partition: • To run saupdate from the Offline Diagnostic CD: a. Place the Offline Diagnostic CD containing saupdate.efi in the CD drive before booting the system. b. Boot the system to the EFI Shell prompt. c. Locate the cdrom entry in the list of mapped devices, and change to the device by entering its associated fs number (for example, fs0) under EFI Shell prompt. d.
1. Prepare to run saupdate from the Offline Diagnostics CD or the EFI partition: • To run saupdate from the Offline Diagnostic CD: a. Download the firmware and copy it to the EFI partition. b. Place the Offline Diagnostic CD containing saupdate.efi in the CD drive before booting the system. c. Boot the system to the EFI Shell prompt. d. Locate the cdrom entry in the list of mapped devices, and change to the device by entering its associated fs number (for example, fs0) under EFI Shell prompt. e.
2. Use saupdate LIST to confirm that the correct firmware version is installed. See “Verifying the Controller Firmware” (page 11). For example: fs0:\EFI\TOOLS> saupdate list ************************************************************************ Smart Array Offline Firmware Update Utility Version 2.07.09.02 (C) Copyright 2006 Hewlett-Packard Development Company, L.P.
Confirming and Updating Physical Disk Firmware Use the sautil command to confirm and update the firmware version on each physical disk in the SmartArray disk enclosure attached to the Smart Array Controller. NOTE: This section of the HP Smart Array Support Guide focuses on the sautil command options used to confirm, or change, physical disk firmware.
Serial Number....................... Device File......................... Hardware Revision................... Firmware Revision (in ROM).......... # of Logical Drives................. # of Physical Disks Configured...... # of Physical Disks Detected........ PA5360BBFSW2ON /dev/ciss5 ‘B’ 2.08 1 6 8 ---- ARRAY ACCELERATOR (CACHE) INFORMATION ----------------------------------Array Accelerator Board Present?.... Cache Configuration Status.......... Cache Ratio......................... Total Cache Size (MB).
Disk Capacity.................................... Device Status.................................... Device Vendor ID................................. Device Product ID................................ Device Serial Number............................. Device Firmware Version.......................... 36.4 GB OK HP DG036A8B5B B2G2P55001H70519 HPD4 ---- SAS/SATA DEVICE 1I:1:10:0x5000c5000032b839 [DISK] ----------------------Connector Location............................... Connector...........................
---- SAS/SATA DEVICE 2I:1:14:0x5000c5000030b9c9 [DISK] ----------------------Connector Location............................... Connector........................................ Enclosure........................................ Bay.............................................. WWID............................................. Device Type...................................... Disk Capacity.................................... Device Status.................................... Device Vendor ID...................
• as a boot device, configure a logical drive and then complete the entire boot setup process again. If you have trouble accessing RAID boot data, only limited troubleshooting tools are available. HP recommends booting from an alternative boot media and using STM and sautil online tools. For more information, see the HP Smart Array P400 and P800 Controller for Integrity Servers Support Guide at: http://docs.hp.com/en/netcom.
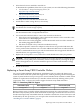
To create a logical drive using ORCA, follow these steps: 1. Select Create Logical Drive. The screen displays a list of available (unconfigured) physical drives and the valid RAID options for the system. 2. Use the arrow keys, space bar, and Tab key to navigate around the screen and set up the logical drive, including an online spare drive if one is required. NOTE: You cannot use ORCA to configure a single spare drive to be shared among several arrays.
2 OpenVMS Installation This chapter describes the installation process for the HP Smart Array P800 Controller on OpenVMS servers.
Checking for the Latest Driver Software The drivers and utilities for the Smart Array series controllers are located at the IT Resource Center website. To search for updated drivers and patches, follow these steps: • Go to the IT Resource Center website: http://itrc.hp.com/ • Search for “Smart Array”. Installing Software To install Smart Array P800 driver software, follow the procedure in the download package.
7. Replace the access panel or cover, and secure it with the thumbscrews if any are present. CAUTION: Do not operate the server with the access panel removed for extended periods of time. The access panel protects thermally sensitive components by ensuring the proper airflow through the server, and also minimizes personal contact with hazardous energy levels. 8. Power on the server.
• • Run saupdate.efi using the using the fs0:\> saupdate.efi command. Use saupdate LIST to display all detected Smart Array controllers along with the active firmware versions. For example: fs0:\EFI\TOOLS> saupdate list ******************************************************************************** Smart Array Offline Firmware Update Utility Version 2.06.10.03 (C) Copyright 2006 Hewlett-Packard Development Company, L.P.
IMPORTANT: Both saupdate.efi and the firmware image file must be located in the same directory. If they are not, copy them both to the EFI partition. Run the saupdate.efi using the fs0:\> saupdate command. • 1. 2. 3. • If you are not using the Offline Diagnostic CD: Download the SA EFI update utility saupdate.efi and copy it to the EFI partition. Download the firmware and copy it to the EFI partition. Boot the system to the EFI Shell and change directories to the EFI partition.
HELP or ? Use HELP or ? to display usage text, program version number, and build date: Enter: saupdate HELP or saupdate ? Error Messages The following error messages may appear when using the saupdate utility: • When keyword LIST or UPDATE is misspelled or extra parameters are specified: Error: Syntax Error Usage: saupdate LIST or saupdate UPDATE [ | all ] • When the controller ID in the saupdate UPDATE command is not correct: No matching controller found • When a firmware file does not exist in the s
fs0:\EFI\TOOLS> saupdate list ************************************************************************ Smart Array Offline Firmware Update Utility Version 2.07.09.02 (C) Copyright 2006 Hewlett-Packard Development Company, L.P. Seg 0 Bus 8 Dev 0 Func 0 Description HP Smart Array P800 External Enclosures Connected : Index Description 2 MSA70 Version 4.10 Version 2.04 In this example, the system contains one MSA70 enclosure at segment 0, bus 8, device 0, function 0, index 2; enclosure firmware 2.
3. • Boot the system to the EFI Shell and change directories to the EFI partition. When you are ready, use saupdate UPDATE to update the firmware on the controller. To update a single enclosure, use this command: saupdate UPDATE To update all attached enclosures, use this command: saupdate UPDATE all_encl For example, to update the enclosure at segment 0, bus 8, device 0, function 0, index 2 with the firmware file VWG2_206.
Verifying the Controller Installation After the system reboots, verify that the installation was successful by following these steps: 1. 2. Boot OpenVMS and log in to a privileged account. Use the MSA Utility to verify that the controller is installed and operating. For example: $ RUN SYS$SYSTEM:MSA$UTIL MSA> SET ADAPTER PKA0 MSA> SHOW ADAPTER Adapter: _PKA0: (DEFAULT) P800 (c) HP P98690D9SU80UT Software 4.
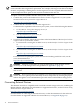
NOTE: Pressing the F8 key at the ORCA prompt may not start ORCA on all terminals. If ORCA does not start when you press the F8 key, reboot the system and use ESC 8 at the ORCA prompt to start ORCA. Figure 2-1 ORCA Main Menu Screen To create a logical drive using ORCA, follow these steps: 1. 2. Select Create Logical Drive. The screen displays a list of all available (unconfigured) physical drives and the valid RAID options for the system.
A Electrostatic Discharge This appendix discusses ways to prevent damage to your system due to Electrostatic Discharge (ESD). This appendix addresses the following topics: “Handling Parts” (page 35) “Grounding” (page 35) Handling Parts To prevent damage to your system, you must take precautions when setting up the system or handling parts. A discharge of static electricity from a finger or other conductor can damage system boards or other static-sensitive devices.
B Cable Kits This appendix provides details on the internal and external cable kits that are available for HP Smart Array SAS controllers. Table B-1 lists internal cables that can be used with HP Smart Array P400 and P800 controllers.
*5992-3804* Printed in the US