User Guide
© Copyright 2012 Hewlett-Packard Development Company, L.P. Bluetooth is a trademark owned by its proprietor and used by Hewlett-Packard Company under license. Microsoft and Windows are U.S. registered trademarks of Microsoft Corporation. SD Logo is a trademark of its proprietor. The information contained herein is subject to change without notice. The only warranties for HP products and services are set forth in the express warranty statements accompanying such products and services.
Table of contents 1 Starting right ................................................................................................................................................... 1 Best practices ....................................................................................................................................... 1 Fun things to do .................................................................................................................................... 1 More HP resources ....
Accessing Beats Audio ..................................................................................... 17 Using video ......................................................................................................................................... 17 Connecting an HDMI device .............................................................................................. 17 Configuring HDMI audio settings .......................................................................................
Updating programs and drivers ......................................................................................... 33 Cleaning your computer ..................................................................................................... 34 Cleaning the trackpad, mouse, and keyboard ................................................... 34 Using security measures .................................................................................................................... 34 Setting passwords .
Computer shuts down unexpectedly .................................................................................. 46 Setup Utility problems ........................................................................................................................ 46 The computer will not enter Setup Utility ........................................................................... 46 Display problems ............................................................................................................
1 Starting right This computer is a powerful tool designed to enhance your work and entertainment. To get the most out of your computer, read this chapter to learn about best practices after setup, fun things to do with your computer, and where to get more HP resources. Best practices After you set up and register the computer, we recommend the following steps: TIP: To quickly return to the computer Start screen from an open app or the Windows desktop, press the Windows logo key on your keyboard.
More HP resources You have already used Setup Instructions to turn on the computer and locate this guide. To locate product details, how-to information, and more, use this table. Resource Contents Setup Instructions ● Overview of computer setup and features. Windows 8 Basics guide ● Overview of using Windows 8. Help and Support ● A broad range of how-to information and troubleshooting tips. ● How-to videos about using the features of your computer.
Resource Contents Limited Warranty* ● Specific warranty information about this computer. To access this guide, select the HP Support Assistant app on the Start screen, select My computer, and then select Warranty and services, or go to http://www.hp.com/go/orderdocuments. *You can find the expressly provided HP Limited Warranty applicable to your product located with the user guides on your computer and/or on the CD/DVD provided in the box.
2 Getting to know your computer Finding your hardware and software information Locating hardware To find out what hardware is installed on your computer: 1. From the Start screen, type c, and then select Control Panel. 2. Select System and Security, and then in the System area, click Device Manager. A list displays all the devices installed in your computer.
Component (2) Description Webcam Records video and takes still photographs. To use the webcam, from the Start screen, type c, and then select Camera. (3) Webcam light On: The webcam is on. (4) Power button ● When the computer is off, press the button to turn on the computer. ● When the computer is in the Sleep state, press the button briefly to exit Sleep. ● When the computer is in Hibernation, press the button down briefly to exit Hibernation.
Right side Component 6 Description (1) Hard drive light Blinking: The hard drive is being used. (2) USB 3.0 ports (2) Connect optional USB 1.0, USB 2.0, or USB 3.0 devices and provide enhanced USB power performance for USB 3.0 devices.
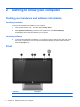
Left side Left side 7
Component (1) Description Audio-out (headphone) jack/ Audioin (microphone) jack Connects an optional device, such as a headset, power stereo speakers, headphones, earbuds, television audio, or a headset microphone. WARNING! To reduce the risk of personal injury, adjust the volume before putting on headphones, earbuds, or a headset. For additional safety information, see the Regulatory, Safety, and Environmental Notices. NOTE: When a device is connected to the jack, the computer speakers are disabled.
Back Component Description (1) Internal microphones (2) Record audio, automatically filtering out the noise around you and cancelling echoes. (2) Security cable slot Attaches an optional security cable to the computer. NOTE: The security cable may not prevent the computer from being mishandled or stolen. (3) USB ports (2) Connect optional USB devices. (4) RJ-45 (network) jack Connects a network cable.
Bottom Component Description (1) Enable the computer fan to cool internal components. Vents (5) NOTE: The fan starts up automatically to prevent overheating. It is normal for the fan to cycle on and off while the computer is on. (2) USB port Connects the USB receiver for the wireless keyboard, mouse, and trackpad. NOTE: This is a dedicated USB port for the receiver.
Labels Identifying the labels The labels on the computer provide information you may need when you troubleshoot problems. The labels are located on the bottom of the computer or in another easily accessible location. ● Service label—Provides important information about your computer. NOTE: Have this information available when you contact support. ● Regulatory label—Provides regulatory information about the computer.
3 Connecting to a network You can explore the globe and access information from millions of websites using your computer and a wired or wireless network connection. This chapter will help you get connected to that world. Connecting to a wireless network Wireless technology transfers information across radio waves instead of wires.
Setting up a WLAN To set up a WLAN and connect to the Internet, you need the following equipment: ● A broadband modem (either DSL or cable) (1) and high-speed Internet service purchased from an Internet service provider ● A wireless router (2) (purchased separately) NOTE: Some modems have a built-in wireless router. Check with your ISP to determine what type of modem you have.
Wireless encryption uses security settings to encrypt and decrypt information that is transmitted over the network. For more information, go to Help and Support. From the Start screen, type h, and then select Help and Support. Connecting to a WLAN To connect to a WLAN, follow these steps: 1. Be sure that the WLAN device in your computer is on. 2. From the Start screen, point to the far-right upper or lower corner of the screen to display the charms. 3.
Connecting to a wired network WARNING! To reduce the risk of electric shock, fire, or damage to the equipment, do not plug a modem cable or telephone cable into an RJ-45 (network) jack. Connecting to a local area network (LAN) Use a LAN connection if you want to connect the computer directly to a router in your home (instead of working wirelessly), or if you want to connect to an existing network at your office. Connecting to a LAN requires an 8-pin, RJ-45 (network) cable.
4 Enjoying entertainment features Use your HP computer as an entertainment hub to socialize via the webcam, enjoy and manage your music, and download and watch movies. Or, to make your computer an even more powerful entertainment center, connect external devices like speakers, headphones, or a gaming console.
Connecting headphones You can connect wired headphones to the headphone jack on your computer. To connect wireless headphones to your computer, follow the device manufacturer's instructions. WARNING! To reduce the risk of personal injury, adjust the volume before putting on headphones, earbuds, or a headset. For additional safety information, see the Regulatory, Safety and Environmental Notices.
3. If the computer screen does not automatically switch, press fn+HDMI to alternate the computer screen to the HDMI device. 4. Use the enter, back space, up arrow, or down arrow keys to make your selections. Configuring HDMI audio settings HDMI is the only video interface that supports high-definition video and audio. After you connect an HDMI device to the computer, you can then turn on HDMI audio by following these steps: 1.
5 Navigating using the keyboard and pointing devices Your computer includes a wireless keyboard, mouse, and trackpad for easy navigation. Use the trackpad to explore all of the Windows 8 touch gestures. After you remove the battery tabs from the accessories, they will automatically pair with the computer. NOTE: The wireless receiver is preinstalled in the dedicated USB port on the bottom of the computer stand.
Using trackpad touch gestures Use your fingers on the trackpad to control the pointer. Tapping To make an on-screen selection, point to an item on the screen, and then tap the trackpad with one finger. Double-tap an item to open it. You can also press and hold your finger to open a help screen that provides information about the selected item. 2-finger click 2-finger click allows you to make menu selections for an object on the screen.
Scrolling Scrolling is useful for moving up, down, or sideways on a page or image. To scroll, place two fingers slightly apart on the trackpad, and then drag them up, down, left, or right. NOTE: Scrolling speed is controlled by finger speed.
Pinching/stretching Pinching and stretching allow you to zoom in or out on images or text. ● Zoom in by placing two fingers together on the trackpad and then moving them apart. ● Zoom out by placing two fingers apart on the trackpad and then moving them together. Edge swipes Use edge swipes to perform tasks such as changing settings and finding or using apps. Right-edge swipe The right-edge swipe reveals the charms, which let you search, share, start apps, access devices, or change settings.
Top-edge swipe The top-edge swipe opens a list of the available apps. To perform a top-edge swipe, gently slide your finger from the top edge toward the center of the trackpad. Left-edge swipe The left-edge swipe reveals your open apps so that you can switch to them quickly. Using the trackpad, swipe from the left edge of the trackpad to switch between apps.
Using the keyboard With the keyboard and mouse, you can type to select items and perform the same functions as you do by using touch gestures. The keyboard also allows you to use action keys to perform specific functions. TIP: The Windows logo key on the keyboard allows you to quickly return to the computer Start screen from an open app or the Windows desktop. Pressing the Windows logo key again will return you to the previous screen.
Component Description (5) Windows application key Displays options for a selected object. (6) HDMI key Alternates the screen image between the computer screen and the external HDMI device connected to the HDMI-in port computer. Press fn+HDMI to switch the screen image. For example, if a game console is connected to the computer, pressing the fn+HDMI keys alternates the screen image from the computer display to the game console. Using the action keys An action key performs an assigned function.
Icon Key Description f10 Decreases speaker volume incrementally as long as you hold down the key. f11 Increases speaker volume incrementally as long as you hold down the key. Using Microsoft Windows 8 shortcut keys Microsoft Windows 8 provides shortcuts to perform actions quickly. Several shortcuts will help you with Windows 8 functions. Press the Windows logo key in combination with the key to perform the action. For additional information on Windows 8 shortcut keys, go to Help and Support.
6 Managing power Initiating Sleep and Hibernation Windows has two power-saving states, Sleep and Hibernation. ● Sleep–The Sleep state is automatically initiated after a period of inactivity. Your work is saved to memory, allowing you to resume working very quickly. You can also initiate Sleep manually. For more information, see Initiating and exiting Sleep on page 27. ● Hibernation–The Hibernation state is automatically initiated if the computer is in the Sleep state for an extended period.
To exit Hibernation, briefly press the power button. The power lights turn on and your work returns to the screen where you stopped working. If you have set a password to be required on wakeup, you must enter your Windows password before your work will return to the screen. Setting password protection on wakeup To set the computer to prompt for a password when the computer exits Sleep or Hibernation, follow these steps: 1. From the Start screen, type power, select Settings, and then select Power Options.
● Press and hold the power button and the mute button. ● Disconnect the computer from external power.
7 Managing and sharing information Drives are digital storage devices or solid-state drives that help you store, manage, share, and access information. Your computer has an internal hard drive that stores your personal files and your computer's software and operating system. For added capacity or functionality, connect an external drive (purchased separately), such as an optical drive or hard drive.
Connecting a USB device CAUTION: To reduce the risk of damage to a USB connector, use minimal force to connect the device. ▲ Connect the USB cable for the device to the USB port. A sound indicates that the device has been detected. NOTE: The first time you connect a USB device, a message displays on the Windows desktop and an icon in the notification area lets you know that the device is recognized by the computer.
Inserting and removing a digital storage card To insert a digital storage card: CAUTION: To reduce the risk of damage to the digital card connectors, use minimal force to insert a digital storage card. 1. Hold the card label-side up, with the connectors facing the computer. 2. Insert the card into the Digital Media Slot, and then press in on the card until it is firmly seated. A sound indicates that the device has been detected. To remove a digital storage card: 32 1.
8 Maintaining peak performance Keep your computer at peak operating performance using the practices and tools described in this chapter. Start with routine maintenance, keep the equipment clean, and regularly update software. Also pay attention to important security issues, including passwords, virus protection, and anti-theft measures. Finally, find out how to access your system settings when you need to contact support or run diagnostics on your computer system.
Cleaning your computer Cleaning your computer helps to keep it in good working condition. CAUTION: Do not use strong solvents, such as alcohol, acetone, ammonium chloride, methylene chloride, and hydrocarbons, which can permanently damage the surface of the computer. Gently wipe the display using a soft, lint-free cloth moistened with an alcohol-free glass cleaner. Use a premoistened germicidal wipe to clean other surfaces. Fibrous materials, such as paper towels, can scratch the computer.
Using Internet security software When you use your computer to access email, a network, or the Internet, you expose your computer to viruses, spyware, and other online threats. To help protect your computer, Internet security software that includes antivirus and firewall features is preinstalled on your computer. ▲ To access Norton Internet Security, from the Start screen, type n, and then select Norton Internet Security.
Setting the Setup Utility (BIOS) security password Password Function BIOS administrator password ● Must be entered each time you access Setup Utility (BIOS). ● If you forget your administrator password, you must take your computer to a service center. NOTE: Use extreme care when making changes in Setup Utility (BIOS). Errors can prevent the computer from operating properly. To set, change, or delete a Security password in Setup Utility (BIOS): 1.
9 Backing up, restoring, and recovering Your computer includes tools provided by HP and the operating system to help you safeguard your information and retrieve it if ever needed. These tools will help you return your computer to a proper working state or even back to the original factory state, all with simple steps.
Creating HP Recovery media HP Recovery Manager offers a way to create recovery media after you set up the computer. HP Recovery media can be used to perform system recovery if the hard drive becomes corrupted. System recovery reinstalls the original operating system and the software programs installed at the factory, and then configures the settings for the programs. HP Recovery media can also be used to customize the system or aid in the replacement of a hard drive.
can choose to restore to a previous point. For more information and steps for using Windows System Restore, from the Start screen, type h, and then select Help and Support. ● If you want a quick and easy way to recover the system without losing your personal data, settings, pre-installed apps on your computer, consider using Windows Refresh. This option does not require backing up data to another drive. See Using Windows Refresh for quick and easy recovery on page 40.
Using Windows Refresh for quick and easy recovery When your computer is not working properly and you need to regain system stability, the Windows Refresh option allows you to start fresh but keep items important to you. IMPORTANT: at the factory. Refresh removes any Desktop apps that were not originally installed on the system NOTE: During Refresh, a list of removed Desktop apps will be saved to your Desktop so you have a quick way to see what you might need to reinstall.
To remove everything and reinstall Windows from the Start screen: 1. On the Start screen, point to the far-right upper or lower corner of the screen to display charms. 2. Click Settings. 3. Click Change PC settings in the bottom right corner of the screen, and then select General from the PC settings screen. 4. Under Remove everything and reinstall Windows, select Get started, and follow the onscreen instructions.
Using HP Recovery media to recover You can use HP Recovery media to recover the original system. This method can be used if your system does not have an HP Recovery partition or if the hard drive is not working properly. 1. If possible, back up all personal files. 2. Insert the recovery media you created (a USB flash drive or a DVD on an external optical drive), and then restart the computer. NOTE: If the computer does not automatically restart in HP Recovery Manager, change the computer boot order 3.
10 Troubleshooting Wireless connection problems Some possible causes for wireless connection problems include the following: ● Wireless device is not turned on. ● Wireless device is not installed correctly or has been disabled. ● Wireless device encountered interference from other devices. ● Wireless device or router hardware has failed. Cannot connect to a WLAN If you have a problem connecting to a WLAN, confirm that the integrated WLAN device is turned on and properly installed on your computer.
If entering a security code is not the problem, you may have a corrupted WLAN connection. Many times, Windows can automatically repair a corrupted WLAN connection. ● If there is a network status icon in the notification area, at the far right of the taskbar, right-click the icon, and then click Troubleshoot problems. Windows resets your network device and attempts to reconnect to one of the preferred networks. ● If there is no network status icon in the notification area, follow these steps: 1.
Network status icon is not displayed If the network status icon is not displayed in the notification area after you configure the WLAN, the software driver is either missing or corrupted. A Windows “Device not Found” error message may also be displayed. To resolve this problem, get the latest version of the WLAN device software and drivers for your computer from the HP website at http://www.hp.com. 1. Open your Internet browser. 2. For U.S. support, go to http://www.hp.com/go/contactHP.
Computer is not responding Use the Windows Task Manager to close any programs that are not responding. 1. Press the ctrl+alt+delete keys. 2. Click Task Manager. 3. Select any program that is not responding, and then click End Task. If closing programs does not work, restart the computer. 1. Press the ctrl+alt+delete keys. 2. Click the Power icon, and then click Restart.
Keyboard, mouse, and trackpad problems ● Be sure that you are using the wireless keyboard or wireless mouse within range of the receiver. ● Be sure that the mouse is not in Suspend mode, which occurs after 20 minutes of inactivity. Click the left mouse button to reactivate it. ● Replace the batteries in the keyboard and mouse. ● Remove the wireless USB receiver on the bottom of the stand, and then reinsert it. Re-pair the keyboard and mouse to the receiver.
4. Press and hold the Connect button (3) for 5 to 10 seconds, until the LED on the receiver lights up or stops flashing. 5. Press and hold the Connect button (4) for 5 to 10 seconds, until the LED on the receiver lights up or stops flashing. Audio problems No sound is produced 48 ● Be sure that you connected powered speakers and that they are turned on. ● Adjust the volume, either on the speakers or through the computer operating system.
To check the audio functions on your computer, follow these steps: 1. From the Start screen, type c, and then select Control Panel. 2. Select Hardware and Sound, and then select Sound. 3. When the Sound window opens, click the Sounds tab. Under Program Events, select any sound event, such as a beep or alarm, and click the Test button. You should hear sound through the speakers or through connected headphones. To check the recording functions on your computer, follow these steps: 1.
11 Specifications Operating specifications NOTE: To see the electrical ratings, refer to your computer’s ratings label, located on the outside of the computer, to determine the exact electrical rating. 50 Factor Metric U.S.
12 Electrostatic Discharge Electrostatic discharge is the release of static electricity when two objects come into contact—for example, the shock you receive when you walk across the carpet and touch a metal door knob. A discharge of static electricity from fingers or other electrostatic conductors may damage electronic components.
Index Symbols/Numerics 2-finger click trackpad touch gesture 20 A action keys ejects a disc 25 fast forward 25 Help and Support 25 identifying 24 mute 25 next track or section 25 play, pause, resume 25 rewind 25 stop 25 using 25 volume down 26 volume up 26 audio-in (microphone) jack, identifying 8 audio-out (headphone) jack, identifying 8 B back up, personal files 37 backups 37 Beats Audio 17 Beats Audio Control Panel 17 best practices 1 Bluetooth device 12 Bluetooth label 11 boot order, changing HP Recover
M maintenance, Disk Defragmenter 33 microphone jack, identifying minimized image creating 41 N network jack, identifying NFC 18 8 9 O operating specifications 50 original system recovery 41 P passwords administrator 34 power-on 34 setting 34 Setup Utility (BIOS) 36 user 34 pinching trackpad touch gesture 22 ports HDMI-in 9, 17 USB 9 USB 3.
turning off the computer 28 U unresponsive system 28 USB 3.