
HP Storage Essentials V5.1 User Guide First Edition (T4283-96026, August 2006)


Storage Essentials 5.1 User Guide 185
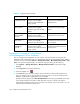
• ”Changing the Provider Log Level” on page 187
• ”Enabling the Scanning of Critical Events of the Management Server Database” on page 188
• ”Viewing the Results of Logging” on page 189
Accessing the Log Files
You can obtain information about the software's and CIMOM's transactions in the log files, which
are in the %MGR_DIST%\logs directory. CIMOM is a component in the CIM management
infrastructure that handles the interaction between management applications and providers. The
log files may contain information that is difficult to understand.
The following listing provides the logs files that would be the most useful to you. It is not a complete
list of all the logs. Some logs are for internal use only.
• appiq.log - Provides information about the transactions in the software including web
messages, EJB information, and general exceptions.
• cimom.log - Provides information about threads with CIMOM, such as provider transactions.
If you want to view all log files, you can save them in a zip file as described in the topic,
”Downloading Logs to a File” on page 185.
Downloading Logs to a File
If you run into problems with the management server, use the “download logs to a file” feature to
track the problem. This feature saves all the log files in a zip file, which is then stamped with the
date and time (24-hour clock).
NOTE: Some of the log files are generated only when you run certain features. For example the
reports.log is only generated when you run reports.
To save all logs to a file:
1. Click Options > Storage Essentials > Manage Product Health in HP Systems Insight
Manager.
2. Select Log Files in the Product Health tree.
3. Click the Download Logs button.
4. When you are asked if you want to open or save the file, do one of the following:
• Microsoft Internet Explorer - Click the Save button.
• Netscape 7 - Select the Save this file to disk option.
The Downloading window appears.
5. Type a name for the *.zip file and select the directory to which you want to save the file.
Keep in mind the following:
• Netscape 7 assumes the file is an HTML file. If you are running Netscape, make sure the file
type is selected to All Files and the file extension is zip. You can make Netscape 7
recognize the zip file next time, by clicking the Advanced button.