
HP StorageWorks Storage Mirroring for Virtual Infrastructure user's guide (T2558-96086, February 2008)

Storage Mirroring for Virtual Infrastructure user’s guide 5
Start Storage Mirroring for Virtual Infrastructure
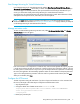
Launch Storage Mirroring for Virtual Infrastructure by selecting Start, Programs, Storage Mirroring, Storage
Mirroring for Virtual Infrastructure
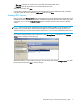
. The first time you launch Storage Mirroring for Virtual Infrastructure, a login
window will appear. In subsequent sessions, after you have entered and saved login information for your
servers, you will be taken directly to the Storage Mirroring for Virtual Infrastructure interface.
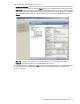
Storage Mirroring for Virtual Infrastructure uses standard Windows-style controls. Enter information in fields,
select options from drop-down menus, click buttons, and use menu options.
NOTE: You must properly configure your ESX servers before you can use Storage Mirroring for Virtual
Infrastructure. Follow the instructions in “Configure your VMware ESX server” on page 3 before you attempt to
use the Storage Mirroring for Virtual Infrastructure software.
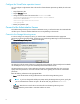
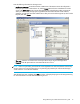
Manage activation codes
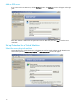
To enter an additional Storage Mirroring activation code, select Go, Manage Activation Codes. The Manage
Activation Codes
window will appear.
Each valid activation code corresponds to a number of slots, where each slot represents the capacity to protect
a single virtual machine. The slots are not bound to a specific socket or piece of hardware. Instead, a slot can
be used to protect a virtual machine on any server in your VI enterprise. Each time a protection is created using
the wizard, the application will automatically update the number of slots available for subsequent protections.
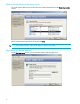
Type in a new Storage Mirroring activation code to be used for a protected virtual machine, then click
Add.
When you are finished, click
Done.
Configure the SCP timeout
The SCP may timeout during the initial mirror if you have a large virtual machine or a slow connection from
the source to the target. Follow these steps to modify the SCP transfer timeout value.
1. Stop all protection jobs.
2. Change the default value of 2880 minutes in the
DefaultJob.xml file:
<PropertyItem Name="ScpTimeoutMin" Access="PUBLIC" Permission="READWRITE">
<Value xsi:type="xsd:int">2880</Value>
</PropertyItem>
3. Restart your protection jobs.