
HP StorageWorks Storage Mirroring for Virtual Infrastructure user's guide (T2558-96086, February 2008)


24
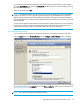
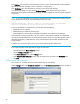
NOTE: When you click the Delete Protection button, you will be prompted to either keep or delete the
associated replica virtual machine.
If you no longer want to protect the source
and
are no longer interested in the target replica, then select
the
Delete the associated replica virtual machine option.
If you no longer want to move data from the source to the target but still want to keep the target replica,
then select the
Keep the associated replica virtual machine option. (For instance, you would use this option
to de-commission the source and use the target replica as the production server.) When you select this
option, the target will be preserved and registered (provided that it has been fully synchronized), and
the target virtual machine will appear in VirtualCenter with the name
<source vm name>_Replica. If
the target is not fully synchronized, related files will be kept on the target ESX server but will not be
registered.
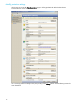
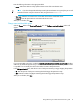
• Start protection—Select a protection, then click the Start button to enable protection for the protection.
NOTE: If you have previously stopped protection and then click the Start button for that protection job,
Storage Mirroring for Virtual Infrastructure will check to see if the source ESX server
.vmdk files are the
same as the target
.vmdk files. If they are the same, Storage Mirroring for Virtual Infrastructure will
resume protection starting with the Replication cycle, bypassing the synchronization step.
• Stop protection—Select a protection, then click the Stop button to disable protection for the protection job.
NOTE: After the initial synchronization has completed, you can use the Stop button to stop protection
for a job. This allows the end user to perform a manual failover.
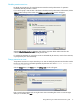
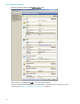
• Failover—Select a protection, then click the Failover button to shut down the source virtual machine and start
the replica virtual machine. A dialog box will appear where you can select failover options. For more
information about when to use each option, see “Understanding failover and job reversal” on page 25.
•
Reverse protection—Select a protection that has already failed over, then click the Reverse protection button to
start the protection in the reverse order.
The job will start synchronization in the reverse direction. The job name and the log file name will change
accordingly. When the restore completes, the job will be running in the opposite direction (that is, if the job
had originally be running from server
Indy to server Jersey, it will now be running from server Jersey to
server
Indy).
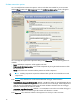
•
Undo Failover—Select a protection that has already failed over, then click the Undo Failover button to undo
the failover of the selected protection.
The state will change to Undoing. When the Undo Failover is complete, the job will re-start as normal.
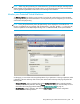
•
View protection errors—Select a protection, then click the View errors button to view the most recent errors
that have been detected for that protection job.
•
View protection details—Click this button to show or hide the bottom pane, which shows protection
information for the selected protection job.