
HP StorageWorks Storage Mirroring Recover User's Guide (T5437-96008, November 2009)


242 of 739
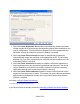
4. In the Config Database Server field, enter the name of the Microsoft SQL Server
that hosts the configuration database.
5. In the Config Database Name field, enter the name of the configuration database
for the production SharePoint web front-end server.
6. In the SharePoint Admin Name field, enter the account used to install and
configure SharePoint on the production SharePoint web front-end server. This
should be entered as a fully-qualified domain name (domain\username).
7. In the SharePoint Admin Password field, enter the password for the SharePoint
Admin account.
8. In the Confirm Password field, re-enter the password.
9. When you have finished setting the configuration options, click Connect Server.
When you select this button, the SharePoint front-end web server specified in the
Server Name field will be extended into the source SharePoint configuration.
Note:
● After you click Connect Server, it is recommended that you connect to
both the source and target front-end web servers using a browser.
● The process of connecting a front-end web server to an existing
SharePoint configuration can take several minutes to complete. During
this time, you will be able to perform other tasks within the Configure
Protection window; however, you will not be able to close the Configure
Protection window until the task is complete.
● You must manually install the Central Administration web application
after the target has been extended in order to be able to administrate
SharePoint in the event of a failover.
Next step: Save configuration configuration
Saving configuration changes
If you have not done so already, launch the Protecting a SharePoint server workflow.
After you have changed the configuration parameters, click OK to apply the settings. If
you click Cancel, any changes you have made will be discarded and the previous
configuration parameters will be used.
When you have finished configuring the optional protection options, continue with
Validate the configuration.