HP StorageWorks 1/8 Tape Autoloader User and Service Guide Ultrium 230, Ultrium 232, Ultrium 448, Ultrium 460, Ultrium 960, DLT VS80, SDLT 320 Part number: AF202-96003 Third edition: August 2005
Legal and notice information © Copyright 2002-2005 Hewlett-Packard Development Company, L.P. Hewlett-Packard Company makes no warranty of any kind with regard to this material, including, but not limited to, the implied warranties of merchantability and fitness for a particular purpose. Hewlett-Packard shall not be liable for errors contained herein or for incidental or consequential damages in connection with the furnishing, performance, or use of this material.
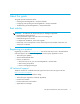
Contents About this guide . . . . . . . . . . . . . . . . . . . . . . . . . . . . . . . . . . . . . . . . . . . . . . . . . 7 Rack stability . . . . . . . . . . . Registering your product . . . HP technical support . . . . . . HP-authorized reseller . . Helpful web sites . . . . . . ... ... ... ... ... ... ... ... ... ... .... .... .... .... .... ... ... ... ... ... ... ... ... ... ... .... .... .... .... .... ... ... ... ... ... ... ... ... ... ... ... ... ... ... ... .... .... .... .... .... ..
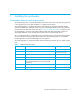
Cleaning the tape drive. . . . . . . . . . . . . . . . . . . . . . . . . . . . . . . . . . . . . . . . . . . . . . . . . . . . . 34 Updating cartridge inventory . . . . . . . . . . . . . . . . . . . . . . . . . . . . . . . . . . . . . . . . . . . . . . . . . 36 3 Autoloader administration . . . . . . . . . . . . . . . . . . . . . . . . . . . . . . . . . . . . . . . 37 Configuring the autoloader . . . . . . . . . . . . . . . . . . . . . . . . . . . . . . . . . . . . . . . . . . . . . . . . . .
B Regulatory compliance notices . . . . . . . . . . . . . . . . . . . . . . . . . . . . . . . . . . . . 73 Regulatory compliance identification numbers . . . . . . . . . . . . . . . . . . . . . . . . . . . . . . . . . . . . . Regulatory compliance label location . . . . . . . . . . . . . . . . . . . . . . . . . . . . . . . . . . . . . . . . . . . Power cords. . . . . . . . . . . . . . . . . . . . . . . . . . . . . . . . . . . . . . . . . . . . . . . . . . . . . . . . . . . . .
About this guide This guide provides information about: • Installing the HP StorageWorks 1/8 Tape Autoloader • Configuring and operating the HP StorageWorks 1/8 Tape Autoloader • Troubleshooting the HP StorageWorks 1/8 Tape Autoloader Rack stability WARNING! To reduce the risk of personal injury or damage to equipment: • Extend leveling jacks to the floor. • Ensure that the full weight of the rack rests on the leveling jacks. • Install stabilizing feet on the rack.
• Operating system type and revision level • Detailed, specific questions For continuous quality improvement, calls may be recorded or monitored. HP strongly recommends that customers sign up online using the Subscriber's choice web site at http://www.hp.com/go/e-updates. • Subscribing to this service provides you with e-mail updates on the latest product enhancements, newest versions of drivers, and firmware documentation updates as well as instant access to numerous other product resources.
1 Installing the autoloader Autoloader features and requirements The unique design of the 1/8 Tape Autoloader has the drive in the center with slots rotating around it. This design houses up to eight cartridges in a compact 2U form factor.
Maximum storage capacity and data transfer rate Maximum storage capacity and maximum data transfer rates for each 1/8 Tape Autoloader model are as follows: 1/8 Ultrium Tape Autoloaders Table 2 Characteristic Specification Maximum storage capacity, 8 data cartridges Native: 800 GB (8 x 100 GB) Compressed: 1.6 TB (2:1 compression) Maximum data transfer rate Native: 15 MB/s (54 GB/hr.) Compressed: 30 MB/s (108 GB/hr.
Table 6 Ultrium 960 Tape Autoloader specifications Characteristic Specification Maximum storage capacity, 8 data cartridges Native: 3.2 TB (8 x 400 GB) Compressed: 6.
The 1/8 Tape Autoloader is NOT compatible with a standard differential (Diff) or High-Voltage Differential (HVD) SCSI bus. The autoloader is compatible with a narrow (50-pin) SCSI bus using a 68-pin to 50-pin adapter that terminates the unused 18 pins (NOT included with the autoloader). These adapters are sometimes labeled high-byte termination. NOTE: HP does not recommend connecting any of the Ultrium or SDLT 320 Tape Autoloaders to a 50-pin adapter as this will degrade performance.
Autoloader product overview Figure 1 Front panel overview Number Description 1 Power switch 2 Mailslot 3 Front panel LEDs 4 Front panel LCD screen 5 Control keys Figure 2 Rear panel overview Number Description 1 68-pin HD SCSI connectors 2 Fan vent 3 Power connector 1/8 Tape Autoloader User and Service Guide 13
Choosing a location Choose a location that meets the following criteria: Table 9 Location criteria Criteria Definition Standalone requirements Select a location that is flat, sturdy, level, and close to a host server. Do not place the autoloader on the floor or other carpeted surfaces. Do not place the autoloader on its side, upside down, or stack items on top of the autoloader.
Unpacking the autoloader Before you begin, clear a work surface to unpack the autoloader. Select an open 2U computer rack location or choose a desktop location near the host server. CAUTION: If the temperature in the room where the autoloader will be installed varies by 30 degrees F (15 degrees C) from the room where the autoloader was stored, allow the autoloader to acclimate to the surrounding environment for at least 12 hours before opening the shipping container. Unpacking the autoloader: 1.
Identifying product components Confirm that you have received the following: • SCSI cable • SCSI terminator • Power cable • Documentation kit • Documentation CD • Installation Poster • HP OpenView Storage Data Protector Installation Instructions • HP Worldwide Warranty • HP Safety Guide Rack mount kit (optional) If you purchased the optional rack mount kit, verify that you have received the following components: Figure 4 Rack mount kit components 16 Number Description 1 Screws and clip nuts 2 Mounti
Installing the autoloader into a rack (optional) The autoloader fits all standard 19-inch racks, taking up 2U of space. To install the autoloader into a rack, install the mounting brackets on both sides of the autoloader and the rails in the selected rack location. To install the autoloader: 1. Use a medium-sized Phillips screwdriver to remove the two screws near the front on each side of the autoloader cover (see Figure 5). 2.
4. Slide the autoloader onto the rails and secure the mounting bracket to the rack using the screws and clip nuts from the rack mount kit (see Figure 7). Figure 7 Sliding the autoloader into the rack slot and securing the mounting bracket SCSI host bus adapters (HBAs) To get optimum performance from your 1/8 Tape Autoloader you need a SCSI bus that can transfer data at a rate that supports the Tape Autoloader’s maximum burst transfer speed, see ”Maximum storage capacity and data transfer rate” on page 10.
LUN scanning The HP StorageWorks 1/8 Ultrium 960, Ultrium 448 and Ultrium 232 Tape Autoloaders and the DLT VS80 Tape Autoloader use a single SCSI ID and dual LUNs to control the tape drive (LUN 0) and autoloader robotic (LUN 1). These models require an HBA that supports LUN scanning. If it is not enabled, your host system will not scan beyond LUN 0 and will fail to discover the library. It will just see the tape drive. Some HBAs, such as RAID controllers, do not support LUN scanning.
NOTE: The host bus adapter should be LVDS. A SE SCSI host bus adapter will work, but will severely degrade performance. If there are any SE devices on the same SCSI bus, the entire SCSI bus will negotiate down to SE speed and severely degrade performance. Never attach the Ultrium 960 Tape Autoloader to a SE SCSI bus.
Preparing the host and verifying the connection Follow these general guidelines: • Connect to a suitably-rated HBA, see ”SCSI host bus adapters (HBAs)” on page 18. Remember that if there are any SE devices on the same SCSI bus, the entire SCSI bus will negotiate down to SE speed and severely degrade performance. • When the host server is powered on, install software and/or driver(s) that are compatible with the autoloader. Software compatibility information is available at www.hp.com/go/automated.
Installing the autoloader
2 Operating the autoloader Operator’s panel overview The operator's panel consists of four LEDs, four buttons, and a 2-line by 16-character LCD screen. The operator's panel provides everything you need to monitor autoloader status and control all of its functions. The display defaults to the Home screen. The Home screen consists of the autoloader status on the top line and the current cartridge inventory on the second line.
Exporting the indicated cartridge will clear the error condition. See ”Exporting tape cartridges” on page 31. If these symptoms occur on multiple known-good cartridges, consider cleaning the tape drive. See ”Cleaning the tape drive” on page 34. If a particular cartridge causes these symptoms repeatedly, that cartridge may be defective or invalid. If the tape drive has a cartridge loaded, the top line displays: Drive ready or Drive loaded.
Table 10 LEDs LED Color Description Media Attention Amber Illuminated if the tape drive has detected a cartridge or tape fault. Recommended action is to export the cartridge from the autoloader. Doing so turns off the LED. See ”Exporting tape cartridges” on page 31. If a particular cartridge causes these symptoms repeatedly, that cartridge may be defective. Error Red Illuminated if an unrecoverable tape drive or autoloader error occurs.
To access Offline mode 1. From the Home screen, press + or - until Go Offline displays on the top line of the LCD screen. 2. Press Enter to select. You can either use the menu to Go Online again or the autoloader will automatically revert to online mode, if it receives no further commands from the Operator’s Control Panel for three minutes.
Understanding the menu structure (all other models) This menu structure is available for all Tape Autoloader models except the Ultrium 232, Ultrium 448 and Ultrium 960 Tape Autoloaders, which are described on page 25.
Using tape cartridges CAUTION: Do not degauss HP Ultrium data cartridges! Ultrium data cartridges are pre-recorded with a magnetic servo signal. This signal is required in order to use the cartridge with the Ultrium 460, Ultrium 232, Ultrium 448 and Ultrium 960 Tape Autoloader. Keep magnetically charged objects out of close range.
Table 14 Ultrium 448 tape autoloader Cartridge Type Part Number HP Ultrium 400 GB data cartridge Ultrium 2, red C7972A HP Ultrium universal cleaning cartridge, (50 cleans), orange C7978A Table 15 Ultrium 460 tape autoloader Cartridge Type Part Number HP Ultrium 400 GB data cartridge Ultrium 2, red C7972A HP Ultrium universal cleaning cartridge, (50 cleans), orange C7978A Table 16 Ultrium 960 tape autoloader Cartridge Type Part Number HP Ultrium 800 GB data cartridge Ultrium 3, yellow C7
Table 18 SDLT 320 tape autoloader Cartridge Type Part Number HP Super DLTtape 1 data cartridge 220/320GB, green C7980A HP SDLT cleaning cartridge (20 cleans) C7982A Importing tape cartridges CAUTION: Importing or exporting media during a data backup may result in adverse results that could include backup failure or other errors. This operation imports a cartridge into a specific empty slot on the carousel. To import tapes into the autoloader: 1.
Exporting tape cartridges CAUTION: Importing or exporting media during a data backup may result in adverse results that could include backup failure or other errors This option moves a cartridge from a specific slot to the mailslot. It is accessed from the Commands menu. To export one or more cartridges from the autoloader: 1. Ultrium 232, Ultrium 448 and Ultrium 960: From the Home Screen, press + or - until Go Offline displays on the top line of the LCD screen. Press Enter to select.
Loading tape cartridges This option loads a cartridge from the autoloader slots into the tape drive. To use this option: 1. Ultrium 232, Ultrium 448 and Ultrium 960: From the Home Screen, press + or - until Go Offline displays on the top line of the LCD screen. Press Enter to select. Press + or - until Commands displays on the top line of the LCD screen. Press Enter to select. All other models: From the Home Screen or Main menu, press + or - until Commands displays on the top line of the LCD screen.
Ultrium 800 GB, 400 GB and 200 GB cartridges • Slide the switch to the right to write-protect the cartridge. A small pad-lock is visible indicating that the cartridge is write-protected (see Figure 15). • Slide the switch to the left to allow the autoloader to write data to the cartridge (see Figure 15). You cannot write-enable Ultrium 800 GB WORM cartridges because you cannot erase or overwrite data on WORM data cartridges; you can only append data up to the maximum, full capacity of the tape cartridge.
Maintaining cartridges CAUTION: Do not degauss HP Ultrium data cartridges! These data cartridges are pre-recorded with a magnetic servo signal. This signal is required in order to use the cartridge with the Ultrium 960, 448, 232 or 460 tape drive. Keep magnetically charged objects out of close range. To ensure the longest possible life for all of your data cartridges, follow these guidelines: • Do not drop a cartridge.
To clean the tape drive: 1. Ultrium 232, Ultrium 448 and Ultrium 960: From the Home Screen, press + or - until Go Offline displays on the top line of the LCD screen. Press Enter to select. Press + or - until Commands displays on the top line of the LCD screen. Press Enter to select. All other models: From the Home Screen or Main menu, press + or - until Commands displays on the top line of the LCD screen. Press Enter to select. 2. Press + or - until Clean Drive displays on the LCD screen.
Updating cartridge inventory This option will analyze the slots and drives in the autoloader. To update the inventory information: 1. Ultrium 232, Ultrium 448 and Ultrium 960: From the Home Screen, press + or - until Go Offline displays on the top line of the LCD screen. Press Enter to select. Press + or - until Commands displays on the top line of the LCD screen. Press Enter to select.
3 Autoloader administration Configuring the autoloader The Configuration menu provides access to the following autoloader configuration options: • Resetting the autoloader • Changing SCSI IDs • Setting autoloader mode • Updating firmware from tape To access the Configuration menu: 1. Ultrium 232, Ultrium 448 and Ultrium 960: From the Home Screen press + or - until Go Offline displays on the top line of the LCD screen. Press Enter to select.
Changing the SCSI ID This option changes the SCSI IDs that the autoloader uses. • The HP StorageWorks 1/8 Ultrium 232, Ultrium 448 and Ultrium 960 Tape Autoloader models and the DLT VS80 Tape Autoloader models occupy one SCSI ID. The default SCSI ID is 5. Change a SCSI ID only if there is another device already assigned to this ID, • All other Tape Autoloader models occupy two SCSI IDs, one ID is assigned to the autoloader’s SCSI controller and the second ID is assigned to the tape drive.
NOTE: If you changed the SCSI ID, you must also cycle power on the host server and reconfigure your backup software before you can use the autoloader. Consult your hardware and software manuals for more information.
When the first tape is full or unloaded for any reason, the autoloader automatically removes the tape from the drive, puts it in its original slot, then loads the next available higher numbered slot. To further determine how you want tapes loaded into the autoloader’s tape drive while in Sequential mode, you can set Loop (1/8 Ultrium 232, Ultrium 448 and Ultrium 960) or Circular (all other models) and Autoload options from the autoloader front panel.
2. Press + or - until Loop Mode or Circular Mode displays on the LCD screen. The second line on the LCD screen indicates the current status, either On or Off. Press Enter. The LCD screen indicates whether you are about to turn Loop or Circular mode on or off. 3. Press Enter to accept the change to Loop or Circular mode or Cancel to exit and not save the changes. Autoload mode on/off This option turns Autoload mode on or off and is only used when in Sequential mode.
Using a firmware upgrade tape This option performs a firmware code update to the drive only using a firmware upgrade cartridge. NOTE: The code update operation assumes the upgrade tape is imported as part of the procedure. Do not import the firmware update cartridge before starting this procedure. NOTE: To update the firmware for the autoloader robotics, a SCSI diagnostic utility is needed, such as HP Library & Tape Tools. To use this option: 1.
Running the autoloader system test The System Test option cycles the autoloader through the process of loading, calibrating, and unloading all cartridges in the carousel. Running a System Test verifies the basic operational soundness of the autoloader and tape drive. In the DLT VS80 Tape Autoloader, the System Test continues indefinitely until you press Cancel. With all Ultrium Tape Autoloaders and the SDLT 320 Tape Autoloaders you have the option to Select Cycles: 270, 540, 1080 or endless.
View error log or event log This option provides access to the most recent autoloader errors and events (see Table 20 on page 59 for a description of error codes). This information is stored in the error log (Ultrium 232, Ultrium 448 and Ultrium 960 models) or event log (all other models). To use this option: 1. From the Home screen or Main menu, press + or - until Information displays on the top line of the LCD screen. Press Enter to access the available options. 2.
Firmware revision This option displays the version of the firmware currently installed in the autoloader. There are three firmware images in the autoloader. The revision information for these images is displayed on the bottom line of the LCD display in this order: Ultrium Tape Drive Controller, Autoloader SCSI Controller, and Autoloader Robotics Controller. To use this option: 1. From the Home screen or Main menu, press + or - until Information displays on the top line of the LCD screen.
Autoloader administration
4 Diagnostics and troubleshooting Using HP Library & Tape Tools to diagnose problems With HP Library & Tape Tools installed on the host server • Identify all SCSI devices connected to your system • View detailed configuration, identification, inventory, and drive information for the autoloader • Easily update autoloader and drive firmware • Run advanced diagnostic tests, including connectivity, read/write, media validation, and testing the functionality of the autoloader • View autoloader and drive error
Troubleshooting Installation problems Problems encountered during the installation of the autoloader are usually caused by improper SCSI bus configuration, application software configuration errors, or an incorrectly configured operating system.
• Compatibility: Ensure that the autoloader is compatible with the SCSI host adapter and backup application you plan to use. For a list of compatible SCSI adapters and application software, check with your SCSI host adapter manufacturer, backup application vendor, or the HP support website at www.hp.com/support. NOTE: The host bus adapter for the 1/8 Ultrium 232, Ultrium 448, Ultrium 460, Ultrium 960 and SDLT 320 Tape Autoloaders should be SCSI-3 LVDS.
Troubleshooting table Table 19 Troubleshooting table Problem Solution Power Autoloader does not power on. • Check all power cord connections. • Make sure the power switch on the front panel is in the ON position. • Make sure there is power to the outlet. Try another working outlet. • Replace the power cord. • Contact your service representative. No display messages appear. • Make sure the power cord is connected. • Make sure the power switch is on. • Power cycle the autoloader.
Problem Solution Media Cleaning or data cartridge incompatible with drive. Make sure you are using data and cleaning cartridges that are compatible with the drive and model of your autoloader (see ”Cartridge type” on page 28). The autoloader automatically unloads incompatible cartridges, the Media Attention LED flashes, and an exclamation point (!) displays in the inventory display for the indicated slot number. You will need to export the media in order to clear the state.
Problem Solution Device Not Detected on SCSI Bus Connected to a high voltage differential SCSI bus/host adapter • Attach device to a LVDS SCSI host adapter/bus. • SCSI cable length exceeded, use shorter cable, or remove other devices from the bus. • Check for conflicting SCSI IDs. • DLT VS80, Ultrium 232, Ultrium 448 and Ultrium 960 models: check that the HBA supports LUN scanning and this feature is enabled. • Device not properly terminated. See ”Installation problems” on page 48.
Problem Solution SCSI ID Changed drive SCSI ID, but the host server does not recognize the new ID. • Make sure that all SCSI devices on the same bus have unique ID numbers. • If the SCSI bus is narrow (50-pin) only SCSI IDs 0 through 7 are available. • Make sure that you cycle power on the autoloader after changing the SCSI ID. • Reboot the host server. Autoloader Performance The autoloader is not efficiently backing up data. • Check the network bandwidth from the host computer.
Problem Solution Media Attention LED Issues Contamination by loose debris. Avoid contamination by ensuring that the autoloader is installed in a clean, contamination-free environment. Cartridges should be stored vertically in their plastic cases. Continue cleaning the tape drive as needed. Non-acclimated media A cartridge should be acclimated for at least 24 hours before being used, particularly if it has been stored at a substantially different temperature or level of humidity than the autoloader.
Removing stuck tapes from slots NOTE: Contact your HP support representative if a cartridge is stuck in the drive. In the event of a severe mechanical problem with the autoloader or circumstances require you to remove cartridges: 1. Move the power switch on the front panel to the OFF position. You may need to use the tip of a pen or similar item to move the power switch. 2. Remove the power cable and SCSI cables from their connectors on the back panel of the autoloader.
carrier is directly in front of the mailslot, gently rotate the carousel counterclockwise by moving the belt or carriers until the carrier is no longer in front of the mailslot.
8. Carefully pull the cartridge lock release lever as shown in Figure 20 away from the cartridge carrier allowing the cartridge to slide out of the carrier. Figure 20 Pull cartridge lock release lever 9. After removing the cartridges from the desired carriers, reinstall each carrier by placing it on the belt and rotating it clockwise until the tab engages with the belt. • Make sure that the rollers on the bottom of the carrier are aligned in the carrier tracks.
Autoloader error codes If an error occurs during operation of the autoloader, the autoloader stops the current operation and displays an error code on the top line of the LCD screen. Unless otherwise noted in Table 20, try to resolve the error by cycling power on the autoloader and retrying the last operation. If the error persists, contact support personnel. To view the error log: 1. From the Home screen or Main menu, press + or - until Information displays on the top line of the LCD screen.
A description of each error codes is provided in the following table. Table 20 Main Error codes Error Code Description Details 81 Invalid command error This error indicates that the autoloader received an undefined command or an invalid parameter to a command. This is most likely caused by software, a diagnostic or the driver. Retry and if the error recurs, contact your technical support representative.
Table 20 Main Error codes Error Code Description Details 87 Operation time-out A command did not complete in the required amount of time. Use the Reset option in the Configuration menu or cycle power on the autoloader and attempt the operation again. If the error recurs, contact your technical support representative. 88 Ultrium 232, Ultrium 448 and Ultrium 960: reserved Contact your technical support representative.
Table 20 Main Error codes Error Code Description Details 93 Cartridge load error A failure occurred while trying to load a cartridge from its slot to the drive. Run the System Test from the Diagnostic menu. If the error recurs, contact your technical support representative. 94 Cartridge unload error A failure occurred while trying to unload a cartridge from the drive to its slot. Run the System Test from the Diagnostic menu. If the error recurs, contact your technical support representative.
Table 20 Main Error codes Error Code Description Details A2 Gripper position error Gripper unable to reach position. Run the System Test from the Diagnostic menu. If the error recurs, contact your technical support representative. A3 Cartridge pick error Error occurred while trying to pull a cartridge from the drive or a carousel slot. Run the System Test from the Diagnostic menu. If the error recurs, contact your technical support representative.
Table 20 Main Error codes Error Code Description Details B4 Loader to drive communication IC error Failure in IC handling loader to drive communication. Contact your technical support representative. B5 Display error Cycle power on the autoloader and attempt the operation again. If the error recurs, contact your technical support representative. B6 Memory error Cycle power on the autoloader and attempt the operation again. If the error recurs, contact your technical support representative.
Table 20 Main Error codes Error Code BE Description Details VS80: Autoloader did not load cartridge currently in tape drive Cycle power on the autoloader and attempt the operation again. If the error recurs, contact your technical support representative. Ultrium/SDLT: Generic Drive response error BF 64 Drive broken, needs repair Diagnostics and troubleshooting Cycle power on the autoloader and attempt the operation again. If the error recurs, contact your technical support representative.
Error subcode description Table 21 Error subcodes Error Subcode Description 00 No error 01 Communication timeout 02 Length expired before getting expected character 03 Any other kind of driver error 10 Start pattern missing 11 Sequence enumeration error 12 Packet length error 13 Checksum mismatch 14 End pattern missing 15 Drive busy - command rejected 16 General drive error 17 Byte error 18 Command negative acknowledged. 19 Link not open. 21 Carrier state error.
Table 21 Error subcodes Error Subcode 66 Description 2D Belt position error at move to carrier 4. 2E Belt position error at move to carrier 5. 2F Belt position error at move to carrier 6. 30 Belt position error at move to carrier 7. 31 Belt position error at move to carrier 8. 32 Belt position error at move to carrier 9 (optional). 33 Belt position error at move to carrier 10 (optional). 35 Gripper start error. Start of gripper motor unsuccessful. 36 Gripper open error.
Table 21 Error subcodes Error Subcode Description 4E Error in slider adaption. 50 Door open error. Door open position not reached. 51 Door close error. Door close position not reached. 52 Door repetitions error. Door close repetitions reached. 60 Axis initialization error. Initialization of all axis not successful. 61 Carrier position error. 70 Unknown cartridge error. 71 Door close error at import/export. 72 Wrong source carrier state. 73 Wrong destination carrier state.
Diagnostics and troubleshooting
A Technical specifications Physical 1/8 autoloader specifications: all models Table 22 1/8 Tape Autoloader physical specifications Characteristics Product alone Packaged Height 8.6 cm (3.4 in) 24 cm (9.4 in) Width 42 cm (16.5 in) 60 cm (23.6 in) Depth 61.7 cm (24.3 in) 79 cm (31.1 in) Weight 11.3 kg (24.9 lb.
Characteristic Specification Number of slots 8 MSBF 500,000 swaps Interface Ultra160 SCSI LVD/SE 1/8 Tape Autoloader Ultrium 448 Maximum storage capacity 8 data cartridges Native: 1.6 TB Maximum data transfer rate Native: 24 MB/s (86 GB/hr.) Compressed: 3.2 TB (assuming 2:1 compression) Compressed: 48 MB/s (172 GB/hr.
Characteristic Specification MSBF 500,000 swaps Interface Ultra320 SCSI LVD 1/8 Tape Autoloader DLT VS80 Maximum storage capacity 8 data cartridges Native: 320 GB Maximum data transfer rate Native: 3 MB/s (10.8 GB/hr.) Compressed: 640 GB (assuming 2:1 compression) Compressed: 6 MB/s (21.6 GB/hr.
Environmental specifications Table 24 Autoloader Environmental Specifications Characteristic Specification Temperature Operating 10º to 35º C Non-operating -40º to 60º C Recommended operating temperature 20º to 30º C Temperature shock immunity - maximum rate of change 10º C per hour Humidity 72 Operating 20% to 80% RH non-condensing Non-operating 20% to 80% RH non-condensing Technical specifications
B Regulatory compliance notices This appendix contains regulatory notices for the HP StorageWorks 1/8 Tape Autoloader. Regulatory compliance identification numbers For the purpose of regulatory compliance certifications and identification, this product has been assigned a unique regulatory model number. The regulatory model number can be found on the product nameplate label, along with all required approval markings and information.
NOTE: Route power cords so that they will not be walked on and cannot be pinched by items placed upon or against them. Pay particular attention to the plug, electrical outlet, and the point where the cords exit from the product. Federal Communications Commission notice Part 15 of the Federal Communications Commission (FCC) Rules and Regulations has established Radio Frequency (RF) emission limits to provide an interference-free radio frequency spectrum.
• Connect the equipment into an outlet on a circuit that is different from that to which the receiver is connected. • Consult the dealer or an experienced radio or television technician for help. Declaration of Conformity for products marked with the FCC logo, United States only. This device complies with Part 15 of the FCC Rules.
European Union notice Products bearing the CE marking comply with the EMC Directive (89/336/EEC) and the Low Voltage Directive (73/23/EEC) issued by the Commission of the European Community.
Korean notices Class A equipment Class B equipment BSMI notices Class A equipment Class B equipment 1/8 Tape Autoloader User and Service Guide 77
Taiwan battery recycle statement Recovery mark: Recovery text: Four-in-one recycling symbol “Please recycle waste batteries” 廢電池請回收 Laser compliance notices This device may contain a laser that is classified as a Class 1 Laser Product in accordance with U.S. FDA regulations and the IEC 60825-1. The product does not emit hazardous laser radiation.
Dutch laser notice French laser notice AVERTISSEMENT : cet appareil peut être équipé d'un laser classé en tant que Produit laser de classe 1 et conforme à la réglementation de la FDA américaine et à la norme 60825-1 de l'IEC. Ce produit n'émet pas de rayonnement dangereux. L'utilisation de commandes, de réglages ou de procédures autres que ceux qui sont indiqués ici ou dans le manuel d'installation du produit laser peut exposer l'utilisateur à des rayonnements dangereux.
German laser notice VORSICHT: Dieses Gerät enthält möglicherweise einen Laser, der nach den US-amerikanischen FDA-Bestimmungen und nach IEC 60825-1 als Laserprodukt der Klasse 1 zertifiziert ist. Gesundheitsschädliche Laserstrahlen werden nicht emittiert. Die Anleitungen in diesem Dokument müssen befolgt werden. Bei Einstellungen oder Durchführung sonstiger Verfahren, die über die Anleitungen in diesem Dokument bzw.
Japanese laser notice Spanish laser notice ADVERTENCIA: Este dispositivo podría contener un láser clasificado como producto de láser de Clase 1 de acuerdo con la normativa de la FDA de EE.UU. e IEC 60825-1. El producto no emite radiaciones láser peligrosas. El uso de controles, ajustes o manipulaciones distintos de los especificados aquí o en la guía de instalación del producto de láser puede producir una exposición peligrosa a las radiaciones.
Regulatory compliance notices
C Electrostatic discharge To prevent damaging the system, be aware of the precautions you need to follow when setting up the system or handling parts. A discharge of static electricity from a finger or other conductor may damage system boards or other static-sensitive devices. This type of damage may reduce the life expectancy of the device.
Electrostatic discharge
Index A accessories 16 authorized reseller, HP 8 autodetect mode 39 autoloader registration 7 autoloader accessories 16 autoloader reset 37 autoloader specifications 69 autoloader specifications, SDLT 320 data transfer rate 71 drive type 71 interface 71 number of slots 71 storage capacity 71 autoloader specifications, Ultrium 230 data transfer rate 69 drive type 69 interface 69 number of slots 69 storage capacity 69 autoloader specifications, Ultrium 232 data transfer rate 69 drive type 69 interface 70 numb
connecting the autoloader 18 control button 25 customer support 7 cycle count 43 D Declaration of Conformity 75 device driver SCSI 49 diagnostic utility 41 diagnostics 41 dissipating floor mats 83 DLT VS80 71 drive cleaning 34 E electrostatic damage prevention 83 electrostatic discharge (ESD) protection 21 electrostatic discharge.
Ready/Activity 24 loader mode changing 40 location requirements 14 loop mode 40 LUN 19 LUN scanning 9, 19 regulatory compliance identification numbers 73 notices 73 regulatory model number 73 resetting the autoloader 37 S packing 15 parts proper handling 83 storing 83 transporting 83 physical specifications 69 power source 14 powering on 18 preventing electrostatic damage 83 product components 16 product revision 44 SCSI backup application 49 SCSI cabling 48 SCSI compatibility 49 SCSI device driver 49 S
tapes 28 stuck 55 technical support, HP 7 temperature and humidity specifications 72 termination SCSI 48 toe straps, using 83 tools, conductive type 83 troubleshooting table 50 U Ultrium 230 69 Ultrium 232 69 Ultrium 448 70 Ultrium 460 70 Ultrium 960 70 unloading cartridges 32 unpacking the autoloader 15 using cartridges 28 V verifying the connection 21 W warning rack stability 7 web sites HP storage 8 HP Subscriber’s choice 8 work mat, static-dissipating 83 wrist straps specifications 83 using 83 write