
DCFM Enterprise User Manual (53-1001775-01, June 2010)


448 DCFM Enterprise User Manual
53-1001775-01
Assigning an LLDP profile to a port or ports in a LAG
17
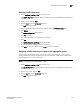
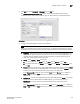
4. Select an existing LLDP Profile from the LLDP Profiles table in the upper right pane.
NOTE
You cannot delete <Global Configurations>. You can, however, edit global configurations. For
more information, see “Editing an LLDP profile” on page 447
5. Click Delete.
A confirmation dialog displays.
6. Click Yes to confirm you want to delete the LLDP profile.
The LLDP Profile table row is removed.
7. Clic k OK.
The CEE Confirmation and Status dialog box displays.
8. Review the changes carefully before you accept them.
9. Click Start to apply the changes, or click Close to abort the operation.
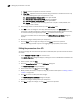
Assigning an LLDP profile to a port or ports in a LAG
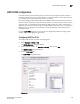
You create LLDP profiles using the Edit Switch dialog box, which you access from the CEE
Configuration dialog box. Global configuration parameters, which is the default selection, are
displayed in the Assigned Profile table shown in Figure 185.
NOTE
When LLDP is disabled on the switch, a yellow banner displays on the LLDP-DCBX dialog box,
indicating that LLDP-DCBX is not only disabled on the switch, it is also disabled for all ports and LAGs
on the switch.
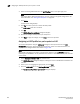
1. Select Configure > Switch > CEE from the menu bar.
The CEE Configuration dialog box displays, showing the status of all CEE-related hardware and
functions.
2. Select a port or link aggregation group (LAG), and click Edit.
3. Click the LLDP-DCBX tab on the Edit Port/Edit LAG dialog box.
The Assign an LLDP profile to <port name> dialog box displays.