
DCFM Enterprise User Manual (53-1001775-01, June 2010)


452 DCFM Enterprise User Manual
53-1001775-01
Editing the parameters of an ACL
17
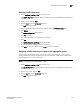
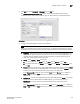
• Count - Instructs the system to maintain a counter.
• Ether Type - Specifies the Ethernet protocol being transferred in the Ethernet frame. Only
one of the following Ether types is supported at a time.
Address Resolution Protocol (ARP) - Ether Type 0x0806
Fibre Channel over Ethernet (FCoE) - Ether Type 0x8906
Internet Protocol, version 4 (IPv4) - Ether Type 0x0800
Custom - Ether type values must be greater than or equal to 1536 (0x0600). The
range is 1536 - 65535.
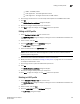
6. Click the right button to add the ACL entity to the ACL Entities table.
7. Clic k OK to close the dialog box. The newly-added ACL displays in the ACL Entities table.
If the name of the ACL already exists (duplicate Standard or Extended ACL names cannot exist),
an overwrite warning message displays. Click Yes to overwrite the existing ACL.
If the name of the ACL does not already exist, the CEE Confirmation and Status dialog box
displays.
8. Review the changes carefully before you accept them.
9. Click the Start button to apply the changes, or click Close to abort the operation.
You can now assign the ACL to ports or link aggregation groups (LAGs) on the switch.
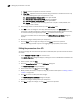
Editing the parameters of an ACL
You cannot change the name of the ACL (Standard or Extended) after you have created the ACL on
the switch.
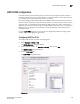
1. Select Configure > Switch > CEE from the menu bar.
The CEE Configuration dialog box displays, showing the status of all CEE-related hardware and
functions.
2. Select a switch, and click Edit.
3. Click the Access Control List tab on the Edit Switch dialog box.
The Access Control List dialog box displays.
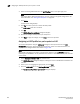
4. Select an ACL row in the ACLs table and click Edit.
5. Modify the ACL parameters, as required, using the parameter descriptions in “Adding an ACL to
a switch” on page 450.
6. Click OK to commit the ACL parameter changes.
The CEE Confirmation and Status dialog box displays.
7. Review the changes carefully before you accept them.
8. Click Start to apply the changes, or click Close to abort the operation.