
Fabric OS Encryption Administrator's Guide v6.4.0 (53-1001864-01, June 2010)


100 Fabric OS Encryption Administrator’s Guide
53-1001864-01
Steps for connecting to an SKM appliance
3
Steps for connecting to an SKM appliance
The following configuration steps are performed from the SKM management web console, which
can be accessed from any web browser with Internet access to the SKM appliance. The URL for the
appliance is as follows:
https://<appliance hostname>:<appliance port number>
Where:
- <appliance hostname> is the hostname or IP address when installing the SKM appliance.
- <appliance port number> is 9443 by default. If a different port number was specified
when installing the SKM appliance, use that port number.
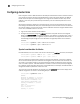
Configuring a Brocade group
A Brocade group is configured on SKM for all keys created by Brocade encryption switches and
blades. This needs to be done only once for each key vault.
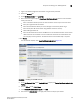
1. Login to the SKM management web console using the admin password.
2. Select the Security tab.
3. Select Local Users & Groups under Users and Groups.
The User & Group Configuration page displays.
4. Select Add under Local Users.
5. Create a Brocade user name and password.
6. Select the User Administration Permission and Change Password Permission check boxes.
7. Se le ct Save to save this user data.
8. Select Add under Local Groups.
9. Add a Brocade group under Group. The group name must be brocade, with a lower case “b”
10. Select Save.
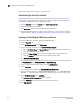
11. Select the new Brocade group name, and then select Properties.
Local Group Properties and a User List are displayed.
12. In the User List section, select or type the Brocade user name under Username.
13. Select Save.
The Brocade user name and password are now configured on SKM.
NOTE
Fabric OS version 6.2.0 uses brcduser1 as a standard user name when creating a Brocade group
on SKM. If you downgrade to version 6.2.0, the user name is overwritten to brcduser1, and the
Brocade group user name must be changed to brcduser1.
Setting up the local Certificate Authority (CA)
To create and install a local CA, perform the following steps: