
edge switch 2/32 product manager user guide


3–26 edge switch 2/32 product manager user guide
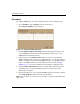
Configuring the Switch
6. Set the Switch back online.
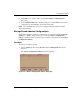
a. Choose Maintenance > Set Online State from the Product Manager
window. The Set Online State dialog box displays.
b. Click Set Online. A warning box displays asking you to confirm the online
state.
c. Click OK.
7. When you are finished configuring the Switch, you can back up the configuration
data.
Configure Date and Time
Use the procedures in this section to display and change the date and time set on the
Switch. You must set the current date and time on the Switch using this dialog box so
the correct time stamps display in the Event Log, Audit Log, Hardware Log, Link
Incident Log, and Threshold Alerts Log.
S/390 mode only. If both periodic synchronization and Switch clock alert mode are
enabled, an error will result. Disable one of them to fix the error. Refer to the
following procedure to disable periodic synchronization. Refer to Configure Feature
Key on page 3-24 to disable Switch clock alert mode.
Procedure
Set the Switch date and time using the following steps:
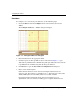
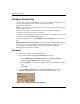
1. Choose Date/Time from the Configure menu on the menu bar.
The Configure Date and Time dialog box displays.
If the Periodic Date/Time Synchronization check box in the Configure Date
and Time dialog box is selected, the HAFM server periodically synchronizes the
Switch time to the HAFM server, and daylight savings time automatically
updates. When the Periodic Date/Time Synchronization option is selected, the
Date and Time fields are disabled (grayed out).
If the Periodic Date/Time Synchronization check box is not selected, you can
set the HAFM server date and time manually.