HP StorageWorks 1000/1500 Modular Smart Array application note Migrating from an active/passive single controller to active/active dual controllers in HP-UX environments *400677-002* *400677–002* Part number: 400677–002 Second edition: October 2006
Legal and notice information © Copyright 2005-2006 Hewlett-Packard Development Company, L.P. Hewlett-Packard Company makes no warranty of any kind with regard to this material, including, but not limited to, the implied warranties of merchantability and fitness for a particular purpose. Hewlett-Packard shall not be liable for errors contained herein or for incidental or consequential damages in connection with the furnishing, performance, or use of this material.
About this document This guide provides information about migrating existing HP-UX MSA1000 and MSA1500 installations from a single-controller, active/passive configuration to a dual-controller, active/active configuration.
Related documentation for the MSA1500 User documents for the MSA1500 can be found in the shipping carton, on the documentation CD, and on the MSA1500 Technical Documents web site: http://www.hp.com/go/msa1500cs.
Overview This document outlines the required steps to migrate existing HP-UX MSA1000 or MSA1500 environments from a single-controller MSA using active/passive controller firmware to a dual-controller MSA using active/active controller firmware. Active/active features: • Supports simultaneous I/O processing on the controllers, providing better performance as well as high availability. (I/O can be processed simultaneously by both controllers, but the LUNs are owned by only one controller at any given time.
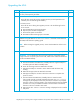
Step Description Check 1 Review or obtain the following documents from the appropriate MSA Technical Documents page: F • Quickspecs • Compatibility guide • Command Line Interface user guide • Firmware updating guide 2 Obtain the following items from the appropriate MSA Software, firmware & drivers page: F • latest active/active controller firmware files • latest MSA1000/1500 Support Software CD • latest release notes for the controller firmware files and Support Software CD 3 Review the latest lis
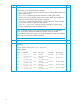
Upgrading the MSA Step Description Check 1 Notify all system administrators of devices connected to the MSA SAN fabric that the disk array will temporarily be offline. F 2 For servers with their root file system on the MSA: F • Power off those servers during this migration process (to avoid potential issues caused by the root disk being inaccessible.) For all other servers: • Power off the servers during this migration process or do the following from the server console: a.
Step Description (continued) Check 5 Verify that the firmware upgrade completed successfully and the storage is visible. F From the MSA CLI, enter the following commands: • show version—Displays MSA version information, including MSA firmware and MSA hardware build. • show disks—Displays physical disk information, including disk number, enclosure box and bay number, enclosure bus number and ID, physical disk size, and Logical Units (LUNs) to which the disk is assigned.
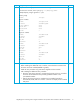
Step Description (continued) Check 8 Verify that all volume groups remain linked to the storage units.
Step Description (continued) Check 10 Verify that both MSA controllers are running the same version of firmware, and examine the status of the MSA, the storage, and the connections. F From the MSA CLI, enter the following commands: • show version—Displays MSA version information, including MSA firmware and MSA hardware build.
Verifying SAN connectivity Step Description Check 1 For switch fabric SAN connectivity: F • Log on to the switch management utility and verify that the switch fabric is set up properly, including zoning. • From the MSA CLI, enter show this_controller to verify that this MSA array controller is configured for switch fabric connectivity. • From the MSA CLI, enter show other_controller to verify that the other MSA array controller is configured for switch fabric connectivity.
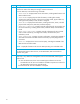
Configuring the redundant path Step Description Check 1 Complete any new Fibre Channel cable connections between the MSA and the server. F 2 Initiate a scan of the I/O infrastructure to discover the new connection. F From the server console, enter ioscan -fnC fc 3 Record the World Wide Port Name (WWPN) of the newly added host connection to the MSA. (This information is required to configure a connection name and access the control list on the second controller.
Step Description (continued) Check 5 Assign a name and operating system profile to the connection (the additional HBA connected to the second MSA array controller). F From the CLI, enter add connection WWPN= profile= Example display, assigning a connection name of HBA2: CLI>add connection HBA2 WWPN=50060B00-00225CB0 profile=hp Connection has been added successfully. Profile hp is set to the new connection. 6 Verify the connection.
Step Description (continued) Check 11 Detect the storage units linked to each physical path. F From the server console, enter ioscan -fnC disk Example display: 12 Class I H/W Path disk 5 0/10/0/0.1.0.0.0.0.0 sdisk /dev/dsk/c6t0d0 Driver S/W State CLAIMED /dev/rdsk/c6t0d0 H/W Type Description DEVICE HP MSA VOLUME disk 6 0/10/0/0.1.0.0.0.0.1 sdisk /dev/dsk/c6t0d1 CLAIMED /dev/rdsk/c6t0d1 DEVICE HP MSA VOLUME disk 7 0/10/0/0.1.0.0.0.0.
Step Description (continued) Check 13 If using LVM PVLinks, add an alternate link to each physical volume in the volume group.