Technical Note Revised October 2006 Prepared by: Network Storage Solutions Hewlett Packard Company Contents Configuring the MSA1000 and 1500cs for External Boot with Microsoft Windows Considerations and Limitations ................................... 3 Setup for RBSU Servers ............ 4 Setup for Servers without RBSU......................................... 4 Configuration of Volume(s) on MSA1000/MSA1500cs ............ 5 Configuration of Boot BIOS with Emulex BIOS Utility...........
Configuring the MSA1000/MSA1500cs for External Boot with Windows 2 Notice © 2007 HP Computer Corporation HP, StorageWorks, Smart Array, SupportPaq, and the HP logo are trademarks of Hewlett Packard Company. Other product names mentioned herein may be trademarks of their respective companies. HP shall not be liable for technical or editorial errors or omissions contained herein. The information in this document is provided “as is” without warranty of any kind and is subject to change without notice.
Configuring the MSA1000/MSA1500cs for External Boot with Windows 3 Considerations and Limitations These steps and procedures are intended for an advanced user who has a solid foundation of knowledge in server hardware, storage hardware, and operating system installation. All prerequisites and current scaling limitations for the MSA1000 and MSA1500cs apply.
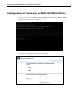
Configuring the MSA1000/MSA1500cs for External Boot with Windows 4 Setup for RBSU Servers 1. Make sure you have the latest ROM BIOS installed on your server. If needed, there are several options available to upgrade the BIOS; you can download the Firmware Maintenance CD from www.hp.com, or you can download individual components for your specific server. 2. Set the boot order: a. While the system is booting, Press F9 to start the ROM Setup Utility. b. Choose Boot Controller Order. c.
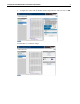
Configuring the MSA1000/MSA1500cs for External Boot with Windows Configuration of Volume(s) on MSA1000/MSA1500cs 1. Power on the server with HP StorageWorks Modular SAN Array 1000 and 1500cs Support Software CD in the CD-Rom . 2. Select the desired language and keyboard settings.
Configuring the MSA1000/MSA1500cs for External Boot with Windows 3. Accept the License Agreement by clicking ‘Agree’. 4. Select the Array Configuration Utility.
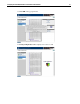
Configuring the MSA1000/MSA1500cs for External Boot with Windows 5. Select the appropriate Array controller from the list to the left. 6. The selected array controller and available drives will be displayed.
Configuring the MSA1000/MSA1500cs for External Boot with Windows 7. Select the drives to be included in the array and choose OK 8.
Configuring the MSA1000/MSA1500cs for External Boot with Windows 9 9. . Configure the volume with the Fault Tolerance and parameters desired and choose OK 10. Click Save to commit the changes.
Configuring the MSA1000/MSA1500cs for External Boot with Windows 11. Click OK on the popup window. 12.
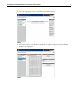
Configuring the MSA1000/MSA1500cs for External Boot with Windows 13. When the configuration is saved, you are back to the main menu: 14. To restrict access to the newly created LUN, you have to enable Selective Storage Presentation. Click on the Selective Storage Presentation link in the right pane. 15. This opens a new window in the right pane; select Enable and click OK.
Configuring the MSA1000/MSA1500cs for External Boot with Windows 12 16. This will display a list of all known WWN to the MSA controller. 17. Pick the one for your server, give it a logical name, set the correct Host mode for your OS and give the server access to the LUN. If you have multipathing, you have to select both HBA’s in the server, give them unique names, and give both access to the LUN.
Configuring the MSA1000/MSA1500cs for External Boot with Windows 18. Click OK, and accept the warning by clicking OK. 19. Click Save.
Configuring the MSA1000/MSA1500cs for External Boot with Windows 14 20. This brings you back to the main menu. Click on Exit in the lower left corner, and then click Exit in the upper right corner. Click OK on the popup window. 21. Configuration of the MSA1000/MSA1500cs is complete. 22. Remove the HP StorageWorks Modular SAN Array 1000 Support Software CD from the CD-Rom and prepare to configure the boot BIOS in the next section.
Configuring the MSA1000/MSA1500cs for External Boot with Windows Configuration of Boot BIOS with Emulex BIOS Utility 1. As the server boots the menu for the HBA will display. Press to start the Emulex BIOS Utility. 2. You are presented with a list of HBAs in the server, press 1 → Enter to select the displayed HBA.
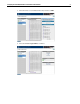
Configuring the MSA1000/MSA1500cs for External Boot with Windows 3. You are presented with two selections. Note the options at the bottom of the screen to navigate through the menus. 4. Press 2 → Enter to select Configure This Adapter’s Parameters. 5. You are presented with 9 options, press 1 → Enter to Enable or Disable BIOS. 6.
Configuring the MSA1000/MSA1500cs for External Boot with Windows 7. Press the PageUp key to return to the previous menu 8. Press PageUp to return to the first menu 9.
Configuring the MSA1000/MSA1500cs for External Boot with Windows 18 10. You are presented with a list of saved boot devices. 11. Press 1 → Enter to select Primary Boot. 12. You are prompted to select the desired boot device. 13. Press 00 → Enter to clear selected boot entry. 14. Press 1 → Enter to select Primary Boot. 15. Press 01 → Enter to select the entry with the LUN that is presented by the MSA1000 controller.
Configuring the MSA1000/MSA1500cs for External Boot with Windows 19 16. You are prompted to enter in a two-digit LUN number, enter 00 → Enter. 17. You are presented with a list of available LUNs visible to the HBA. 18. Press 01 → Enter to select the first LUN (logical drive 1) on the MSA1000.
Configuring the MSA1000/MSA1500cs for External Boot with Windows 19. You are prompted to select how to boot the device. 20. Press 1 → Enter. 21. You are returned to the list of saved boot devices. 22. Press x → y to exit the menu and reboot the server.
Configuring the MSA1000/MSA1500cs for External Boot with Windows 21 Configuration of Boot BIOS with QLogic BIOS Utility 1. As the server boots the menu for the HBA will display. Press to start the QLogic BIOS Utility. 2. Highlight Configuration Settings and press enter.
Configuring the MSA1000/MSA1500cs for External Boot with Windows 22 3. Select the first option Adapter Settings and press Enter. 4. By default, the Host Adapter BIOS is disabled. Arrow down to Disabled, and press Enter to Enable.
Configuring the MSA1000/MSA1500cs for External Boot with Windows 23 5. Once the Bios is Enabled, the options will look like this: 6. Press the Escape key to back up one menu, and arrow down to Selectable Boot Settings, and press Enter to select it.
Configuring the MSA1000/MSA1500cs for External Boot with Windows 7. Use down arrow or press S to select Selectable Boot Settings. 8. The boot bios is disabled, hit to enable it.
Configuring the MSA1000/MSA1500cs for External Boot with Windows 9. Select the Primary boot device. 10. Select the appropriate LUN ID from the list.
Configuring the MSA1000/MSA1500cs for External Boot with Windows 26 11. Select LUN 1. 12. This will bring you back to the configuration menu, with LUN 1 selected.
Configuring the MSA1000/MSA1500cs for External Boot with Windows 27 13. Hit escape to save changes, hit to confirm. 14. Hit to reboot system. 15. This concludes setting up the boot device. Continue to the next section to install your operating system.
Configuring the MSA1000/MSA1500cs for External Boot with Windows 28 Installation of Operating System 1) On reboot insert OS CD and begin installation 2) As the operating system install begins a message will be displayed Setup is inspecting your computers hardware configuration…. followed by a blue installation screen. You must press F6 at this time to allow the operating system to install the additional driver required for the HBA.